# Getting Started

What is Cronos? Why build on Cronos? How to connect?

Thanks for your interest in Cronos.

Please browse the navigation bar of this documentation where you can find reference information for:

* End-users
* dApp developers
* Node hosts
* And more!

## What is Cronos Network?

Cronos Network is a EVM compatible blockchain delivering sub-cent, sub-second 24/7 global settlement, built for financial services and tokenized real-world assets.

As a leading blockchain ecosystem, we have partnered with Crypto.com and more than 100 application developers and contributors representing an addressable user base of more than a 150 million people around the world.

The Cronos universe encompasses 2 chains: **Cronos EVM**, the leading Ethereum-compatible blockchain built on the Cosmos SDK; **Cronos POS**, a leading Cosmos chain for payments and NFTs.

Transaction fees are paid in Cronos ($CRO), a blue chip cryptocurrency.

{% hint style="info" %}
Notice: Cronos zkEVM is being sunset, please [bridge out your assets](https://docs-zkevm.cronos.com/for-users/cronos-zkevm-bridge) before the network is fully decommissioned.
{% endhint %}

## Why build on Cronos EVM?

If you are a Web3 application creator, there are 3 main reasons to build on Cronos:

* EVM compatible – Solidity and all the EVM tools just work out of the box.
* Strategic partnership with [Crypto.com](http://crypto.com/) – easy on-ramp to your dapp.
* \#CROFam - a highly engaged user and builder community of >150 million people worldwide, who are keen to try the latest and greatest apps.

As an application founder/developer on Cronos, you can leverage:

* Wrapped versions of most of the world’s top 50 cryptocurrencies
* 30+ leading wallets (including Crypto.com Defi Wallet, Rabby, MetaMask, Trust Wallet)
* Ethermint, a Ethereum Virtual Machine module built by the open-source Cosmos SDK community.
* IBC cross-chain connectivity to Cosmos chains.
* Convenient Ethereum developer tools (Solidity, Truffle, Hardhat, OpenZeppelin, Web3.js, ethers.js, ChainSafe Gaming SDK, etc.).

## Useful links

Web: [Cronos](https://cronos.com/)

Blog: [Cronos](https://blog.cronos.com/)

Socials:[ X.com](https://x.com/CronosApp) | [Telegram](https://t.me/Cronos_Announcements) | [Discord](https://discord.com/invite/pahqHz26q4)

Code repository: [Github](https://github.com/crypto-org-chain/cronos)

**Ecosystem:**

* [List of Dapps](https://cronos.com/ecosystem)
* [DeFi ecosystem on Defillama](https://defillama.com/chain/Cronos)
* [Dappradar](https://dappradar.com/rankings/protocol/cronos)
* [Block explorer](https://explorer.cronos.com)

**Developer tips:**

* [Hackathon cheatsheet](/for-dapp-developers/hacker-resources)
* [Developer tools and integration](/for-dapp-developers/dev-tools-and-integrations)
* [App creator & developer FAQs](/for-dapp-developers/founder-faqs)


# Background

## Cronos

The Cronos Mainnet was launched on 8 November 2021.

Cronos is the leading EVM-compatible chain build on the Cosmos SDK.

Cronos aims to massively scale DeFi by providing developers with the ability to rapidly port dApps from Ethereum and EVM-Compatible chains, while also benefiting from the multi-chain thesis of the Cosmos ecosystem.

Cronos is powered by the Cronos ($CRO) cryptocurrency for the payment of transaction fees. Cronos runs separately from the [Cronos POS Chain](https://cronos-pos.org/), a Cosmos proof-of-stake chain also powered by $CRO.

## Ethermint

Cronos is powered by the open-source project [Ethermint](https://github.com/evmos/ethermint), which allows for the rapid porting of smart contracts from Ethereum and EVM-compatible chains.

The Inter Blockchain Communications (IBC) protocol enables interoperability and bridging between Cronos and the Crypto.org Chain as well as other Cosmos chain.

## Key features of Cronos technology

#### **EVM-compatible**

Application developers can use Solidity, the leading EVM-compatible language for smart contracts, as well as the broad range of Ethereum developer tools and open-source libraries.

#### **Scalable**

The Tendermint consensus is robust, fast and cheap. The Cronos validator node ecosystem is carbon neutral, owing to low energy consumption which is further offset by the purchase of carbon credits.

#### **Interoperable**

Cronos is EVM-compatible and interoperable with other Cosmos chains.

IBC is a protocol that allows blockchains to communicate with each other, interoperate and transfer value, interchange assets and services, and connect without running into the scaling issues inherent in some of the largest blockchains today.

#### Ecosystem

The Cronos Network engineering team contributes actively to open-source projects of the Ethereum and Cosmos ecosystem.

Through its strategic partnership with Crypto.com, a leading custodial crypto platform, Cronos can leverage easy on-ramp and access for an addressable user community of more than 150 million users worldwide.


# Architecture

## Overview

The Cronos blockchain protocol is an [open-source project](https://github.com/crypto-org-chain/cronos) based on:

* [Ethermint](https://github.com/evmos/ethermint), an open-source Cosmos application module that allows the portability of the Ethereum Virtual Machine (EVM), its go-ethereum client, and its solidity-based smart contracts to the Cosmos ecosystem.
* [Cosmos SDK](https://v1.cosmos.network/sdk), the leading development framework to build interoperable sovereign blockchains.
* [Tendermint’s](https://docs.tendermint.com/) Core BFT Proof-of-Stake consensus engine, a scalable and energy-efficient blockchain consensus.

The open-source Cronos blockchain protocol is fast, cheap, and energy-efficient.

Going forward, Cronos aims to leverage the best of what the Ethereum/EVM and Cosmos ecosystems both have to offer for end-users and developers.

## **Open-source project**

Please visit the [Github repository](https://github.com/crypto-org-chain/cronos) to contribute to the Cronos blockchain protocol.

## **Consensus**

The Cronos consensus is commonly referred to as a proof-of-authority (POA) consensus, as it is a permissioned variant of the proof-of-stake consensus.

Please refer to the [Cronos repository](https://github.com/crypto-org-chain/cronos) for details.

Tendermint was selected by Cronos as the underlying technology for several reasons:

* Backed by [formal research](https://eprint.iacr.org/2018/574.pdf)
* Robustly tested [implementation](http://jepsen.io/analyses/tendermint-0-10-2)
* Strong track record: Tendermint has been in continuous development since 2014, and has been adopted by several high-profile [projects](https://forum.cosmos.network/t/list-of-projects-in-cosmos-tendermint-ecosystem/243)
* Modular architecture: It offers flexibility regarding which applications are developed on top of it, and how they are developed.

## Further reading

Follow [this link](https://github.com/crypto-org-chain/cronos-docs/blob/gitbook/getting-started/broken-reference/README.md) for more information about the Cronos chain protocol.


# Crypto Wallets

Cronos is supported by more than 30 wallets, including popular providers such as MetaMask, Ruby, and Ledger.

## Crypto.com Onchain Wallet

The [Crypto.com Onchain Wallet](https://crypto.com/onchain) is a self-custodial crypto wallet developed by Crypto.com. It supports Cronos and dozens of Cronos cryptocurrencies natively, as well as all NFTs on the Cronos chain. The wallet is available in 3 user interfaces:

* The mobile wallet, available for iOS and Android (download [here](https://crypto.com/fr/defi-wallet)). The mobile app includes a powerful in-app browser to interact with decentralized applications (DeFi, NFTs and Web3 Gaming).
* The browser extension, available from the Chrome store [here](https://chrome.google.com/webstore/detail/cryptocom-wallet-extensio/hifafgmccdpekplomjjkcfgodnhcellj). The browser extension can run in two possible modes: in Standalone mode (meaning that you can approve transactions in the browser) or in Bridge mode (meaning that the extension is connected to the mobile app, where you approve transactions). We recommend Standalone mode for best performance and richest functionalities.
* The desktop wallet (download [here](https://crypto.com/fr/defi-wallet)), which can run as a standalone application on your computer.

The Onchain Wallet is not just for DeFi. One unique feature of the Crypto.com Onchain Wallet mobile app is the NFT tab, where you can see, transfer, buy and sell all your self-custodial NFTs on Cronos chain.

You can import your accounts from any other self-custodial crypto wallet into the Crypto.com Onchain Wallet by importing your seed phrase under "Import wallet".

## Ledger hardware wallet

You can now use your Ledger hardware wallet on Cronos chain.

In the Ledger Live companion app, you can see your CRO holdings on Cronos chain. This can be accomplished by selecting "Add account" and then Cronos (CRO):

<figure><img src="/files/xYHCxC2ay9zTYpyCxloH" alt=""><figcaption></figcaption></figure>

In order to experience the fullest range of functionalities, including interactions with dApps, we recommend to connect your Ledger hardware wallet with the Crypto.com Onchain browser extension in Standalone mode. In order to accomplish this, select "Import wallet" in the Crypto.com Onchain browser extension and then select "Connect to Ledger".

<img src="/files/gryOXCMf5C3kTgIrOCgr" alt="" width="373">

## Trust Wallet

Trust Wallet also support Cronos chain and dApps natively. You can download it [here](https://trustwallet.com/).

## MetaMask

MetaMask can be used to check your cryptocurrency balances on Cronos and to interact with decentralized applications. You can download it [here](https://metamask.io/).

The MetaMask mobile app and browser extension require additional configuration steps to connect to Cronos chain. See [MetaMask configuration](/for-users/metamask) for an easy-to-follow guide.

## Brave Wallet

The crypto wallet developed by Brave Browser can also be used to check your cryptocurrency balances on Cronos and to interact with decentralized applications.

See [Brave Wallet](/for-users/brave-wallet) for an easy-to-follow guide of configuration steps.

## Other wallets and portfolio dashboards

Many other great crypto wallets support Cronos chain cryptocurrencies.

If you are looking for comprehensive portfolio dashboards to view your various cryptocurrencies and DeFi positions on Cronos chain, check out [Debank](https://debank.com/) and [Rabby](https://rabby.io/).


# MetaMask Configuration

In this guide, you will learn how to use the MetaMask extension on Google Chrome to send and receive tokens, and interact with the Cronos network.

## Connecting with MetaMask

First, you will need to connect your MetaMask wallet to the Cronos network:

* Click the "**My Account**" button in the top right corner. Then select **"Networks"** in the settings menu.

<img src="/files/afZmlhgkHzKJJSISX3WO" alt="" width="351">

* Click "**Add Network**":

  <img src="/files/9ycpY0k7z4raP3ekVFsy" alt="" width="348">

{% tabs %}
{% tab title="Mainnet" %}

* **Name**: Cronos
* **New RPC URL:**`https://evm.cronos.com`;
* **Chain ID: 25**
* **Symbol:**`CRO`
* **Block explorer URL:**`https://explorer.cronos.com/`
  {% endtab %}

{% tab title="Testnet" %}

* **Name:** Cronos testnet

* **New RPC URL:** `https://evm-t3.cronos.com`

* **Chain ID:**`338`

* **Symbol**:`tCRO`

* **Block explorer URL:** `https://explorer.cronos.com/testnet`
  {% endtab %}
  {% endtabs %}

* After saving the network configuration, we should be able to see the token in your address.

## Importing private keys to MetaMask

Alternatively, We can export the private keys by using the `unsafe-export-eth-key` command with `cronosd.` For example:

```bash
cronosd keys unsafe-export-eth-key mykey --keyring-backend test
```

It will show your private key and you can copy it for the next step. Click the "**My Account"** button at the top right corner again. Then, select "**Import Account**":

![](/files/4zT4zW0RxNtANznwmGYf)

Paste your private key string from the previous step and click "**Import"**.

<img src="/files/BgbxS7qoibztNYFHQ3og" alt="" width="353">

Once it has been connected, you should see your token balance and you can then begin performing transactions using your MetaMask wallet!

## Address conventions

Please note that the address format in Cronos is in the form of bech32 `crc...` , we can use `cronosd debug addr` to convert an address between hex and bech32. For example:

```bash
$ cronosd keys list --keyring-backend test
  - name: mykey
    type: local
    address: crc19a6r74dvfxjyvjzf3pg9y3y5rhk6rds2c9265n
    pubkey: '{"@type":"/ethermint.crypto.v1alpha1.ethsecp256k1.PubKey","key":"Azy1tg0wZKRdQ7sd9mICzteCstGThiodZtQqlVT9Amlc"}'
    mnemonic: ""

$ cronosd debug addr crc19a6r74dvfxjyvjzf3pg9y3y5rhk6rds2c9265n
    Address: [47 116 63 85 172 73 164 70 72 73 136 80 82 68 148 29 237 161 182 10]
    Address (hex): 2F743F55AC49A446484988505244941DEDA1B60A
    Bech32 Acc: crc19a6r74dvfxjyvjzf3pg9y3y5rhk6rds2c9265n
    Bech32 Val: crcvaloper19a6r74dvfxjyvjzf3pg9y3y5rhk6rds2ph398y

$ cronosd debug addr 2F743F55AC49A446484988505244941DEDA1B60A
  Address: [47 116 63 85 172 73 164 70 72 73 136 80 82 68 148 29 237 161 182 10]
  Address (hex): 2F743F55AC49A446484988505244941DEDA1B60A
  Bech32 Acc: crc19a6r74dvfxjyvjzf3pg9y3y5rhk6rds2c9265n
  Bech32 Val: crcvaloper19a6r74dvfxjyvjzf3pg9y3y5rhk6rds2ph398y
```

{% hint style="info" %}
Remarks: You will need to add `0x` at the beginning when using the Ethereum HEX address shown as above. For example: `Address (hex): 2F743F55AC49A446484988505244941DEDA1B60A` implies that `0x2F743F55AC49A446484988505244941DEDA1B60A` will be the address in Ethereum.
{% endhint %}

## Resetting your account on MetaMask

If you come across any issue with your MetaMask account or if you have used your imported account to perform transactions in the legacy testnet, you can reset it by using the `Reset Account` function.

Simply go to `Setting/Advance` and click `Reset Account`:

<img src="/files/mrqHcwX228YPxp7M8JOC" alt="" width="375">


# Brave Wallet

In this guide, you will learn how to use the Brave Wallet on Brave to interact with the Cronos network.

## Add Cronos to the Brave Wallet

Let's connect your Brave Wallet to the Cronos network:

* **Step 1**\
  On the top right side of the Brave browser, click the <img src="/files/I9BADZCJmxpxcyCFIvBW" alt="" data-size="line"> (Wallet) icon.\
  If you don’t see it? Click **Update** in the toolbar for the latest version of Brave.
* **Step 2**\
  Now follow the wizard to either **create a new wallet** or **import an existing wallet.** Once you have your wallet ready, click the **three dots** in the upper right corner of your wallet view and go to "**settings".**\
  ![](/files/CWCf1kYim9U9EPf4tJVM)![](/files/HiXn2DRNCBfJpCuSVfTr)
* **Step 3**\
  In the settings page, under the"**Wallet"** ta&#x62;**,** click **"Networks".** Alternatively, you can visit `brave://settings/wallet/networks` in the browser URL.

<figure><img src="/files/0kyI2ruolAsDBFjots7P" alt="" width="375"><figcaption></figcaption></figure>

* **Step 4**\
  Now in the list of networks, click "**Add**" in the top right corner to add a Cronos network.

<figure><img src="/files/F4Th25z47tyYj8QU9Ssp" alt="" width="333"><figcaption></figcaption></figure>

* **Step 5**\
  A new window to add config for a new network will pop up.\
  Under "**Search network**", select "**25 Cronos Network"** from the drop-down menu for Cronos Mainnet or "**338 Testnet"** for Testnet.\
  Now, most fields should be pre-populated, as shown below:

<figure><img src="/files/pY52wMabALnGdWIbcxHQ" alt=""><figcaption></figcaption></figure>

* In order to display the Cronos logo, set the "**Icon URLs**" field to:

```
https://cronos.org/favicon.png 
```

and click "Submit".

* **Step 6**\
  Congratulations, we should now be able to see the Cronos network in the wallet view.

<figure><img src="/files/WUJXFvnsLT0A6thfC69u" alt="" width="563"><figcaption></figcaption></figure>


# Bridges

In this section you can find different tutorials on how to bridge your assets:

{% content-ref url="/pages/B474DtVRMwOzXHtbHf5z" %}
[From the Crypto.com App and Exchange](/for-users/bridge/app_n_ex)
{% endcontent-ref %}

{% content-ref url="/pages/l6We5cDjzoIXRlAgklAn" %}
[IBC (Cronos POS Chain, other Cosmos chains)](/for-users/bridge/other_chain)
{% endcontent-ref %}


# From the Crypto.com App and Exchange

For most users, the easiest way to acquire $CRO cryptocurrency and fund your self-custodial wallet on Cronos is to use the Crypto.com App or Exchange.

## From the Crypto.com App

From within the Crypto.com App, you can withdraw $CRO or any of dozens of cryptocurrencies to your self-custodial cryptocurrency wallet on the Cronos (CRC20) blockchain.

For a complete list of available assets to withdraw, please refer to the Help Centre [help page](https://help.crypto.com/en/articles/5978017-what-should-i-know-about-cryptocurrency-deposits-and-withdrawals).

Visit the link below for more details.

{% content-ref url="/pages/1tMoE2eumjpNRVWOEu1e" %}
[From the Crypto.com App](/for-users/bridge/app_n_ex/cdcapp)
{% endcontent-ref %}

## From the Crypto.com Exchange

From within the Crypto.com Exchange, you can withdraw $CRO or any of dozens of cryptocurrencies to your self-custodial cryptocurrency wallet on the Cronos (CRC20) blockchain.

Visit the link below for more details.

{% content-ref url="/pages/Oaz00YeqyRE7cu10d7gs" %}
[From the Crypto.com Exchange](/for-users/bridge/app_n_ex/cdcex)
{% endcontent-ref %}


# From the Crypto.com App

## Transfer assets using the Crypto.com App

### Step-by-step walkthrough

**Step 1**: Select the token that you would like to withdraw from your Crypto Wallet.

<img src="/files/C9hUpjh84jaoCDp12me4" alt="" width="375">

**Step 2**: Click on “**Transfer**”, then “**Withdraw**”

![](/files/IMiFx3hB2HdKpBB0b1ip) ![](/files/Rals4uJ9JBkAHts5GOiz)

**Step 3**: Select “**External Wallet**” and whitelist your Cronos wallet address.

![](/files/2NNqIEwjREvbgujEgRki) ![](/files/g1XvijMKBvd7HU7o8R73)

**Step 4**: Select the Cronos network and paste your Cronos wallet address .

You should have a Cronos wallet address ready at this point (either on MetaMask, Crypto.com Onchain Wallet, or any other wallet supporting Cronos). No memo is required to withdraw your funds to Cronos. Once you have confirmed that your Cronos wallet address is accurate, tap “**Continue**”.

<img src="/files/D90utExC6AgPeojWkN7Z" alt="" width="375">

**Step 5**: Select your newly whitelisted Cronos wallet address and input the amount of tokens that you wish to withdraw. After entering the amount, tap “**Withdraw**”. You will then be prompted to enter your password and 2FA code (if enabled).

<img src="/files/1SN0r51cKGx3KYwcvIEe" alt="" width="375">

**Step 6**: Tap '**Confirm**' to make the transfer


# From the Crypto.com Exchange

## Transfer assets using the Crypto.com Exchange

### Step-by-step walkthrough

**Step 1**: Select the asset that you would like to bridge in your Spot Wallet and click "**Withdraw**".

![centered image](/files/eFpeNLH2h6qAIRJcwxHz)

**Step 2**: Select “**External Wallet Address**”

![centered image](/files/wHI8kmiXFOJ0ZbKXIFKK)

**Step 3**: Select “**Add Withdrawal Address**”

![centered image](/files/Fg39PKGYY6mfRIjLhYNn)

**Step 4**: Select the Cronos Network, add your Cronos wallet address, and save it

![centered image](/files/GxKT18nj92hDBC0imzdw)

**Step 5**: Select the Cronos wallet address that you have whitelisted and input the withdrawal amount

![centered image](/files/SL6l3H6YAfxmAMlREdXY)

**Step 6**: Review your withdrawal information and click “**Review Withdrawal”**. You will then be taken to another page for you to confirm your withdrawal information and type in your 2FA code to finalise your withdrawal. Your assets will appear in your Cronos wallet within a few minutes of withdrawal confirmation.


# IBC (Cronos POS Chain, other Cosmos chains)

## Introduction

<figure><img src="/files/LNhTTYH6iaGS4RiQE0Lc" alt=""><figcaption></figcaption></figure>

The Cronos Bridge’s goal is to support the seamless transfer of assets between blockchains to foster interoperability and for users to enjoy the best DApps and earnings no matter the chain.

The Cronos Bridge (Beta) can be found at <https://cronos.com/bridge>

Cronos Bridge is a fully decentralised protocol built on the open-source projects of [IBC](https://ibcprotocol.org/).

Please read this guide and review the project documentation carefully as misuse may cause the incorrect transfer or even loss of assets. We recommend transferring a small amount first to get yourself acquainted with the Bridge before moving over significant amounts.

#### Currently supported networks:

* Cronos POS Chain <=> Cronos (Cronos EVM Chain): CRO token;
* [Cosmos Hub](https://hub.cosmos.network/) <=> Cronos: ATOM token;
* [Akash](https://akash.network/) <=> Cronos: AKT token;
* [IRISnet](https://www.irisnet.org/)<=> Cronos: IRIS token;
* [CANTO](https://www.canto.io/) <=> Cronos: CANTO token;
* [Celestia](https://celestia.org/) <=> Cronos: TIA token;
* [Juno](https://www.junonetwork.io/) <=> Cronos: JUNO token.

#### Currently supported wallets:

* Metamask, Keplr, Crypto.com Onchain Wallet

We are constantly working on adding new tokens and blockchains. If you have any feedback or concerns, please reach out to <bridge@cronos.com>.

## Via Cronos Bridge Web App

The Cronos Bridge (Beta) can be found at <https://cronos.com/bridge>.

{% content-ref url="/pages/MJuN2Zmq4nFYCsGWRHZo" %}
[Cronos Bridge Web App](/for-users/bridge/other_chain/webapp)
{% endcontent-ref %}

## Via Crypto.com Onchain Wallet

Crypto.com Onchain Wallet has integrated with Cronos Bridge and provided a front-end UI to allow all users to seamlessly transfer assets over to Cronos straight from the app.

Please visit the [Crypto.com Onchain Wallet page](https://help.crypto.com/en/articles/5645017-cronos-bridge) for details.


# Cronos Bridge Web App

## Transfer assets from Cronos POS Chain using the Cronos Bridge Web App

### Step-by-step walkthrough

**Step 1: Connect your wallet**

Click “**Connect Wallet**" to connect your cryptocurrency wallet. We currently support browser-compatible versions of Metamask, Keplr, and Crypto.com Onchain Wallet. Once a connection request is sent, look for a popup from your wallet interface or click into the wallet extension to give it consent.

{% hint style="info" %}
Note 1: If you are bridging assets to or from Crypto.org, you may specify the destination wallet by pasting the address directly or connecting a second wallet to avoid manual errors.
{% endhint %}

<figure><img src="/files/38jYRzoj1wXc9Gob2K4L" alt=""><figcaption></figcaption></figure>

**Step 2. Select Network and Token**

Select the origin chain on the left and destination chain on the right in the Cronos Bridge interface. We will do our best to automatically suggest your wallet network to match the desired transfer parameters. However, a manual adjustment on your end may be needed to set your wallet to match the selected network.

If you are transferring to or from Cronos POS chain, you need to specify the destination address by inputting the address manually or connecting a second wallet to receive your funds.

Once the networks are chosen, select the asset you would like to transfer.

<figure><img src="/files/UySX1NbwUrLp2f1Ebcl0" alt=""><figcaption></figcaption></figure>

**Step 3. Enter the amount**

Once the network and asset have been chosen, input and confirm the amount you would like to transfer.

Our decentralised bridge protocol does not impose a minimum and maximum amount. However, bridging a very small amount may have a high gas fee in proportion to the amount transferred.

After the amount is entered, the bridge network fees will be calculated accordingly. The bridge itself and Crypto.org do not charge any additional fees.

During the promotional launch period, the network fee incurred by the bridge will be waived. You will still be liable to pay a gas fee directly on your preferred wallet, which is charged by the source network.

Before bridging a large amount, we encourage testing a transfer of a small amount first to ensure that all settings are correct.

<figure><img src="/files/ccnI6PQpjLTIfxvZbOCg" alt=""><figcaption></figcaption></figure>

<img src="/files/vHFyiwovmV8AhLkYE2TW" alt="" width="356">

&#x20;

<img src="/files/pDU8jpHCjQXvHC9ZcXEq" alt="" width="355">

&#x20;

<img src="/files/4ri4DvLtbJdXxluLMurY" alt="" width="357">

**Step 4. Confirm the transaction**

Once all the transfer settings have been confirmed, a transaction confirmation page will pop up, summarising the transaction.

This will send a transaction request to your wallet. Please confirm the request in your wallet to ultimately authorise the transfer.

After bridging the tokens, they will be converted to tokens that are supported by the destination blockchain. For more information, please see this [FAQ](/for-users/bridge/faq).

<figure><img src="/files/vTE4GyGcpQVskwtIswuS" alt=""><figcaption></figcaption></figure>

**Step 5. Bridging assets**

After the transaction is confirmed from the wallet, the bridge operation will commence.

First, we will initiate and wait for the deposit of assets on the origin chain. Once the deposit is confirmed, we will initiate the transfer in the destination chain to your desired receiving wallet address. Both transactions will include an external link to view and monitor the transaction on-chain via scanning utilities such as the [Cronos POS Chain Explorer](https://cronos-pos.org/explorer/).

Even if you dismiss, quit, or refresh the page, a small popup reminder will be available to indicate an in-progress transaction. A “Transfer Completed” message will confirm that the transaction has been carried out successfully. You may also see a full record of past transactions tied to your wallet in the History tab.

Thank you for using the Cronos Bridge and supporting the Crypto.org ecosystem.

<figure><img src="/files/IO6B2bN3bv0yOyL6plmq" alt=""><figcaption></figcaption></figure>

<figure><img src="/files/Z3fKesWUvJv0cyX2IExc" alt=""><figcaption></figcaption></figure>


# Independent bridges

The following bridge is operated by independent protocols. Use it at your own risks.

[Symbiosis](https://app.symbiosis.finance/swap)


# FAQs for Bridge transfers

#### What are the fees involved?

* The Cronos Bridge service itself is free and does not charge any additional service fees. The fees displayed are network gas fees which the blockchain infrastructure charges itself to process the transactions and vary depending on the network.
* For any bridge transaction, network gas fees are incurred on two chains: origin and destination.
  * For the origin chain gas fee, this will be displayed and settled directly on your wallet extension.
  * For the destination chain gas fee (“Bridge network fee”), our decentralised bridge is tasked to collect the appropriate gas fee and pay the network.

#### How does the Cronos Bridge network fee waiver work?

* The following transactions are eligible for a fee waiver:
  * Cronos POS Chain => Cronos (Cronos EVM chain)
  * Cronos (Cronos EVM chain) => Cronos POS Chain
* The fee waived is the bridge network transaction fee on the destination chain. However, you are still liable to pay for the origin chain gas fee directly on your wallet extension.
* This is a promotional waiver; we reserve the right to modify and terminate the promotion at any time

#### How fast is the transfer?

IBC Transfers will take between 1 min to 1 hour, depending on transfer congestion. After an hour, the transaction will either go through or revert with the funds sent back to your origin wallet.

#### Can I transfer assets to a different wallet than my own?

* For transfers between Cronos and Cronos POS Chain, we support either connecting a second compatible wallet or inputting the wallet address string.
* If possible, we recommend connecting the second wallet to avoid manual typing and potential malware risks such as clipboard attacks.

#### What are the support blockchains and tokens?

The networks supported are:

* Cronos (Cronos EVM Chain)
* Cronos POS Chain
* [Cosmos](https://hub.cosmos.network/)
* [Akash](https://akash.network/)
* [IRISnet](https://www.irisnet.org/)
* [Canto](https://www.canto.io/)
* [Celestia](https://celestia.org/)
* [Juno](https://www.junonetwork.io/)

#### What are the supported wallets?

* The initially supported wallets will be Crypto.com Onchain Wallet, MetaMask, Rabby and Keplr.
* Please ensure to set the correct active network on your Wallet if it is supported.

#### Can I complete multiple transfers in one go?

While it is possible to have multiple ongoing transactions, we recommend having one transaction at a time, even if there is some waiting time to avoid issues and duplication.

#### Where can I report bugs and provide product feedback?

For any bug reports, or feedback please contact <bridge@cronos.com>. This is for the web Cronos bridge only. For Crypto.com app, exchange, and Onchain wallet, refer to <https://help.crypto.com/en/> or <https://help.crypto.com/en/articles/5645017-cronos-bridge>.

#### How do I find my missing funds?

Please check the transaction history table for your past transactions. If your transactions are not on the list, it was likely not initiated at all. If you believe you still have missing funds, please contact <bridge@cronos.com>[.](mailto:product@cronos.com.)

#### Is transferring tokens across blockchains safe?

* As with any decentralised application, there is a degree of risk related to code exploits and hacking.
* Our bridge code is publicly available. We leverage open-source code from the IBC protocol project.

#### How to check a IBC transfer?

IBC transfers do not appear in Cronos Explorer because they are processed at the Cosmos layer and do not emit EVM-compatible logs, making them invisible to standard Ethereum JSON-RPC APIs. To look up an IBC transfer, use the [Cronos IBC Bridge Activity API](/cronos-chain-protocol/cronos-ibc-bridge-activity-api) instead.


# FAQs for transactions from/to centralized exchanges

#### **I transferred CRO from the other centralised exchanges (CEXs) to the Crypto.com Defi Desktop wallet, but why it is not showing up in my Crypto.com DeFi Desktop Wallet?**

Some centralised exchanges currently only support Ethereum Mainnet ERC20-CRO withdrawal, while the Crypto.com Defi Desktop Wallet only supports Cronos POS Chain & Cronos Chain for the moment, thus you're not able to view any ERC20 assets or balances of Ethereum Chain on the Desktop Wallet. It is highly recommended that all users check the networks before making the withdrawal and always begin with a small amount to make sure the transfer actually works.

#### **I have already made the transfer from the centralised exchange that does not support Cronos Chain to my Crypto.com DeFi Desktop Wallet. What should I do to retrieve my funds?**

* Here's what you could do:

1. Send some ETH (around 0.03 ETH) to your `0x..` address for paying the transaction gas fee on Ethereum.
2. Download our Crypto.com App, and register an account (skip this if you're already a user)
3. Send your ERC20-CRO to the Crypto.com App ERC20-CRO deposit address\*
4. When you get your CRO, withdraw your CRO to your ledger address (MAKE SURE YOU SELECT Cronos Chain) `0x..` address
5. You would be able to see your funds on Crypto.com DeFi Desktop Wallet afterwards

* Other than this, it is also possible that there is no Ethereum in your wallet, which could result in your funds getting stuck as you aren't able to pay for the Ethereum gas fee. Please ensure you have enough ETH for the transaction.

{% hint style="info" %}
*For step 3 of transferring your ERC20-CRO, you could either use MetaMask or Ledger Live (for ledger user) to send ERC20-CRO from your Ledger to Crypto.com App. Take the wallet on MetaMask as an example, if you log into the same wallet on MetaMask and switch the network to the Ethereum mainnet on MetaMask, you would be able to access those ERC20 tokens in this wallet on MetaMask. After that, you would be free to transfer the funds to the Crypto.com app then withdraw them to the Cronos network.*
{% endhint %}

#### I would like to send ERC20-CRO from Crypto.com App or Onchain Wallet to the other CEXs directly. Is this possible?

Please make sure both sender and receiver accounts support ERC20 format. Only if the other CEXs support ERC20-CRO can you send it. Users may refer to this guide for more details:

* [Difference between ERC-20 CRO and native CRO](https://help.crypto.com/en/articles/5019195-send-and-receive-cro-the-difference-between-native-cro-and-erc20-cro)
* [CRO deposit/withdrawal information](https://help.crypto.com/en/articles/4970776-cro-deposit-withdrawal-information-in-crypto-com-app)

#### I made a transaction on MetaMask (through Cronos network) to another CEX that does not support Cronos Network. How can I retrieve it back?

In this case, only the owner of the receiving account has access to that funds. You could also check if your transaction is successful/confirmed on [Cronos Explorer.](https://explorer.cronos.com/) Given the receiving account is from other CEXs, you may contact the receiving party and find out if it is possible for them to do a manual refund for your transaction. They may or may not do it depending on their own policies. Otherwise, you will most likely not be able to access the funds until that CEX starts to support Cronos.

{% hint style="info" %}
For additional FAQ about CRO migrations, head to the [CRO Token migration help](https://help.crypto.com/en/articles/5015397-all-about-cro-token-migration) page.
{% endhint %}


# Testnet Faucet

### Testnet Faucets

* To interact with the blockchain, simply use the [test-token faucet](https://faucet.cronos.com/) to obtain test CRO tokens for performing transactions on the **Cronos** testnet.
* Users can use the [faucet](https://faucet.cronos.com/) to obtain test tokens, please note that you would need a Ethereum type address `0x...` that can be obtained by [Using metamask](/for-users/metamask#using-metamask-on-cronos-testnet).

{% hint style="info" %}
In case you have reached the daily limit on faucet , you can simply send a message on [Discord](https://discord.gg/pahqHz26q4) #request-tcro-cronos channel , stating who you are and your `0x...` address.
{% endhint %}

{% tabs %}
{% tab title="Cronos Testnet" %}

* \[Cronos.com] [Cronos testnet faucet](https://faucet.cronos.com/)
  {% endtab %}
  {% endtabs %}


# Tips & FAQs

For end-users

**How can I get started on Cronos chain?**

* For most end-users, the easiest way to get started on Cronos chain is to start with a Crypto.com app account and then transfer some CRO and cryptocurrency holdings to your self-custodial wallet on Cronos via the "withdraw" feature.
* With respect to the choice of a self-custodial wallet, a Crypto.com Onchain Wallet, MetaMask, or Rabby wallet is a good place to start. You can start trying other wallets once you become more familiar with self-custody.
* Don't forget that you need CRO in your wallet in order to pay for transaction fees on Cronos chain.

**Are there video tutorials on how to use DeFi or NFT apps on Cronos?**

* Yes! Visit the [Cronos Youtube channel](https://www.youtube.com/@cronos_chain/featured) where you can find a [playlist for end-users](https://www.youtube.com/playlist?list=PLeksbq0Q1AQECqvZX4nfvFk94jVnlOxgw) with tutorials and video streams.
* Favorite videos include:
  * [Cronos tutorial: Connect your crypto wallet to Cronos chain](https://youtu.be/0p8v5O_Bu_Y)
  * [Cronos tutorial: Top up your crypto wallet on Cronos chain](https://youtu.be/JDDfFIt1kaI)
  * [Cronos tutorial: Use the Dapp browser in your crypto wallet](https://youtu.be/b5pvHHVWJds)
  * [Cronos tutorial: Trade and invest your cryptos on Cronos chain](https://youtu.be/xsFjF0KAKiU)
  * [Cronos tutorial: See and sell your NFTs on Cronos](https://youtu.be/z51wMmWBge0)

**Where can I find the list of applications available on Cronos chain?**

* In the Crypto.com Onchain Wallet, you can check the "browser" tab where you can see a selection of apps.
* You can also visit <https://cronos.com/ecosystem> to browse a database of available dapps (decentralized apps).

**I have transferred cryptocurrencies by mistake to an address on Cronos chain. Can someone help me to recover the funds?**

* Cronos chain is a public, open-source, decentralized, immutable blockchain network. The Cronos Labs team coordinates open-source development of the network, but it has no control over the network.
* If you have sent your cryptocurrencies to an incorrect address or network, it is not materially possible for the Cronos Labs team to revert the transaction or recover these funds. You need to contact the owner of the address where the funds have been sent.
* If you are the owner of that address and the address is self-custodial, meaning that you know the seed phrase or private key of the address, then you should be able to take control of the funds yourself. For this, you need to use either the [Crypto.com Onchain Wallet](https://crypto.com/fr/defi-wallet) or [MetaMask](https://metamask.io), where you can import either the seed phrase (Crypto.com Onchain Wallet) or private key (MetaMask) of the address. You can then connect to Cronos chain (see for example <https://docs.cronos.com/for-users/metamask>). You may then transfer your funds to another address, or to a Crypto.com account if you would like to move the cryptos to another chain.
* On the other hand, if you are not the owner of the address, it can be very difficult to contact the owner. If the address is the deposit address of a custodial exchange that does not support Cronos, most of the time it is not possible to recover the funds, and in any case, only the owner of that address can help.


# Key Principles for Wallet Security

Ensuring the security of your crypto wallet is crucial to protect your digital assets from prevalent and sophisticated scams. This guide outlines essential practices to enhance the security of your wallet and prevent potential loss of assets.

## Key Practices for Wallet Security

* **Keep Your Recovery Phrase Safe and Private:** Your recovery phrase is the master key to your crypto wallet. Store it securely and never share it with anyone.
* **Lock Your Crypto Wallet When Not in Use:** Always lock your wallet to prevent unauthorised access.
* **Revoke Access to Unused dApps:** Regularly review and revoke permissions granted to dApps you no longer use.
* **Avoid Public WiFi:** Never access your wallet over public WiFi networks to prevent potential interceptions by hackers. If you must use Public WiFi, then use a Virtual Private Network (VPN).

## Understanding Crypto Wallets

A crypto wallet allows you to store and manage your digital assets securely. At its core, it manages and secures the **Private Key** - an alphanumeric code that gives you ownership of your crypto assets. The Private Key **should be kept private**. The corresponding **Public Key** derived from the Private Key, is used to receive cryptocurrencies, NFT’s, and other digital assets.

The **Private Key** as well as the **Seed Phrase** (covered later) are the two crucial pieces of information. Keeping these safe ensures the security of your assets.\\

## Types of Wallets

### Hot Wallets vs Cold Wallets

**Hot Wallets:** Internet-connected wallets are typically software-based, available as mobile or desktop applications. Hot Wallets store and manage your Private Key. They are convenient but are susceptible to cyber threats.

Examples include:

* [Crypto.com Onchain Wallet](https://crypto.com/defi-wallet)
* [Crypto.com App](https://crypto.com/eea/app)
* [MetaMask](https://metamask.io/)
* [Keplr Wallet](https://www.keplr.app/)

**Security Tips for Hot Wallets**

* Keep your software up-to-date: operating system, wallet software updates, etc.
* Use antivirus software: Install reputable antivirus software to protect against malware.
* Use strong passwords: Create complex passwords and use a password manager.
* Enable two-factor authentication (2FA): this adds an extra layer of security by requiring a second form of verification.

**Cold Wallets:** Cold wallets store your private key offline, offering greater security as they are not exposed to the internet and online threats. These can be physical devices like hardware wallets or even paper wallets. However, they can be lost, stolen, or damaged. Examples include:

* [Ledger](https://www.ledger.com/)
* [Trezor](https://trezor.io/)
* [NGRAVE](https://ngrave.io/)

**Security Tips for Cold Wallets**

* Buy from trusted sources: Purchase hardware wallets directly from manufacturers or trusted retailers to avoid tampered devices.
* Keep firmware up-to-date: Regularly update your wallet’s firmware for improved security and functionality.
* Protect the recovery phrase: Never share the recovery phrase, as it grants control over your cryptocurrencies. Store it securely offline.
* Set a strong PIN: Use a strong PIN to safeguard your device from unauthorised access. Avoid easily guessable PINs.
* Verify addresses: Double-check the recipient’s address to avoid malware altering the copied addresses.
* Confirm transactions on the device: Always verify transaction details on the hardware wallet’s screen before confirming.
* Secure your wallet physically: Store your hardware wallet in a safe place when not in use, treat it like a family heirloom.
* Consider using a passphrase: Some wallets offer an additional passphrase for enhanced security. Use with caution as forgetting it can lead to permanent loss of access.
* Use trusted computers: Connect your hardware wallet only to computers with good security measures. Avoid convenience-driven connections.
* Understand the risks: Be aware of risks such as physical theft, phishing attacks, inadequate backups, forgotten PINs or recovery phrases, device damage, firmware vulnerabilities, and address verification. Take precautions to mitigate these risks.

## Self-Custody vs. Hosted Wallets

**Hosted Wallets:** These wallets are usually provided and managed by centralised crypto exchanges (CEX). The exchange holds the private key, meaning they technically own & control the assets. E.g. the Crypto.com App ([https://crypto.com/app](https://crypto.com/uk/app))

**Self-Custody Wallets:** In self-custody wallets you hold/own the private key, giving you full control over the digital assets. Crypto.com Onchain Wallet is an example of a self-custody solution (<https://crypto.com/onchain>).

## Critical Data to Secure

**Seed Phrases:** Along with the Private Key (mentioned above), the seed phrase is a series of words generated by your wallet that can be used to generate & recover your Private Key/s. **Protecting your seed phrase is as crucial as securing your private key**. Never share it, keep it private and store it securely.

**Security Tools and Techniques**

1. **Password Managers:** Use them to create and store strong, unique passwords.
2. **Two-Factor Authentication (2FA):** Adds an extra layer of security by requiring a second form of verification.
3. **A Physical Security Key (2FA):** Consider using a hardware security key as part of your 2FA solution.
4. **Virtual Private Network (VPN):** Use a VPN to encrypt your internet connection, especially on public WiFi.

## Avoiding Common Scams

Understanding and recognising common scams is crucial for protecting your crypto assets. Here are some prevalent scams and tips on how to avoid them:

### **1. Rug-pulls**

A rug pull is a type of scam that involves a team raising money from investors and the public by selling a token only to quietly shut down the project or suddenly disappear, stealing the raised funds and leaving “investors” (i.e., their victims) with worthless tokens.

#### **Key Features**

Rug pulls can be extensively orchestrated, with nefarious actors leveraging social media influencers and hype-generating campaigns to lure as many victims as possible. Some scams even use trusted key opinion leaders in the social space to gain trust. Others promise extremely high yields or offer exclusive digital goods, as seen in NFT rug pulls.

Crypto rug pulls can also occur when the project’s owners manipulate the value of a particular token or coin to deceive investors and subsequently siphon off their investments. Fraudsters often attract victims with a sudden, sharp increase in the token’s value in a short period.\
Once the price peaks, the people behind the token sell it to generate a profit while leaving “investors” with steep losses. Rug pulls often occur on decentralized trading platforms, enabling the fraudster to benefit from the pseudonymity of DEXs.

#### **Types**

Rug pulls can generally be categorized into hard and soft rug pulls.

* Hard rug pulls: Sudden and severe, where project creators execute a complete exit, often by draining liquidity or manipulating the smart contract. Investors lose all their funds almost instantly.
* Soft rug pulls: Gradual exit scams where the development team slowly reduces activity or support for the project while still maintaining appearances, leading to a gradual decline in value.

#### Common types of rug pulls include:

* Liquidity Pulls: Malicious actors remove liquidity from a token pool, causing the token’s value to plummet due to a lack of buyers and sellers.
* Fake Projects: Scammers create seemingly legitimate projects, gather investments, and then disappear with the funds, leaving investors with worthless tokens.
* Pump and Dump: Fraudsters artificially inflate the price of a token through coordinated buying, only to sell their holdings at the peak and crash the value.
* Team Exit: The project’s team members suddenly disappear or exit, ceasing support and updates, leaving investors with no support and a collapsing token.

#### **How to Identify & Avoid Rug-pulls**

Identifying and avoiding rug pulls requires a combination of diligence and caution. Here’s how you can protect yourself:

* Thorough research: Investigate the project’s team, technology, goals, and community before investing. Be cautious of anonymous teams or limited information.
* Security audits: Reputable projects often undergo a reputable third-party security audit. Check if the project has been audited and review the audit report for vulnerabilities.
* Community engagement: Engage with the project’s community on social media and forums. An active and engaged community is often a positive sign of legitimacy.
* Warning signs: Be cautious of unrealistic returns and yields, excessive marketing hype, and pressure to invest quickly or unusual patterns in token distribution.
* Token Utility: Ensure the token has a clear and useful purpose rather than being created solely for speculation. Projects with practical use cases are more likely to be legitimate.

### **2. Airdrop Scams**

Airdrop scams involve malicious tokens being sent to your wallet, tricking you into interacting with phishing sites or giving permissions to your wallet that allow scammers to steal your assets.

**How to avoid Airdrop Scams**

* Never enter your Private Key and/ or Recovery Phrase on any websites.
* Be cautious of unsolicited tokens and do not interact with them.
* Verify the legitimacy of the token and its contract address.

### **3. Dusting Attack**

Dusting attack involves sending a small amount of cryptocurrency, referred to as dust, to multiple crypto wallet addresses. These transactions are often sent at similar intervals or in quick succession and may involve tiny fractions of a cryptocurrency unit. The attack aims to connect the receiver's addresses with other addresses, potentially revealing their real-world identity and their links to centralised exchanges or other platforms.

How to avoid Dusting Attacks

* Use separate “Burner Wallets” to deposit crypto dust you receive.
* Use a hierarchical-deterministic (HD) wallet. This type of wallet creates a new wallet address for each transaction making it more difficult to track.
* Ignore unknown or unanticipated tokens, if you received some unknown or unanticipated tokens in your wallet, it’s best to ignore and not interact with the tokens or linked addresses.
* Only interact with AirDrops from official and legitimate projects. Avoid Airdrops from unfamiliar sources.
* Hide small balances and non-listed tokens to help shield yourself. Most wallets have features to “Hide small balances” and “Hide non-listed tokens” utilise them to reduce clutter and potential risk.
* Refrain from sharing any personal details alongside your wallet address.

### **4. Phishing Scams**

Phishing is a tactic that targets the user’s identity, aiming to obtain private keys, seed phrases, and/or login credentials. Scammers use fraudulent websites, emails, or texts to deceive individuals into revealing their private data.

Phishing websites mimic the look and feel of a legitimate cryptocurrency exchange or wallet, leading users to believe they are interacting with a trustworthy platform.

Phishing emails or texts trick users into installing malware or downloading malicious software that can compromise their computer or device. These malicious software can lead to the theft of private keys, seed phrases, or other sensitive information.

**How to avoid Phishing Scams**

* Verify the authenticity of emails and websites. Check the sender's email address and the website's URL for any discrepancy like spelling errors, typos, and misspellings in the domain name.
* Enable **two-factor authentication (2FA)** on your cryptocurrency wallets and exchanges.
* Avoid clicking on links or downloading attachments from unknown senders, especially if they request sensitive information or ask you to update your account details.
* Keep your operating system, wallet software and Antivirus updated.
* Use a Password Manager to store your cryptocurrency wallet passwords and passphrases securely.
* Use a hardware wallet to store and manage your private key offline where it's less susceptible to phishing attacks.
* Regularly backup your seed phrase and store it in a secure location. Safety Deposit Boxes are great storage options.
* Be cautious of offers that seem too good to be true. Adverts offering high-return investments or promising large sums of cryptocurrency could be scams designed to lure you into revealing your sensitive information.

### **5. Wallet Drainer, Signature Phishing and Ice Phishing Scams**

Scammers use various tactics to drain wallets and steal funds. Wallet drainer, signature phishing, and ice phishing scams are just a few common methods:

**Wallet Drainer Scams:** involve tricking users into signing a fraudulent transaction or approving a malicious contract, which grants the scammer access to their wallet and allows them to drain their funds. These attacks often occur through social engineering tactics such as:

* Phishing emails or messages.
* Fake websites mimicking legitimate services.
* Unsolicited offers or promotions.
* Fake airdrops or giveaways.
* Malicious browser extensions or software.

**Signature Phishing Scams:** Signature phishing scams are a subtype of wallet drainer attacks that focus on obtaining a victim's signature approval for a malicious transaction. Scammers may use fake pop-ups, notifications, or websites to trick users into approving a transaction that grants the attacker access to their wallet.

**Ice Phishing Scams:** Ice phishing scams (also known as token approval scams) are a specific type of attack that relies on a user's willingness to approve a token transaction. The scammer creates a phishing website that mimics a legitimate crypto service and tricks the user into approving a token transaction, granting the attacker access to their wallet.

**How to avoid these attacks**

* Be cautious when connecting your wallet to external websites or services.
* Verify the authenticity of websites and services before providing any information or connecting your wallet.
* Use two-factor authentication (2FA) whenever possible to add an extra layer of security.
* Monitor your transactions and wallet activity regularly to detect any suspicious activity.
* Avoid clicking on unknown links or downloading attachments from unknown sources.
* Reject transactions that you do not recognise or understand. Verify transactions are from legitimate dApps.
* Keep your software and firmware up to date to ensure you have the latest security patches.
* Use a reputable antivirus and anti-malware software to protect your device from infections.
* Educate yourself about common scams and phishing tactics to stay vigilant.

### **6. Address Poisoning**

Also known as address spoofing, this deceptive tactic where scammers send small amounts of cryptocurrency, NFTs, or worthless tokens from a wallet that closely mimics the recipient's or a frequently used partner's address. This makes its way to transaction history. If the victim is in the habit of copying and reusing addresses from recent transactions when sending crypto, they can end up sending their funds to the scammer’s wallet.\
It is common for crypto users to only glance at the first and last several characters of the address copied from one’s smartphone notes or transaction history, especially if this is a wallet with which one has previously interacted.

**How to Avoid Address Poisoning Scams**

* Double-check the address when sending crypto. Always take the time to verify the recipient’s entire address, not just the beginning or end.
* Save frequently used addresses. Utilise wallet features to save trusted addresses and assign nicknames and QR codes to them to avoid the need for frequent copying and pasting.
* Use name services like Ethereum Name Service (ENS), which provide shorter, more recognisable addresses that are difficult for scammers to replicate.
* Conduct test transactions when transferring significant amounts of digital assets. Send a small amount first to make sure that the recipient address is correct.
* Be vigilant with copying and pasting. Malware can alter clipboard content to replace your copied address with one owned by a scammer. Always recheck the address after pasting and consider typing out some characters manually.

By understanding which data is important, recognising common tactics used by scammers and taking appropriate precautions users can effectively protect their wallets and funds. Always be cautious and verify the authenticity of websites and services before interacting with them.

Always ensure you only invest money you can afford to lose. Many cryptocurrency projects are experimental, and sometimes the failure of an idea can lead to the team doing a soft rug pull, which means they quietly stop supporting the project.\
\
Remember, in the decentralised world of crypto, you are the primary custodian of your assets. Stay informed, stay vigilant, and protect your investments.


# Founder FAQs

Planning to release a dApp on Cronos? Here is what you need to know.

## **Essential information sources**

Don’t forget to follow these Twitter accounts to receive key announcements:

* [Cronos App](https://x.com/CronosApp)
* [Cronos Network](https://x.com/CronosNetwork)

**Subscribe to the Cronos newsletter:**

* [Cronos newsletter](https://blog.cronos.com/)

## TLDR; what do I need to know if I am considering Cronos Network for my dapp?

[Cronos (cronos.com)](https://cronos.com) is the leading Ethereum-compatible layer 1 blockchain network built on the Cosmos SDK, supported by Crypto.com and hundreds of app developers and partners. Today, the #CROfam ecosystem represents an addressable user base of more than 150 million people worldwide.

[Cronos](https://cronos.com/) can help most dapp creators to enhance the visibility of their product in the Cronos user community. However, Cronos is generally not able to promote token or NFT sales. The following support is available to dapp creators:

* Technical support via [Discord](https://crofam.me/discord) and [Telegram](https://t.me/Cronos_Announcements).
* Project listing on our [Ecosystem page](https://cronos.com/ecosystem)
* Introductions to other dapps, key opinion leaders and project launchpads.

## FAQs - ecosystem

**How can I get my project featured at** [**cronos.com/ecosystem**](https://cronos.com/ecosystem/)**?**

* Visit [https://cronos.com/ecosystem](https://cronos.com/ecosystem/) where you can submit your project to be added to the Cronos ecosystem (or submit directly to the form [here](https://docs.google.com/forms/d/e/1FAIpQLSdbCFhO_IjnrDIIU1PyuCLSdXDP6SM7SPSaUxud17wyIzr5IA/viewform)).

**How can I get my project featured in Trust Wallet, once deployed on Cronos?**

* [Trust Wallet](https://trustwallet.com/) supports the Cronos mainnet from within the in-app Dapp browser (via the injected Web3 provider) and also via Wallet Connect.
* You can contact the Trust Wallet team to have your Dapp and/or token featured in the Trust Wallet’s mobile Dapp browser. Refer to the [documentation](https://developer.trustwallet.com/developer/listing-new-dapps/listing-guide) for more details.

**How can I get my NFT collection allow-listed on the relevant NFT platforms?**

* Ebisu’s Bay
  * Ebisu’s Bay is a self-custodial NFT platform on Cronos chain and on Ethereum.
  * New launch & secondary trading: the Cronos Labs team can put you in touch with the Minted team via Telegram. Please send your Telegram handle to your Cronos Labs contact.

**How can I become a node operator?**

* Anyone can run their own Cronos node: see [the documentation](https://docs.cronos.com/for-node-hosts/running-nodes/cronos-mainnet) for instructions.
* However, the Cronos network is not currently adding **new validators** (except on an exceptional basis). The Cronos Labs team will make public announcements when validator applications are open again. Feel free to email <contact@cronoslabs.org> to register your interest.

## FAQs - technical

**Where can I find developer quick start resources?**

* Check out the Cronos documentation: <https://docs.cronos.com/getting-started/readme>
* Check out this repository of resources published for Cronos hackathons: [Hacker's Getting Started Resources](/for-dapp-developers/hacker-resources)

**Are there best practices and security standards that apply to dApps on Cronos?**

* The Cronos team strongly encourages all development teams to follow the best practices summarized at this [link](https://docs.cronos.com/for-dapp-developers/cronos-smart-contract/defi-practice/). You can find more information at this [link](https://consensys.github.io/smart-contract-best-practices/) too.
* It will be difficult for the Cronos team to engage meaningfully with teams who do not publish their code and do not have their smart contracts verified on [Cronos Explorer](https://explorer.cronos.com)

**I need a commercial node provider because my dApp exceeds the rate limits of the free Cronos JSON-RPC endpoints. Who offers this ?**

* See here: [Free and commercial RPC endpoints](/for-dapp-developers/chain-integration/public-rpc-endpoints)

**Where can I find a list of available developer tools and integrations?**

* We have prepared one for you! See here: [Dev Tools & Integrations](/for-dapp-developers/dev-tools-and-integrations)

**Where can ask technical questions to integrate with Cronos chain?**

* You can contact the community support on our [Discord server](https://discord.com/invite/pahqHz26q4), in the #cronos-mainnet-beta channel.
* Or, if the Cronos team already has a joint Telegram group with your team, feel free to reach out to the team in that group. You can also email <contact@cronoslabs.org>.

**How can I connect my Dapp to commonly used crypto wallets like MetaMask, Crypto.com Onchain Wallet, or Trust Wallet?**

* See this [tutorial](/for-dapp-developers/chain-integration/web3-wallet).


# Cronos EVM: Differences from Ethereum

### Overview

While Cronos is an EVM-compatible chain, its underlying architecture as a Cosmos SDK blockchain (built using Ethermint) introduces several technical nuances that deviate from standard Ethereum behavior. Understanding these differences is critical for developers migrating dApps or building indexing solutions.

### 1. Batch Transactions

The most significant architectural departure is how multiple messages are handled within a single transaction envelope.

* **Ethereum:** Typically, an Ethereum transaction is a single signed message. To execute multiple actions, a user must send multiple transactions or use a smart contract (like a "`Multicall`" contract) to bundle calls.
* **Cronos:** Leveraging the Cosmos SDK, Cronos supports Batch Transactions. In this model, a single Cosmos transaction can contain multiple `MsgEthereumTx` messages within its `body.messages`.

#### Key Characteristics of Cronos Batching

* **Execution:** Messages execute sequentially in the same block.
* **Fees:** They share a single Cosmos fee envelope; the total gas limit and fee amount are the aggregate sums of the individual parts.
* **Indexing:** Each message generates a separate Ethereum receipt, assigned sequential `transactionIndex` values (0, 1, 2, etc.).

{% hint style="warning" %}
**Predictability**: Developers should never rely on a nonce or contract address generated during a batch transaction. Because nonces are verified differently during batch submission, the resulting contract address can be unpredictable compared to the standard Ethereum derivation.
{% endhint %}

#### Implementation Example (Integration Pattern)

The canonical pattern for building these transactions involves extracting messages from individual EVM transactions and wrapping them into a single Cosmos body:

```python
def build_batch_tx(w3, cli, txs, key):
    signed_txs = [sign_transaction(w3, tx, key) for tx in txs]
    # Convert signed Eth txs to Cosmos-compatible EVM messages
    tmp_txs = [cli.build_evm_tx(Web3.to_hex(s.raw_transaction)) for s in signed_txs]

    msgs = [tx["body"]["messages"][0] for tx in tmp_txs]
    # Aggregate fees and gas
    total_fee = sum(int(tx["auth_info"]["fee"]["amount"][0]["amount"]) for tx in tmp_txs)
    total_gas = sum(int(tx["auth_info"]["fee"]["gas_limit"]) for tx in tmp_txs)

    return {
        "body": { "messages": msgs, ... },
        "auth_info": { "fee": { "amount": [{"denom": "basetcro", "amount": str(total_fee)}], "gas_limit": str(total_gas) }, ... }
    }
```

### 2. Transaction Hash Uniqueness

A fundamental assumption in Ethereum is that a transaction hash (`TxHash`) is a unique identifier. Cronos has historically deviated from this.

* **Ethereum:** Enforces strict uniqueness. Once a transaction is included in a block, that hash cannot be reused for a different state change.
* **Cronos (Legacy):** In versions prior to `v0.7`, a bug existed that allowed the same transaction to be executed multiple times across different blocks. This resulted in duplicate transaction hashes at different block heights.

#### **Impact on Indexers and RPCs**

Standard Ethereum-style indexers and RPC nodes (using calls like `eth_getTransactionReceipt` or `eth_getBlockReceipts`) are often unprepared for non-unique hashes.

* **Data Inconsistency:** Fetching a receipt by hash might return the "wrong" instance if multiple exist.
* **Reconciliation:** Developers building on Cronos must implement custom reconciliation strategies to handle these duplicates to ensure data integrity, especially when migrating or indexing legacy block data. **We recommend overriding the transaction receipt with the receipt returned for the most recent block.**

#### Behavior Across Current Cronos Versions

Since the affected blocks from the legacy era still live on-chain, and every Cronos release still needs to decide how its JSON-RPC endpoints expose those historical duplicates.

A subsequent patch changed how `eth_getBlockReceipts` handles these duplicates. Releases group into two tiers based on whether they include that patch:

* **Pre-fix:** `v1.7.0` , `v1.7.4`
* **Post-fix:** `v1.7.1` , `v1.7.5`

{% hint style="info" %}
**Note on release lineage:** The fix landed in **v1.7.1** and was carried forward into **v1.7.5**. **v1.7.4 is an exception** - it was cut as an **emergency release** for an unrelated issue and did not bundle this patch. Release order alone is therefore not a reliable signal; always check against the table below.
{% endhint %}

**JSON-RPC behavior by version**

<table data-header-hidden="false" data-header-sticky><thead><tr><th>Endpoint</th><th>Pre-fix (v1.7.0 / v1.7.4)</th><th>Post-fix (v1.7.1 / v1.7.5)</th></tr></thead><tbody><tr><td><code>eth_getBlockReceipts</code></td><td>🚨 <strong>Crashes</strong> when the target block contains an unlucky transaction.</td><td>✅ Returns an empty array <code>[]</code> (no crash) if the target block is <strong>not</strong> the most recent one to include the unlucky tx.</td></tr><tr><td><code>eth_getBlockByNumber</code></td><td>Returns normally, with the unlucky transaction included in the block body.</td><td>Same as pre-fix (unchanged by the patch).</td></tr><tr><td><code>eth_getTransactionReceipt</code></td><td>Returns the receipt pointing to the <strong>most recent</strong> block that includes the unlucky tx.</td><td>Same as pre-fix (unchanged by the patch).</td></tr></tbody></table>

{% hint style="warning" %}
**Upgrade Recommendation**

* If you are on **v1.7.0**, jump directly to **v1.7.5**.
* If you are on **v1.7.4**, **do not assume you have the fix** - v1.7.4 is a hotfix release that predates the `eth_getBlockReceipts` patch. Upgrade to **v1.7.5**.
* Clients that only use `eth_getBlockByNumber` / `eth_getTransactionReceipt` are unaffected by the crash, but should still implement the reconciliation guidance above to handle duplicate hashes correctly.

Impact is concentrated on infrastructure that calls `eth_getBlockReceipts` in bulk - indexers, block-explorer backends, analytics pipelines, and bulk receipt fetchers scanning legacy blocks.
{% endhint %}

### **3.** API & RPC Differences

#### **3.1 debug\_trace traceReplay parameter**

Cronos EVM `debug_traceTransaction`, `debug_traceBlock`, and `debug_traceCall` accept an optional `traceReplay` boolean in the trace config that does not exist in standard Ethereum clients (e.g., Geth).

`{ "tracer": "callTracer", "traceReplay": true }`

This flag is Cronos-specific, used to trace a small number of historical transactions affected by a legacy gas accounting discrepancy. When enabled and the upfront fee deduction fails, the keeper continues the trace without charging the fee.

Enable it only when a `debug_trace` call against an already-committed transaction fails with a gas/balance error. It is off by default.

{% hint style="warning" %}
*Note: Do not rely on trace results with traceReplay: true for exact gas accounting. Use it to inspect execution flow only.*
{% endhint %}

For the full list of affected blocks and technical details, see [debug\_trace Gas Simulation Bug page](/for-node-hosts/running-nodes/cronos-mainnet/debug_trace-methods-gas-simulation-bug-fixed-in-v1.7.8).     &#x20;

#### **3.2** EIP-4844 Blob Transactions

Cronos EVM does not implement EIP-4844 blob functionality. \
\
Blob transaction fields are accepted for tooling compatibility but are no-op, transactions execute as standard calls. Blob-related opcodes (e.g., `BLOBHASH`, `BLOBBASEFEE`) return zero.


# Hacker's Getting Started Resources

Quick-start resource if you are hacking and need to integrate with Cronos.

## Overview of Cronos chain

[Cronos](https://cronos.com/) is the leading Ethereum-compatible layer 1 blockchain network built on the Cosmos SDK, supported by [Crypto.com](http://crypto.com), [Cronos.com](http://crypto.org) and more than 500 app developers and partners. Today, the #CROfam ecosystem represents an addressable user base of more than 80 million people worldwide. Our mission is to make it easy and safe for the next billion crypto users to adopt Web3, with a focus on DeFi and GameFi.

[https://github.com/crypto-org-chain/cronos-docs/blob/gitbook/for-dapp-developers/broken-reference/README.md](https://github.com/crypto-org-chain/cronos-docs/blob/gitbook/for-dapp-developers/broken-reference/README.md "mention")

## How to stand out and win in a Web3 hackathon 🥇

Check out our [blog post](https://blog.cronos.com/p/cronos-developer-series-5-tips-to-stand-out-in-a-web3-hackathon-924d774f1617).

## Hack with Cronos 🥚

Developing Dapps on Cronos is as easy as developing them on any of the major EVM-compatible chains: write and test solidity with Hardhat, deploy your contract, connect your frontend or your backend with ethers.js, and connect your wallet with MetaMask or Crypto.com Onchain Wallet.

The native cryptocurrency of Cronos mainnet is CRO, while the testnet uses TCRO.

**Cronos overview & key links for developers**

* Cronos docs: <https://docs.cronos.com>
* [Why build on Cronos](https://blog.cronos.com/p/why-build-grow-on-cronos-692da1de7885)
* Cronos overview by [Eat The Blocks](https://www.youtube.com/watch?v=NqeeKEJiPZU)

**MetaMask end-user configuration**

* The [cronos.com](http://cronos.com) website has a little orange button at the top of the page, that you can click to add Cronos mainnet to your MetaMask wallet.
* For more details, see [Metamask configuration](/for-users/metamask)

**JSON-RPC endpoint configuration**

* For most use cases you can use the free endpoints that are provided by Cronos Labs. Most developers use a configuration file that looks like this:

  For Hardhat:

  ```json
  {
  "cronos_mainnet": {
        "chainId": 25,
        "url": "https://evm.cronos.com/",
        "gasPrice": 5000000000000,
        "blockExplorer": "https://explorer.cronos.com/",
        "blockExplorerPrefix": "https://explorer.cronos.com/tx/"
      },
  "cronos_testnet": {
        "chainId": 338,
        "url": "https://evm-t3.cronos.com/",
        "gasPrice": 5000000000000,
        "blockExplorer": "https://explorer.cronos.com/testnet/",
        "blockExplorerPrefix": "https://explorer.cronos.com/testnet/tx/"
      },
  }
  ```

  or, using EIP1559 in a Node.js backend:

  ```json
  {
  "cronos_mainnet": {
        "id": 25,
        "url": "https://evm.cronos.com/",
        "maxPriorityFeePerGas": 5000000000,
        "maxFeePerGas": 6000000000000,
        "blockExplorer": "https://explorer.cronos.com/",
        "blockExplorerPrefix": "https://explorer.cronos.com/tx/"
      },
  "cronos_testnet": {
        "id": 338,
        "url": "https://evm-t3.cronos.com/",
        "maxPriorityFeePerGas": 5000000000,
        "maxFeePerGas": 6000000000000,
        "blockExplorer": "https://explorer.cronos.com/",
        "blockExplorerPrefix": "https://explorer.cronos.com/tx/"
      },
  }
  ```
* Testnet CRO faucet

  <https://faucet.cronos.com/>

## Tutorials 🚀

**Essential tutorials / boilerplates**

* [Deploy and verify your smart contracts](https://github.com/kentimsit/cronos-hardhat-boilerplate)
* [Build a Dapp: how to connect and interact with Web3 wallets on Cronos](/for-dapp-developers/chain-integration/web3-wallet)
* [Create & deploy a smart contract with OpenZeppelin Wizard and Remix](https://cronoslabs.substack.com/p/cronos-developer-series-create-deploy-a-smart-contract-with-openzeppelin-wizard-and-remix-5b6769fc8b93) (low code version)

**Other useful tutorials**

* Create an end to end Web3 application: [smart contract](https://github.com/cronos-labs/cronos-accelerator-workshop-hardhat) and [front-end client](https://github.com/cronos-labs/cronos-accelerator-workshop-client) (GitHub)
* [Create a NFT collection on Cronos and IPFS](https://cronoslabs.substack.com/p/cronos-developer-series-build-a-simple-dapp-with-react-crypto-com-defi-wallet-and-metamask-87c37ccd589f)
* [Get Started with Cronos Chain](https://www.youtube.com/watch?v=lKzzyUXPeRk) (video)
* [Build your Web3 Game with Cronos Play](https://www.youtube.com/watch?v=lmM7HgXDZ2w) (video)
* [Cronos Metaverse Gaming Hackathon](https://www.youtube.com/live/kyMg0jtuT-8?si=Tr8ARBJalFsm11zt) (video)

## Essential developer tools 💻

Write, test and deploy smart contracts

* Smart contracts library: [OpenZeppelin](https://www.openzeppelin.com/)
* Compile & test: [Hardhat](https://hardhat.org/)

Connect your Dapp to the blockchain

* Web3 library for Javascript / Typescript: [ethers.js](https://docs.ethers.io/v5/), [web3.js](https://web3js.readthedocs.io/)
* Web3 library for Python: [web3.py](https://web3py.readthedocs.io/)

Create games

* Javascript SDK: [Moralis](https://moralis.io/)
* Unity plugin: [repo](https://github.com/ChainSafe/web3.unity)
* Unreal plugin: [repo](https://github.com/cronos-labs/play-unreal-plugin) and [demo](https://github.com/cronos-labs/play-unreal-demo)
* C++ SDK: [repo](https://github.com/cronos-labs/play-cpp-sdk)
* [Full list of available dev tools and integration](/for-dapp-developers/dev-tools-and-integrations/overview-of-dev-tools-and-integrations)

## Developer support ☎️

Please visit the [#dev-mainnet ](https://discord.com/channels/783264383978569728/823481249179107389)channel on the Cronos [Discord](https://discord.com/invite/pahqHz26q4) server.

Feedback is a gift! [Let us know](mailto:contact@cronoslabs.org) if there is anything that we can improve in this documentation.

Socials: [X](https://twitter.com/cronos_chain) | [Telegram](https://t.me/Cronos_Announcements) | [Discord](https://discord.com/invite/cronos) | [YouTube](https://www.youtube.com/@cronos_chain)


# Smart Contracts

Smart contracts hold an essential role in the blockchain ecosystem of dApps. It is critical to ensure they work as intended and remain as secure as possible. Complete and well-design smart contracts save us from unnecessary financial losses and help the project stay secure. Smart contract verification is sometimes overlooked when teams are rushing to ship, but it is vital to verify smart contracts on their correctness, validity and security.

The following documentation demonstrates the deployment and verification of a smart contract by Solidity to Cronos. `@openzeppelin/contracts` is used for the demo Solidity script. Both Truffle and Hardhat for deployment are included in this documentation and you shall use one of your choices.

## Pre-requisites

Below are the prerequisites for contract deployment and verification.

### Supported OS

We officially support macOS, Windows and Linux only. Other platforms may work but there is no guarantee. We will extend our support to other platforms after we have stabilized our current architecture.

### Prepare nodejs and npm environment

You can refer to [Downloading and installing Node.js and npm](https://docs.npmjs.com/downloading-and-installing-node-js-and-npm)\
`Nodejs v18+` is suggested

### Sufficient funds on deployer address

You can access to [faucet](https://faucet.cronos.com/) to obtain testnet TCRO and [explorer](https://explorer.cronos.com/testnet) to view the address details.

### Git clone `smart-contract-example`

```bash
$ git clone git@github.com:crypto-org-chain/cronos-smart-contract-example.git
```

Once you have them all ready, now we are ready to go through the next step of contract deployment and verification!


# Contract Development on Testnet

When developing smart contracts on Testnet, use the Testnet version of the Cronos Explorer block explorer:

* Cronos Explorer Testnet URL: <https://explorer.cronos.com/testnet>
* Documentation of Cronos Explorer Testnet API: <https://explorer-api-doc.cronos.org/testnet>

## Truffle: Deploy ERC20 Contract

### Step 1. Enter `smart-contract-example/truffle` folder

```bash
$ cd cronos-smart-contract-example/truffle
```

### Step 2. Run `npm install` inside the folder

```bash
$ npm install
```

### Step 3. Make a copy of `.env.example` to `.env`

```bash
$ cp .env.example .env
```

### Step 4. Modify `.env` and fill *ONE* of the field

```bash
MNEMONIC=goose easy ivory ...
PRIVATE_KEY=XXXXXXX
```

### Step 5. Review Migration Script at `migrations/2_deploy_cronos_token.js`

```javascript
  const CronosToken = artifacts.require("CronosToken");
  
  module.exports = function (deployer) {
      deployer.deploy(CronosToken, "Cronos Token", "CRT", "1000000000000000000000000");
  };
```

### Step 6. Endpoints setting

By default, the script will be using your local host `"127.0.0.1"` - If you are not running a localhost, you may leverage the public endpoint `https://evm-t3.cronos.com/` by making changes to `networks` in `truffle-config.js`, for example:

```json
  networks: {
    development: {
      provider: new HDWalletProvider(getHDWallet(), "http://127.0.0.1:8545"), // TODO
      network_id: "*",       // Any network (default: none)
    },
    testnet: {
      provider: new HDWalletProvider(getHDWallet(), "https://evm-t3.cronos.com/"), // TODO
      network_id: "*",
      skipDryRun: true
    },
  },
```

### Step 7. Deploy Contract

```bash
npm run deploy-contract-cronos
```

### Step 8. Obtain Contract address from console and input to Metamask

Correct balance will be shown on Metamask page

![](/files/53BR7lHHnLO3wVfepFPK)

![](/files/WjMSaIdt8PQWbmLiOmp8) ![](/files/zpf3fmBEoagMVRcWu2p2)

## Hardhat: Deploy ERC20 Contract

### Step 1. Enter `smart-contract-example/hardhat` folder

```bash
$ cd smart-contract-example/hardhat
```

### Step 2. Run `npm install` inside the folder

```bash
$ npm install
```

### Step 3. Make a copy of `.env.example` to `.env`

```bash
$ cp .env.example .env
```

### Step 4. Modify `.env` and fill *ONE* of the field

```bash
MNEMONIC=goose easy ivory ...
PRIVATE_KEY=XXXXXXX
```

### Step 5. Review Migration Script at `scripts/deploy-cronos-token.js`

```javascript
  async function main() {
      const CronosToken = await hre.ethers.getContractFactory("CronosToken");
      const cronosToken = await CronosToken.deploy("Cronos Token", "CRT", "1000000000000000000000000");
  
      await cronosToken.deployed();
  
      console.log("CronosToken deployed to:", cronosToken.address);
  }
```

### Step 6. Endpoints setting

By default, the script will be using your local host `"127.0.0.1"` - If you are not running a localhost, you may leverage the public endpoint `https://evm-t3.cronos.com/` by making changes to `networks` in `hardhat.config.js`, for example:

```json
  networks: {
    development: {
      url: "http://localhost:8545",
      accounts: getHDWallet(),
     },
    testnet: {
      url: "https://evm-t3.cronos.com/",
      accounts: getHDWallet(),
    },
  },
```

### Step 7. Deploy Contract

```bash
npm run deploy-contract-cronos
```

### Step 8. Obtain Contract address from console and input to Metamask

Correct balance will be shown on Metamask page

```bash
CronosToken deployed to: 0x5F803c894a0A16B46fe5982fB5D89eb334eAF68
```

![](/files/WjMSaIdt8PQWbmLiOmp8) ![](/files/zpf3fmBEoagMVRcWu2p2)


# Contract Deployment and Verification

## Block Explorer

The Cronos blockchain network is now using the new [Cronos Explorer](https://explorer.cronos.com).

The Cronos Explorer URLs are as follows:

* Mainnet: <https://explorer.cronos.com>
* Testnet: <https://explorer.cronos.com/testnet>

The documentation of the Cronos Explorer APIs are available at the following URLs:

* Mainnet: <https://explorer-api-doc.cronos.org/mainnet>
* Testnet: <https://explorer-api-doc.cronos.org/testnet>

## Contract Deployment

To interact with Cronos mainnet, you can use the public endpoint `https:.//evm.cronos.com` or an endpoint provided by a commercial vendor. You will need CRO in your self-custodial wallet in order to pay for transaction fees.

In [this Github repository](https://github.com/kentimsit/cronos-hardhat-boilerplate), you will find a convenient example of Hardhat configuration for smart contract development on Cronos Testnet and Mainnet. Please refer to [the README.md file](https://github.com/kentimsit/cronos-hardhat-boilerplate/blob/main/README.md) for a list of frequently used commands, and to the [Hardhat documentation](https://hardhat.org) for more details.

In the `hardhat.config.js` file, you will notice that we currently recommend to set the gas price at 10100000000000 wei, but please [check the Average Gas Price](https://explorer.cronos.com/charts) for a more up to date value.

## Contract Verification

In order to enable users and fellow developers to do their own research, it is imperative that you publish your smart contract code on Cronos Explorer. This is called verifying your contracts.

The new Cronos Explorer supports smart contract verification either through the web interface or programmatically via Hardhat (we recommend to use Hardhat).

**Contract Verification Via Explorer Hardhat:**

For verification via Hardhat, refer to the example provided in [this boilerplate repository](https://github.com/kentimsit/cronos-hardhat-boilerplate/blob/main/README.md). Cronos is supported by Hardhat out of the box, you just need to configure the network parameters in `hardhat.config.js` . You will need an API key. To find out how to obtain an API key, refer to the [Cronos Explorer API documentation](https://docs.cronos.com/block-explorers/block-explorer-and-api-keys#creating-account-and-getting-api-key-cronso-explorer).

After the contract verification is complete, the Cronos Explorer will display details about your smart contract code like shown below.

<figure><img src="/files/SXVvWpBdjiPB3WYmrKLl" alt=""><figcaption><p>Cronos Explorer screenshot</p></figcaption></figure>

**Contract Verification Via Explorer interface:**

For verification via the web interface, visit the following URLs:

* Mainnet: <https://explorer.cronos.com/verifyContract>
* Testnet: <https://explorer.cronos.com/testnet/verifyContract>

**Contract Verification Via Remix and Explorer:**

For contracts developed in Remix, developers can follow the steps below to verify them on the Explorer:

1. Compile the contract.
2. Download the JSON file under `artifacts/build-info/` , and please ensure the file follows this [format](https://docs.soliditylang.org/en/latest/using-the-compiler.html#input-description).
3. Go to the Explorer Contract Verifier introduced in the previous section, fill in the required information, upload the JSON file and verify it on Cronos Explorer.


# Contract Verification Export: Cronoscan To Cronos Explorer

## Cronos EVM: how to verify smart contracts on multiple blockchain explorers

As a developer, you may have submitted your smart contract code to a blockchain explorer (e.g., [Cronoscan](https://cronoscan.com/)) as part of your smart contract deployment script. You can also submit it to other platforms for verification (e.g., [Cronos Explorer](https://explorer.cronos.com/)).

This guide explains how to export data from one explorer and upload it into another. However, this only works for one smart contract at a time.

## Step 1: Obtain smart contract data from a blockchain explorer (e.g., Cronoscan)

Cronoscan provides an [endpoint](https://docs.cronoscan.com/api-endpoints/contracts#get-contract-source-code-for-verified-contract-source-codes) for registered users to retrieve contract source code and compilation settings:

{% code overflow="wrap" %}

```url
https://api.cronoscan.com/api?module=contract&action=getsourcecode&address={YourContractAddress}&apikey={YourApiKeyToken}
```

{% endcode %}

The parameters are as follows:

* YourContractAddress: address of your smart contract on Cronos EVM chain.
* YourApiKeyToken: API key on the Cronoscan platform.

The output may look like this (example from this contract: <https://cronoscan.com/address/0x7de56bd8b37827c51835e162c867848fe2403a48#code>)

<figure><img src="/files/kYF2Za6HmHvhsrSXim97" alt=""><figcaption></figcaption></figure>

The endpoint's response includes the following fields:

* ContractName: Name of contract
* CompilerVersion: Version name of compiler for contact
* ConstructorArguments: Argument inputs used when creating the contract
* OptimizationUsed: the value is "1" if optimization was used when compiling this contract
* Runs: Number of times the optimization was run
* SourceCode: The source code field's value must be reformatted first. See the instructions below.

## Step 2: Reformat the SourceCode fields' value

The source code field's value may be provided in one of the three following formats:

### Scenario 1: Standard JSON input (starts with "{{" and ends with "}}").

In this case, you need to create a .JSON file by following these steps:

* Remove the outer brackets "{" and "}"
* "Unescape" the JSON string. This means replacing the backslashed characters with non-backslashed characters. You can use various tools for this, such as [freeformatter](https://www.freeformatter.com/json-escape.html#before-output) (click: Unescape JSON).
* Paste the resulting string into a new JSON file that you can name, for example, source\_code.json. The JSON file should now be in [this format](https://docs.soliditylang.org/en/latest/using-the-compiler.html#input-description).

### Scenario 2: Source code only, with a single source file (starts with actual source code).

In this case, you need to create a .SOL file. Copy the code and paste it into a new solidity file that you can name, for example, source\_code.sol.

### Scenario 3: Source code only, with multiple source files (starts with a single “{“ and ends with a single "}").

In this case, you need to create a .JSON file by following these steps:

* "Unescape" the JSON string (Once only). This means replacing the backslashed characters with non-backslashed characters. You can use various tools for this, such as [freeformatter](https://www.freeformatter.com/json-escape.html#before-output) (click: Unescape JSON).
* Create a new JSON file that you can name, for example, source\_code.json, using the template below:

```json
{
    "language": "Solidity",
    "sources":**Paste here**   ,
    "settings": {
        "optimizer": {
            "enabled": true,
            "runs": 200
        }
    }
}

```

* In the JSON file that you just created, update the "enabled" and "runs" values to match the OptimizationUsed (where 1 should be converted to true) and Runs values from the Cronoscan response.
* Paste the unescaped JSON string into the JSON file, where "\*\*Paste here\*\*" is a placeholder for where you should insert the unescaped JSON string obtained in the previous step.

```reason
{
    "language": "Solidity",
    "sources": {
        "XXX.sol": {
            "content": "Source code of XXX..."
        },
        "YYY.sol": {
            "content": "Source code of YYY..."
        }
    },
    "settings": {
        "optimizer": {
            "enabled": true,
            "runs": 200
        }
    }
}

```

## Step 3: Submit contract verification into the other blockchain explorer (e.g., Cronos Explorer)

Please visit the [Cronos Explorer User Interface](https://explorer.cronos.com/verifyContract), which looks like this:

<figure><img src="/files/ZOfNhAcGXh8qcSaXmGFL" alt=""><figcaption></figcaption></figure>

You can use the elements from Step 1 to complete the corresponding inputs:

* Contract Name: Refer to the ContractName field from the Cronoscan response.
* Contract Address: Address of the contract.
* Compiler Type: there are two possible scenarios, depending on the format of the source code file generated in Step 2.
  * Scenario 1: The source code is a Solidity file (such as source\_code.sol), generated from a SourceCode value in Source code-only format with a single source file. In that case:
    * Compiler Type: select Solidity Files.
    * Contract Files: Upload the solidity file (.sol) generated in Step 2.
    * Optimizer Enabled: Toggle yes if the OptimizationUsed field from the Cronoscan response is 1.
    * Optimizer Runs: If Optimizer Enabled is toggled, use the value from the Runs field in the Cronoscan response.
  * Scenario 2: The source code is a JSON file (such as source\_code.json) generated from a SourceCode value either in Standard JSON input format or in Source code-only format with multiple source files. In that case:
    * Compiler Type: select Solidity Standard-Json-Input.
    * Check and, if necessary, edit the value of the JSON file as follows:
      * Double check the value of the `settings.optimizer.enabled` field. It must be set to true if the OptimizationUsed field from the Cronoscan response is 1. If there is a mismatch, fix it manually in the source\_code.json file.
      * Double check the value of the `settings.optimizer.runs`field. It must be set to match the value of the Runs field from the Cronoscan response. If there is a mismatch, fix it manually in the source\_code.json file.
* Contract Files: Upload the JSON file (.json) generated in Step 2.
* Compiler Version: Use the value of the CompilerVersion field from the Cronoscan response.
* Constructor Arguments: Use the ConstructorArguments field from the Cronoscan response.

An example of the completed form is shown below:

<figure><img src="/files/qwOKWNTQiZP45I8rD0iB" alt=""><figcaption></figcaption></figure>

After submitting the form, you are done!

## Troubleshooting

If you encounter errors, please email <contact@cronoslabs.org>, making sure that you:

* Specify the address of the smart contract.
* Attach the JSON or SOL file generated in Step 2.
* Attach a screenshot of the verification form you completed.

Most of the time, the errors are caused by mistakes when generating the JSON or SOL source code file.\\


# Contract Verification Export: Etherscan To Cronos Explorer

## Cronos EVM: how to verify smart contracts on multiple blockchain explorers

As a developer, you may have submitted your smart contract code to a blockchain explorer (e.g. [Etherscan](https://etherscan.io/)) as part of your smart contract deployment script. You can also submit it to other platforms for verification (e.g. [Cronos Explorer](https://explorer.cronos.com/)).

This guide explains how to export data from one explorer and upload it into another. However, this only works for one smart contract at a time.

## Step 1: Obtain smart contract data from a blockchain explorer (e.g. Etherscan)

Etherscan provides an [endpoint](https://docs.etherscan.io/api-endpoints/contracts#get-contract-source-code-for-verified-contract-source-codes) for registered users to retrieve contract source code and compilation settings:

{% code overflow="wrap" %}

```url
https://api.etherscan.io/v2/api
?chainid=25
&module=contract
&action=getsourcecode
&address={YourContractAddress}
&apikey={YourApiKeyToken}
```

{% endcode %}

The parameters are as follows:

* YourContractAddress: address of your smart contract on Cronos EVM chain.
* YourApiKeyToken: API key on the [Ethercan API Dashboard](https://etherscan.io/apidashboard).

The output may look like this:

<figure><img src="/files/kYF2Za6HmHvhsrSXim97" alt=""><figcaption></figcaption></figure>

The endpoint's response includes the following fields:

* ContractName: Name of contract
* CompilerVersion: Version name of compiler for contact
* ConstructorArguments: Argument inputs used when creating the contract
* OptimizationUsed: the value is "1" if optimization was used when compiling this contract
* Runs: Number of times the optimization was run
* SourceCode: The source code field's value must be reformatted first. See the instructions below.

## Step 2: Reformat the SourceCode fields' value

The source code field's value may be provided in one of the three following formats:

### Scenario 1: Standard JSON input (starts with "{{" and ends with "}}").

In this case, you need to create a .JSON file by following these steps:

* Remove the outer brackets "{" and "}"
* "Unescape" the JSON string. This means replacing the backslashed characters with non-backslashed characters. You can use various tools for this, such as [freeformatter](https://www.freeformatter.com/json-escape.html#before-output) (click: Unescape JSON).
* Paste the resulting string into a new JSON file that you can name, for example, source\_code.json. The JSON file should now be in [this format](https://docs.soliditylang.org/en/latest/using-the-compiler.html#input-description).

### Scenario 2: Source code only, with a single source file (starts with actual source code).

In this case, you need to create a .SOL file. Copy the code and paste it into a new solidity file that you can name, for example, source\_code.sol.

### Scenario 3: Source code only, with multiple source files (starts with a single “{“ and ends with a single "}").

In this case, you need to create a .JSON file by following these steps:

* "Unescape" the JSON string (Once only). This means replacing the backslashed characters with non-backslashed characters. You can use various tools for this, such as [freeformatter](https://www.freeformatter.com/json-escape.html#before-output) (click: Unescape JSON).
* Create a new JSON file that you can name, for example, source\_code.json, using the template below:

```json
{
    "language": "Solidity",
    "sources":**Paste here**   ,
    "settings": {
        "optimizer": {
            "enabled": true,
            "runs": 200
        }
    }
}

```

* In the JSON file that you just created, update the "enabled" and "runs" values to match the OptimizationUsed (where 1 should be converted to true) and Runs values from the Etherscan API response.
* Paste the unescaped JSON string into the JSON file, where "\*\*Paste here\*\*" is a placeholder for where you should insert the unescaped JSON string obtained in the previous step.

```json
{
    "language": "Solidity",
    "sources": {
        "XXX.sol": {
            "content": "Source code of XXX..."
        },
        "YYY.sol": {
            "content": "Source code of YYY..."
        }
    },
    "settings": {
        "optimizer": {
            "enabled": true,
            "runs": 200
        }
    }
}

```

## Step 3: Submit contract verification into the other blockchain explorer (e.g. Cronos Explorer)

Please visit the [Cronos Explorer User Interface](https://explorer.cronos.com/verifyContract), which looks like this:

<figure><img src="/files/ZOfNhAcGXh8qcSaXmGFL" alt=""><figcaption></figcaption></figure>

You can use the elements from [**Step 1**](#step-1-obtain-smart-contract-data-from-a-blockchain-explorer-e.g.-etherscan) to complete the corresponding inputs:

* Contract Name: Refer to the ContractName field from the Etherscan response.
* Contract Address: Address of the contract.
* Compiler Type: there are two possible scenarios, depending on the format of the source code file generated in [**Step 2**](#step-2-reformat-the-sourcecode-fields-value).
  * Scenario 1: The source code is a Solidity file (such as ***source\_code.sol***), generated from a SourceCode value in Source code-only format with a single source file. In that case:
    * Compiler Type: select Solidity Files.
    * Contract Files: Upload the solidity file (.sol) generated in Step 2.
    * Optimizer Enabled: Toggle yes if the OptimizationUsed field from the Etherscan response is 1.
    * Optimizer Runs: If Optimizer Enabled is toggled, use the value from the Runs field in the Etherscan response.
  * Scenario 2: The source code is a JSON file (such as ***source\_code.json***) generated from a SourceCode value either in Standard JSON input format or in Source code-only format with multiple source files. In that case:
    * Compiler Type: select Solidity Standard-Json-Input.
    * Check and, if necessary, edit the value of the JSON file as follows:
      * Double check the value of the `settings.optimizer.enabled` field. It must be set to true if the OptimizationUsed field from the Etherscan response is 1. If there is a mismatch, fix it manually in the source\_code.json file.
      * Double check the value of the `settings.optimizer.runs`field. It must be set to match the value of the Runs field from the Etherscan response. If there is a mismatch, fix it manually in the ***source\_code.json*** file.
* Contract Files: Upload the JSON file (.json) generated in Step 2.
* Compiler Version: Use the value of the CompilerVersion field from the Etherscan response.
* Constructor Arguments: Use the ConstructorArguments field from the Etherscan response.

An example of the completed form is shown below:

<figure><img src="/files/qwOKWNTQiZP45I8rD0iB" alt=""><figcaption></figcaption></figure>

After submitting the form, you are done!

## Troubleshooting

If you need Technical Support please log a Support Ticket on the [Cronos Discord Server](https://discord.com/channels/783264383978569728/1133334988142690365) and provide the following details:

* The smart contract address.
* Attach the JSON or SOL file generated in Step 2.
* Attach a screenshot of the verification form you completed.

Most errors are caused when generating the JSON or SOL source code file.

\\


# Best Practices

## Introduction

Decentralized Finance (DeFi) is revolutionizing the finance industry and bringing boundless opportunities to the finance world. However, at the same time it has witnessed millions of funds being hacked. We believe it is critical for us to play a part to minimize such incidents as we place security as a top priority. With that, we have compiled a list of best practices to develop secure smart contracts for the Cronos ecosystem. This is by no means an exhaustive list but we believe it is a good foundation and minimum security baseline for any smart contract project.

## Secure Coding Practices

### Design

**Documentation**

* The document about your contract should be recorded clearly, including the smart contract's purpose and what it can do. The document should be updated when you implement and update the contracts: Solidity contracts can use a particular form of comments to provide rich documentation for functions, return variables and more. This particular form is named the Ethereum Natural Language Specification Format [NatSpec](https://docs.soliditylang.org/en/develop/natspec-format.html). You may refer to the Natspec format for more details. Schema and architectural diagrams, including the contract interactions and the state machine of the system. You may refer to [Slither printers](https://github.com/crytic/slither/wiki/Printer-documentation) which can help you to generate your schemas.

**Upgradeability**

* For contract upgradeability, it is recommended to consider contract migration first, which will spare you the risks of an upgradeability mechanism but allows you to have the new functions.
* You may refer to this [contract migration guide](https://blog.trailofbits.com/2018/10/29/how-contract-migration-works/) for contract migration and the [OpenZeppelin smart contracts](https://docs.openzeppelin.com/learn/upgrading-smart-contracts) upgrade guide for the contract upgrade. Also, remember to document the migration/upgrade procedure before the deployment.

**On-chain vs Off-chain computation**

* Keep as much code as you can off-chain and keep the on-chain layer small. Pre-process data with code off-chain in such a way that verification on-chain is simple.

### Development Implementation

**Function Composition**

* Use simple solutions for your functions so that you and your team can understand when they review back. Also, the architecture of your codebase should make your code easy to check.
  * You may write small functions with a clear purpose. This helps facilitate a more straightforward review and testing.
  * You can split the logic of your system either through multiple contracts or by grouping similar functions.
  * You should also note that all state modification in the function must happen before an external call is made, when considering the function in Solidity. This potentially prevent a re-entrancy attack. You can learn more details [here](https://dev.to/zaryab2000/the-significance-of-check-effects-interaction-pattern-5hn6).

**Inheritance**

* Keep the inheritance manageable. Even though inheritance should be used to divide the logic, your project should aim to minimize the depth and width of the inheritance tree. You may check out [Slither’s inheritance printer](https://github.com/crytic/slither/wiki/Printer-documentation#inheritance-graph) to check the contracts’ hierarchy to help you review the size of the hierarchy.

**Solidity**

* For Solidity, use a stable release to compile and the latest release to check for warnings. Make sure your code has no reported issues with the latest compiler version. Also, stay cautious when using inline assembly, as it requires strong EVM expertise.

**Events & Logging**

* Log all major operations. Events will help to debug the contract during the development and monitor it after deployment.

**Dependencies**

* For dependencies, you would want to use well-tested libraries to reduce the chance of buggy code. You may consider using a dependency manager. If you rely on an external source, you should keep it up-to-date with the original source.

**Common Security Issues**

* Be aware of the most common security issues and keep an eye on the warnings and updates from the [Solidity documentation](https://docs.soliditylang.org/en/v0.8.15/).

### Testing

* Static analysis tools are an important toolkit for smart contract auditors. These tools are automated, and hence saves time and improves quality as it helps to discover potential common vulnerabilities in your code. Below are some examples of some tools widely used:
  * [Slither](https://github.com/crytic/slither) runs a suite of vulnerability detectors, prints visual information about contract details, and provides an API to easily write custom analyses. Slither enables developers to find vulnerabilities, enhance their code comprehension, and quickly prototype custom analyses.
  * [Mythril](https://github.com/ConsenSys/mythril) is a security analysis tool for EVM bytecode. It detects security vulnerabilities in smart contracts built for Ethereum. It uses symbolic execution, SMT solving and taint analysis to detect a variety of security vulnerabilities.
  * [Echidna](https://github.com/crytic/echidna) is a smart contract fuzzing tool. Fuzzing is an automated testing technique that randomly feeds invalid and unexpected inputs and data into smart contracts in order to find coding errors and security vulnerabilities. Echidna uses grammar based fuzzing based on an EVM ABI to falsify user-defined predicates or Solidity assertions.
* Testing is important, but more importantly, tests should be automated and have consistently run results. Tests find bugs and vulnerabilities easier, quicker and ensure it meets the functional requirements the smart contracts promised to deliver i.e. verification.
  * Ensure there is sufficient coverage of smart contracts, specifically on those with complex business logic.
  * Ensure deployment on mainnet is after the test suite passes.
  * Ensure testing is part of continuous integration (CI). Ideally, anyone can see the test result/execution from a repository like github.
  * Ensure anyone can checkout the repository and run the test without any additional setup.
  * Ensure writing through unit tests. An extensive test suite is crucial to build high-quality software.
  * Need to know [more about testing](https://ethereum-tests.readthedocs.io/en/latest/)

### Deployment

* Smart contract code must be viewable from Cronos explorer.
* Ideally, each release of smart contracts should be trackable from repositories like github, e.g. using tagging features of github.
* Study and review against smart contracts development best practices.
* Monitor your contracts. Watch the logs, and be ready to react in case of contract or wallet compromise.
* Have a contingency plan for incidents: an attacker may take control of the contract owner's keys even if your contracts are free of bugs.
* [Consensys smart contracts best practices](https://consensys.github.io/smart-contract-best-practices/)
* [List of known attack vectors](https://blog.sigmaprime.io/solidity-security.html)

*The above section is based on the* [*Building Secure Smart Contracts guide*](https://github.com/crytic/building-secure-contracts)*, credit to the Trail of Bits team.*

## Security Audit

* Important to have at least one independent external security team to review smart contracts. The intent of this is for experts to review the code, test the overall quality and find subtle smart contract weaknesses that could be exploited by attackers.
* This is not a one-off exercise, it must be a continuous effort as the smart contracts are being re-factored for cases where it is upgradeable.
* Ideally an external security audit is conducted before deployment of smart contracts to the mainnet.
* Ideally, a report from an external security audit team should be made available publicly as this can provide investors and users of the DeFi project to understand the quality and safety of the smart contracts.

## DeFi Administrator Operation

* Proper key management
  * Using hardware wallets for privileged users or administrators of smart contracts. Recently, a DeFi project bZx has been [hacked](https://rekt.news/bzx-rekt/) due to the administrator's private key being leaked. The private key was leaked because the administrator was a target of a phishing attack resulting in the user’s wallet mnemonic being compromised. To learn how to properly use a hardware wallet refer to [this](https://blog.trailofbits.com/2018/11/27/10-rules-for-the-secure-use-of-cryptocurrency-hardware-wallets/).
  * Use timelock for smart contract changes. There are standards such as one provided by OpenZeppelin for a transaction delay/cancel/other control authority. Related use issue check can refer to this [link](https://forum.openzeppelin.com/t/timelockcontroller-vulnerability-post-mortem/14958).
  * Use multisignature to avoid a single point (owner) of failure (lose/compromise private key).
  * Ownership management - it is unavoidable in some cases, actions in smart contracts need to be controlled by administrators. In such cases, it is advised to use proven open source libraries such as [OpenZeppelin - Access](https://github.com/OpenZeppelin/openzeppelin-contracts/tree/master/contracts/access).
* Clearly document the control or access available to issuers or owners of smart contracts in plain English. A good example please refer to this [link](https://docs.openzeppelin.com/contracts/3.x/access-control)
* Refrain from having owners/issuers to have permission to transfer user’s funds.

## Bug Bounty

* Bug bounty program is a complement to security audit in which it allows ethical hackers to identify and disclose potential vulnerabilities in deployed smart contracts. Typically bug bounty attracts diverse and experienced talents.
* If an ethical hacker discovers a vulnerability, it is reported with severity and details in the bug bounty platform. This information is received by DeFi project selected developers who can check for the validity of the report. If it is a valid vulnerability, the DeFi project developers will patch it and test that the patch works. The DeFi project then pays out a bounty to the ethical hacker. The amount of the bounty typically depends on the severity and the impact of it.
* Bug bounty for smart contracts could easily be set up by the DeFi project on platforms such as [Immunefi](https://immunefi.com/).

## Security Policy

* For DeFi projects without bug bounty programs, it is recommended to have a publicly accessible security policy.
* The security policy may describe the scope of the project and how the project processes vulnerability reports submitted by ethical hackers. It should also outline the assets in/out scope and the do/don’t for ethical hackers.
* The security policy is important as it allows ethical hackers to disclose vulnerabilities securely with the right team. From the ethical hackers perspective, the security policy is a clear message from the project that they will not be prosecuted if vulnerabilities are reported and has been tested in accordance with rules governed in security policy.
* You could also use <https://securitytxt.org/> to generate a basic security policy.
* An [example](https://github.com/yearn/yearn-security/blob/master/SECURITY.md) of a good DeFi project security policy:

## Latest Hacks

* Keep abreast with all hacks in smart contracts across EVM compatible blockchains. Some sources of news of hacks as follow:
  * [Rekt News](https://rekt.news/)
  * [Slowmist hack reports](https://hacked.slowmist.io)
* Encouraged developers to learn from each hack and compile lessons learned from each of it, and to assess if there are any risks to your own respective projects


# Token Contract Addresses

{% hint style="info" %}
Ahead of [**native USDC** launching on Cronos(22nd June, 2026)](https://blog.cronos.com/p/native-usdc-eurc-and-cctp-are-coming), the existing **bridged** USDC contract ([`0xc21223249CA28397B4B6541dfFaEcC539BfF0c59`](https://explorer.cronos.com/token/0xc21223249ca28397b4b6541dffaecc539bff0c59) in the table below) is being relabeled on Cronos Explorer to avoid confusion: symbol `USDC` → `USDC.e`, token name `USD Coin` → `Bridged USDC (Cronos)`.\
**The contract address is unchanged** and existing integrations keep working. Native USDC (issued by regulated Circle affiliates) will launch as a [**separate contract**](https://explorer.cronos.com/token/0x3D7F2C478aAfdB65542BCB44bCeeC05849999d2D).

Over time, the ecosystem will migrate bridged USDC liquidity to native USDC. Bridged USDC continues to operate normally during this transition and will remain clearly labeled in block explorers and app interfaces.
{% endhint %}

{% tabs %}
{% tab title="Cronos Mainnet" %}

<table><thead><tr><th width="176.828125">Token name</th><th width="448">Address</th><th width="97">Decimal</th></tr></thead><tbody><tr><td>WCRO</td><td><a href="https://explorer.cronos.org/token/0x5C7F8A570d578ED84E63fdFA7b1eE72dEae1AE23">0x5C7F8A570d578ED84E63fdFA7b1eE72dEae1AE23</a></td><td>18</td></tr><tr><td>WETH</td><td><a href="https://explorer.cronos.org/token/0xe44Fd7fCb2b1581822D0c862B68222998a0c299a">0xe44Fd7fCb2b1581822D0c862B68222998a0c299a</a></td><td>18</td></tr><tr><td>WBTC</td><td><a href="https://explorer.cronos.org/token/0x062E66477Faf219F25D27dCED647BF57C3107d52">0x062E66477Faf219F25D27dCED647BF57C3107d52</a></td><td>8</td></tr><tr><td>USDC (native USDC)</td><td><a href="https://explorer.cronos.com/token/0x3D7F2C478aAfdB65542BCB44bCeeC05849999d2D">0x3D7F2C478aAfdB65542BCB44bCeeC05849999d2D</a></td><td>6</td></tr><tr><td>USDC.e (<code>Bridged USDC(Cronos)</code>)</td><td><a href="https://explorer.cronos.org/token/0xc21223249CA28397B4B6541dfFaEcC539BfF0c59">0xc21223249CA28397B4B6541dfFaEcC539BfF0c59</a></td><td>6</td></tr><tr><td>USDT</td><td><a href="https://explorer.cronos.org/token/0x66e428c3f67a68878562e79A0234c1F83c208770">0x66e428c3f67a68878562e79A0234c1F83c208770</a></td><td>6</td></tr><tr><td>DAI</td><td><a href="https://explorer.cronos.org/token/0xF2001B145b43032AAF5Ee2884e456CCd805F677D">0xF2001B145b43032AAF5Ee2884e456CCd805F677D</a></td><td>18</td></tr><tr><td>SHIB</td><td><a href="https://explorer.cronos.org/token/0xbED48612BC69fA1CaB67052b42a95FB30C1bcFee">0xbED48612BC69fA1CaB67052b42a95FB30C1bcFee</a></td><td>18</td></tr><tr><td>DOGE</td><td><a href="https://explorer.cronos.org/token/0x1a8E39ae59e5556B56b76fCBA98d22c9ae557396">0x1a8E39ae59e5556B56b76fCBA98d22c9ae557396</a></td><td>8</td></tr><tr><td>ATOM</td><td><a href="https://explorer.cronos.org/token/0xB888d8Dd1733d72681b30c00ee76BDE93ae7aa93">0xB888d8Dd1733d72681b30c00ee76BDE93ae7aa93</a></td><td>6</td></tr><tr><td>LINK</td><td><a href="https://explorer.cronos.org/token/0xBc6f24649CCd67eC42342AccdCECCB2eFA27c9d9">0xBc6f24649CCd67eC42342AccdCECCB2eFA27c9d9</a></td><td>18</td></tr><tr><td>ENJ</td><td><a href="https://explorer.cronos.org/token/0x0A92ea8a197919aCb9BC26660Ed0D43D01ed26b7">0x0A92ea8a197919aCb9BC26660Ed0D43D01ed26b7</a></td><td>18</td></tr><tr><td>ELON</td><td><a href="https://explorer.cronos.org/token/0x02DCcaf514C98451320a9365C5b46C61d3246ff3">0x02DCcaf514C98451320a9365C5b46C61d3246ff3</a></td><td>18</td></tr><tr><td>DOT</td><td><a href="https://explorer.cronos.org/token/0x994047FE66406CbD646cd85B990E11D7F5dB8fC7">0x994047FE66406CbD646cd85B990E11D7F5dB8fC7</a></td><td>10</td></tr><tr><td>ADA</td><td><a href="https://explorer.cronos.org/token/0x0e517979C2c1c1522ddB0c73905e0D39b3F990c0">0x0e517979C2c1c1522ddB0c73905e0D39b3F990c0</a></td><td>6</td></tr><tr><td>RADAR</td><td><a href="https://explorer.cronos.org/token/0xa58e3AeAeA3292c3E260378e55E9684C59E7A27a">0xa58e3AeAeA3292c3E260378e55E9684C59E7A27a</a></td><td>18</td></tr><tr><td>DERC</td><td><a href="https://explorer.cronos.org/token/0x98616a1427a1734DaEbA1E1894db48051244A065">0x98616a1427a1734DaEbA1E1894db48051244A065</a></td><td>18</td></tr><tr><td>PENDLE</td><td><a href="https://explorer.cronos.org/token/0x49c3bBB239f4FB44327073510f4bA72D207a81D6">0x49c3bBB239f4FB44327073510f4bA72D207a81D6</a></td><td>18</td></tr><tr><td>TUSD</td><td><a href="https://explorer.cronos.org/token/0x87EFB3ec1576Dec8ED47e58B832bEdCd86eE186e">0x87EFB3ec1576Dec8ED47e58B832bEdCd86eE186e</a></td><td>18</td></tr><tr><td>XLM</td><td><a href="https://explorer.cronos.org/token/0x747d6C858168B8cD6e537160320b5dE58FD3367C">0x747d6C858168B8cD6e537160320b5dE58FD3367C</a></td><td>7</td></tr><tr><td>EOS</td><td><a href="https://explorer.cronos.org/token/0xA37caA841072a305a0799718aFA16cd504C52118">0xA37caA841072a305a0799718aFA16cd504C52118</a></td><td>4</td></tr><tr><td>QRDO</td><td><a href="https://explorer.cronos.org/token/0x70BB395F1A824D9a3F9D510C25e699cEaf603dEc">0x70BB395F1A824D9a3F9D510C25e699cEaf603dEc</a></td><td>8</td></tr><tr><td>ALI</td><td><a href="https://explorer.cronos.org/token/0x45C135C1CDCE8d25A3B729A28659561385C52671">0x45C135C1CDCE8d25A3B729A28659561385C52671</a></td><td>18</td></tr><tr><td>APE</td><td><a href="https://explorer.cronos.org/token/0x9C62F89a8C9907582f21205Ce90443730361EA05">0x9C62F89a8C9907582f21205Ce90443730361EA05</a></td><td>18</td></tr><tr><td>MATIC</td><td><a href="https://explorer.cronos.org/token/0xf78a326ACd53651F8dF5D8b137295e434B7c8ba5">0xf78a326ACd53651F8dF5D8b137295e434B7c8ba5</a></td><td>18</td></tr><tr><td>FTM</td><td><a href="https://explorer.cronos.org/token/0x63888BaFc5975630E4E5CF50c3845a3250115F64">0x63888BaFc5975630E4E5CF50c3845a3250115F64</a></td><td>18</td></tr><tr><td>AKT</td><td><a href="https://explorer.cronos.org/token/0x39a65A74Dc5A778Ff93d1765Ea51F57BC49c81B3">0x39a65A74Dc5A778Ff93d1765Ea51F57BC49c81B3</a></td><td>6</td></tr><tr><td>CRV</td><td><a href="https://explorer.cronos.org/token/0xfEf44a0C77eca218F443382d3128a7A251a8C542">0xfEf44a0C77eca218F443382d3128a7A251a8C542</a></td><td>18</td></tr><tr><td>ALICE</td><td><a href="https://explorer.cronos.org/token/0x46EfE38eC0558C48352e2eBc85AF3bd2E87Fb2A1">0x46EfE38eC0558C48352e2eBc85AF3bd2E87Fb2A1</a></td><td>6</td></tr><tr><td>SLP</td><td><a href="https://explorer.cronos.org/token/0xc00DcfBc7aC19B7210fa9c73b5F1d2E0f7E62711">0xc00DcfBc7aC19B7210fa9c73b5F1d2E0f7E62711</a></td><td>0</td></tr><tr><td>AXS</td><td><a href="https://explorer.cronos.org/token/0xE27753e456AbA584f10aCEf0B4e367EF38f01e14">0xE27753e456AbA584f10aCEf0B4e367EF38f01e14</a></td><td>18</td></tr><tr><td>GALA</td><td><a href="https://explorer.cronos.org/token/0x7A887D4f8a3221e1aaFA2f4435b774D51429A3e1">0x7A887D4f8a3221e1aaFA2f4435b774D51429A3e1</a></td><td>8</td></tr><tr><td>LTC</td><td><a href="https://explorer.cronos.org/token/0x9d97Be214b68C7051215BB61059B4e299Cd792c3">0x9d97Be214b68C7051215BB61059B4e299Cd792c3</a></td><td>8</td></tr><tr><td>ICP</td><td><a href="https://explorer.cronos.org/token/0x8Bf3E654075E269c1C415e4889C12D9837452be0">0x8Bf3E654075E269c1C415e4889C12D9837452be0</a></td><td>8</td></tr><tr><td>SAND</td><td><a href="https://explorer.cronos.org/token/0x9097eA65B55dfC7383A7EFB465e8fFC18D46e784">0x9097eA65B55dfC7383A7EFB465e8fFC18D46e784</a></td><td>18</td></tr><tr><td>BCH</td><td><a href="https://explorer.cronos.org/token/0x7589B70aBb83427bb7049e08ee9fC6479ccB7a23">0x7589B70aBb83427bb7049e08ee9fC6479ccB7a23</a></td><td>8</td></tr><tr><td>ALGO</td><td><a href="https://explorer.cronos.org/token/0x2fEfe47989214c2e74A6319076c138d395681407">0x2fEfe47989214c2e74A6319076c138d395681407</a></td><td>6</td></tr><tr><td>MANA</td><td><a href="https://explorer.cronos.org/token/0x6Ed8c99E5c6B2c551e012E4272d8f3d1DF23a71A">0x6Ed8c99E5c6B2c551e012E4272d8f3d1DF23a71A</a></td><td>18</td></tr><tr><td>UNI</td><td><a href="https://explorer.cronos.org/token/0x16aD43896f7C47a5d9Ee546c44A22205738B329c">0x16aD43896f7C47a5d9Ee546c44A22205738B329c</a></td><td>18</td></tr><tr><td>SOL</td><td><a href="https://explorer.cronos.org/token/0xc9DE0F3e08162312528FF72559db82590b481800">0xc9DE0F3e08162312528FF72559db82590b481800</a></td><td>9</td></tr><tr><td>AVAX</td><td><a href="https://explorer.cronos.org/token/0x8d58088D4E8Ffe75A8b6357ba5ff17B93B912640">0x8d58088D4E8Ffe75A8b6357ba5ff17B93B912640</a></td><td>9</td></tr><tr><td>ZIL</td><td><a href="https://explorer.cronos.org/token/0xc70ed252E55d68A7020A754Fb92Fa5c68e3c199f">0xc70ed252E55d68A7020A754Fb92Fa5c68e3c199f</a></td><td>12</td></tr><tr><td>FLOW</td><td><a href="https://explorer.cronos.org/token/0x22EF9d73EA90E774CfB21fADDF84b37BD54FE7a6">0x22EF9d73EA90E774CfB21fADDF84b37BD54FE7a6</a></td><td>8</td></tr><tr><td>IMX</td><td><a href="https://explorer.cronos.org/token/0x8f27dB0E597B67F33d5Fb58D5EEcD6A3CC780942">0x8f27dB0E597B67F33d5Fb58D5EEcD6A3CC780942</a></td><td>18</td></tr><tr><td>OMG</td><td><a href="https://explorer.cronos.org/token/0x5a56509C61ad80680caF5b3B980E6C88319eeE33">0x5a56509C61ad80680caF5b3B980E6C88319eeE33</a></td><td>18</td></tr><tr><td>AAVE</td><td><a href="https://explorer.cronos.org/token/0xE657b115bc45c0786274c824f83e3e02CE809185">0xE657b115bc45c0786274c824f83e3e02CE809185</a></td><td>18</td></tr><tr><td>LRC</td><td><a href="https://explorer.cronos.org/token/0xAF760dE3201fEeD80FEeA59FB16A8360C8c4d1a2">0xAF760dE3201fEeD80FEeA59FB16A8360C8c4d1a2</a></td><td>18</td></tr><tr><td>DAR</td><td><a href="https://explorer.cronos.org/token/0x5893915Fe3d15e4004F7232c80036bFa92aCa564">0x5893915Fe3d15e4004F7232c80036bFa92aCa564</a></td><td>6</td></tr><tr><td>GRT</td><td><a href="https://explorer.cronos.org/token/0x4c523222Cd0DE11616F7aD685f24145B9FaF7996">0x4c523222Cd0DE11616F7aD685f24145B9FaF7996</a></td><td>18</td></tr><tr><td>CHZ</td><td><a href="https://explorer.cronos.org/token/0x4E4F362170bFb88D3c9378FF7818d93fC2fbd257">0x4E4F362170bFb88D3c9378FF7818d93fC2fbd257</a></td><td>18</td></tr><tr><td>INJ</td><td><a href="https://explorer.cronos.org/token/0x4E05F3C7ee6155e3add224470E1c4583D4F424A3">0x4E05F3C7ee6155e3add224470E1c4583D4F424A3</a></td><td>18</td></tr><tr><td>KNC</td><td><a href="https://explorer.cronos.org/token/0xd73EBf885C4157D3E88c6D87ad3b8018B4a32fEF">0xd73EBf885C4157D3E88c6D87ad3b8018B4a32fEF</a></td><td>18</td></tr><tr><td>XTZ</td><td><a href="https://explorer.cronos.org/token/0x9D5a7d02D51Dc523197e62c2865907dbB53642Af">0x9D5a7d02D51Dc523197e62c2865907dbB53642Af</a></td><td>6</td></tr><tr><td>RUNE</td><td><a href="https://explorer.cronos.org/token/0x171C8AAA57D0107d0187f54Ccf4CC03406E76a4E">0x171C8AAA57D0107d0187f54Ccf4CC03406E76a4E</a></td><td>8</td></tr><tr><td>KSM</td><td><a href="https://explorer.cronos.org/token/0x0BD48A8A9565385649D9d7f1c945D1d0C4543E26">0x0BD48A8A9565385649D9d7f1c945D1d0C4543E26</a></td><td>12</td></tr><tr><td>HNT</td><td><a href="https://explorer.cronos.org/token/0x61426C150207AbF8a215f3377a0819dDcA842aF3">0x61426C150207AbF8a215f3377a0819dDcA842aF3</a></td><td>8</td></tr><tr><td>NEO</td><td><a href="https://explorer.cronos.org/token/0xB3fc0777738168ce33B228F1831EEbD5A81aaDB3">0xB3fc0777738168ce33B228F1831EEbD5A81aaDB3</a></td><td>0</td></tr><tr><td>YFI</td><td><a href="https://explorer.cronos.org/token/0x7bDF81a86f4AA8B442Ca05670Cbf296BB22Bc7bB">0x7bDF81a86f4AA8B442Ca05670Cbf296BB22Bc7bB</a></td><td>18</td></tr><tr><td>SUSHI</td><td><a href="https://explorer.cronos.org/token/0xdb3de0AAC8A39490932FA19c2e32F179368Ab840">0xdb3de0AAC8A39490932FA19c2e32F179368Ab840</a></td><td>18</td></tr><tr><td>QNT</td><td><a href="https://explorer.cronos.org/token/0x7d54F4E05f273a9317f723997612Ed64eF53C900">0x7d54F4E05f273a9317f723997612Ed64eF53C900</a></td><td>18</td></tr><tr><td>MKR</td><td><a href="https://explorer.cronos.org/token/0xab9Cf8C5A9B6Cf5215c82D088D37d04bB146704A">0xab9Cf8C5A9B6Cf5215c82D088D37d04bB146704A</a></td><td>18</td></tr><tr><td>HOT</td><td><a href="https://explorer.cronos.org/token/0xc4010CfB5172D82A348bcBC8cD543733c1e9BF89">0xc4010CfB5172D82A348bcBC8cD543733c1e9BF89</a></td><td>18</td></tr><tr><td>QTUM</td><td><a href="https://explorer.cronos.org/token/0x32529346958711B3beF92B96507C14821e50C9c8">0x32529346958711B3beF92B96507C14821e50C9c8</a></td><td>8</td></tr><tr><td>CELR</td><td><a href="https://explorer.cronos.org/token/0xfA0235feF8644C107f7e531Fa9CFe0613Fbe8909">0xfA0235feF8644C107f7e531Fa9CFe0613Fbe8909</a></td><td>18</td></tr><tr><td>REN</td><td><a href="https://explorer.cronos.org/token/0x2b4eE166a125E01Aba019885932C944cEfED2932">0x2b4eE166a125E01Aba019885932C944cEfED2932</a></td><td>18</td></tr><tr><td>BAT</td><td><a href="https://explorer.cronos.org/token/0x2F712E0a6f92e3f865EaEb86f07BAFc67974d26c">0x2F712E0a6f92e3f865EaEb86f07BAFc67974d26c</a></td><td>18</td></tr><tr><td>SRM</td><td><a href="https://explorer.cronos.org/token/0xB858e614779f148992949A3b15E6127dDA204ca4">0xB858e614779f148992949A3b15E6127dDA204ca4</a></td><td>6</td></tr><tr><td>DYDX</td><td><a href="https://explorer.cronos.org/token/0x4442C740cc5B47F032983106E66E3C9dC945676C">0x4442C740cc5B47F032983106E66E3C9dC945676C</a></td><td>18</td></tr><tr><td>UMA</td><td><a href="https://explorer.cronos.org/token/0x33564807CC70c6422124d867B344D7b90bF21A76">0x33564807CC70c6422124d867B344D7b90bF21A76</a></td><td>18</td></tr><tr><td>CHR</td><td><a href="https://explorer.cronos.org/token/0xcdee9300A1527E0000b054320D371A9C8c4a8AF6">0xcdee9300A1527E0000b054320D371A9C8c4a8AF6</a></td><td>6</td></tr><tr><td>EFI</td><td><a href="https://explorer.cronos.org/token/0x47E16f9EE811d3651D979941325c545Da6385daF">0x47E16f9EE811d3651D979941325c545Da6385daF</a></td><td>18</td></tr><tr><td>STX</td><td><a href="https://explorer.cronos.org/token/0x30BBA7b57952E7028c47d5c6AB295D0Da7139eF9">0x30BBA7b57952E7028c47d5c6AB295D0Da7139eF9</a></td><td>6</td></tr><tr><td>ENS</td><td><a href="https://explorer.cronos.org/token/0xA0913e0D7A85954e89452e7Ccb8d1235db74C330">0xA0913e0D7A85954e89452e7Ccb8d1235db74C330</a></td><td>18</td></tr><tr><td>PLA</td><td><a href="https://explorer.cronos.org/token/0x044597363b0054986aE4289d25CD7D0D451766Fc">0x044597363b0054986aE4289d25CD7D0D451766Fc</a></td><td>18</td></tr><tr><td>AGLD</td><td><a href="https://explorer.cronos.org/token/0xD3BB5C6961157eB4eb03658Dc5D4144808828168">0xD3BB5C6961157eB4eb03658Dc5D4144808828168</a></td><td>18</td></tr><tr><td>SNX</td><td><a href="https://explorer.cronos.org/token/0x9Aa8F72dd2C06EAff0113bD0380255E1fbDAeaC4">0x9Aa8F72dd2C06EAff0113bD0380255E1fbDAeaC4</a></td><td>18</td></tr><tr><td>SPELL</td><td><a href="https://explorer.cronos.org/token/0xB37e6457C17A370b2eAEb40849d20dcaEa5f7e92">0xB37e6457C17A370b2eAEb40849d20dcaEa5f7e92</a></td><td>18</td></tr><tr><td>XYO</td><td><a href="https://explorer.cronos.org/token/0x211153266F15F9314B214A7dd614d90f850a8D6a">0x211153266F15F9314B214A7dd614d90f850a8D6a</a></td><td>18</td></tr><tr><td>HBAR</td><td><a href="https://explorer.cronos.org/token/0xe0C7226a58f54db71eDc6289Ba2dc80349B41974">0xe0C7226a58f54db71eDc6289Ba2dc80349B41974</a></td><td>8</td></tr><tr><td>AURORA</td><td><a href="https://explorer.cronos.org/token/0xB4f1D9A65816da7e112F11C9A2900b8C5beeD525">0xB4f1D9A65816da7e112F11C9A2900b8C5beeD525</a></td><td>18</td></tr><tr><td>RNDR</td><td><a href="https://explorer.cronos.org/token/0xEaEA1a708DaB6f732E35F06588293204318ac48F">0xEaEA1a708DaB6f732E35F06588293204318ac48F</a></td><td>18</td></tr><tr><td>1INCH</td><td><a href="https://explorer.cronos.org/token/0xEea900FE18F77593C7D7C105fBa9bd714164AC95">0xEea900FE18F77593C7D7C105fBa9bd714164AC95</a></td><td>18</td></tr><tr><td>JASMY</td><td><a href="https://explorer.cronos.org/token/0x227EdF65f866255A0ED4B5b453fe43A41182EC3A">0x227EdF65f866255A0ED4B5b453fe43A41182EC3A</a></td><td>18</td></tr><tr><td>COMP</td><td><a href="https://explorer.cronos.org/token/0x4Fb1af9D09DB3fbbda96071EaE0aeae6E871F9AC">0x4Fb1af9D09DB3fbbda96071EaE0aeae6E871F9AC</a></td><td>18</td></tr><tr><td>ANKR</td><td><a href="https://explorer.cronos.org/token/0x1FE0f470736548794b47AFe5613d3A309d964d3c">0x1FE0f470736548794b47AFe5613d3A309d964d3c</a></td><td>18</td></tr><tr><td>YGG</td><td><a href="https://explorer.cronos.org/token/0xfF9620d9F80F80056cbE4Bb84403a9E9C5174213">0xfF9620d9F80F80056cbE4Bb84403a9E9C5174213</a></td><td>18</td></tr><tr><td>PAXG</td><td><a href="https://explorer.cronos.org/token/0x81749e7258f9e577f61f49ABeeB426b70F561b89">0x81749e7258f9e577f61f49ABeeB426b70F561b89</a></td><td>18</td></tr><tr><td>OGN</td><td><a href="https://explorer.cronos.org/token/0x78E9974A74d6c980De4E3F8039248320c5A2d714">0x78E9974A74d6c980De4E3F8039248320c5A2d714</a></td><td>18</td></tr><tr><td>AR</td><td><a href="https://explorer.cronos.org/token/0xeB6B3AEdA7A2705fAC5e2350fA4D71a64b393b37">0xeB6B3AEdA7A2705fAC5e2350fA4D71a64b393b37</a></td><td>12</td></tr><tr><td>GLMR</td><td><a href="https://explorer.cronos.org/token/0x268B344bF8bbCd9Dd4e4FA68264309B05F15820a">0x268B344bF8bbCd9Dd4e4FA68264309B05F15820a</a></td><td>18</td></tr><tr><td>ACA</td><td><a href="https://explorer.cronos.org/token/0x213E6fb02009c13692bAA23C63FdE8D623d22705">0x213E6fb02009c13692bAA23C63FdE8D623d22705</a></td><td>12</td></tr><tr><td>SPS</td><td><a href="https://explorer.cronos.org/token/0x1B554fda68bA95924E5bbD0BaF8e769F039e775B">0x1B554fda68bA95924E5bbD0BaF8e769F039e775B</a></td><td>18</td></tr><tr><td>CKB</td><td><a href="https://explorer.cronos.org/token/0x5dEED46f39c485bA03b61d83763d0f6357dc4737">0x5dEED46f39c485bA03b61d83763d0f6357dc4737</a></td><td>8</td></tr><tr><td>VOXEL</td><td><a href="https://explorer.cronos.org/token/0x5fdbFE38E050829374001630B8710BDd05Ea55C0">0x5fdbFE38E050829374001630B8710BDd05Ea55C0</a></td><td>18</td></tr><tr><td>KRL</td><td><a href="https://explorer.cronos.org/token/0x62E622fa4E180C391f2E089FC1d5eA7AdCB96575">0x62E622fa4E180C391f2E089FC1d5eA7AdCB96575</a></td><td>18</td></tr><tr><td>IRIS</td><td><a href="https://explorer.cronos.org/token/0xd27FC10235E41Ba8c70652Ed833460949Ed2B882">0xd27FC10235E41Ba8c70652Ed833460949Ed2B882</a></td><td>6</td></tr><tr><td>CANTO</td><td><a href="https://explorer.cronos.org/token/0x83E8B8C435C594e0aBa30910f725c5186B2455a0">0x83E8B8C435C594e0aBa30910f725c5186B2455a0</a></td><td>6</td></tr><tr><td>TIA</td><td><a href="https://explorer.cronos.org/token/0x982b59aaE4f0BC66960b4BF06d6fE96b9F33d3F7">0x982b59aaE4f0BC66960b4BF06d6fE96b9F33d3F7</a></td><td>6</td></tr><tr><td>JUNO</td><td><a href="https://explorer.cronos.org/token/0x8f45Cc102D6ad9502CC305E5590b4d5c844b2DD7">0x8f45Cc102D6ad9502CC305E5590b4d5c844b2DD7</a></td><td>6</td></tr><tr><td>CHESS</td><td><a href="https://explorer.cronos.org/token/0xA263eB1747007111e9801797D711f31D9B734f38">0xA263eB1747007111e9801797D711f31D9B734f38</a></td><td>18</td></tr><tr><td>CSPR</td><td><a href="https://explorer.cronos.org/token/0x15a9e70f166BcaAA7bfF094d865cE5aAa73A2A58">0x15a9e70f166BcaAA7bfF094d865cE5aAa73A2A58</a></td><td>9</td></tr><tr><td>EGLD</td><td><a href="https://explorer.cronos.org/token/0x5c54Cc9A7abeD2dd102361c142417756Fb157292">0x5c54Cc9A7abeD2dd102361c142417756Fb157292</a></td><td>18</td></tr><tr><td>EPX</td><td><a href="https://explorer.cronos.org/token/0x15C65aD983F4E5814595953808C8616f867d061c">0x15C65aD983F4E5814595953808C8616f867d061c</a></td><td>18</td></tr><tr><td>ETC</td><td><a href="https://explorer.cronos.org/token/0xd9ce64C200721a98103102f9ea8e894E347EA287">0xd9ce64C200721a98103102f9ea8e894E347EA287</a></td><td>18</td></tr><tr><td>FIL</td><td><a href="https://explorer.cronos.org/token/0x7d7130B0B4733D603Cea12628b52067ce8458058">0x7d7130B0B4733D603Cea12628b52067ce8458058</a></td><td>18</td></tr><tr><td>FITFI</td><td><a href="https://explorer.cronos.org/token/0xcD7d4cB8a8B4810Fb740A42E344513d49e0AC11f">0xcD7d4cB8a8B4810Fb740A42E344513d49e0AC11f</a></td><td>18</td></tr><tr><td>HOD</td><td><a href="https://explorer.cronos.org/token/0x68D43230470c67BeB61e00a6E8EC869F947365fD">0x68D43230470c67BeB61e00a6E8EC869F947365fD</a></td><td>18</td></tr><tr><td>ICX</td><td><a href="https://explorer.cronos.org/token/0xf6726cEBd173CF30926B69087179E18489183422">0xf6726cEBd173CF30926B69087179E18489183422</a></td><td>18</td></tr><tr><td>NEAR</td><td><a href="https://explorer.cronos.org/token/0xAFE470AE215e48c144c7158EAe3CcF0C451cb0CB">0xAFE470AE215e48c144c7158EAe3CcF0C451cb0CB</a></td><td>24</td></tr><tr><td>ONE</td><td><a href="https://explorer.cronos.org/token/0xf0F2cCf4F18a13F73F7C48FA248645dD4Ac51341">0xf0F2cCf4F18a13F73F7C48FA248645dD4Ac51341</a></td><td>18</td></tr><tr><td>OP</td><td><a href="https://explorer.cronos.org/token/0x4907c3Fa905103b443C3a3c659caC1B703a235BD">0x4907c3Fa905103b443C3a3c659caC1B703a235BD</a></td><td>18</td></tr><tr><td>THETA</td><td><a href="https://explorer.cronos.org/token/0x73B6FcF8Ed6daEfE3775bC38949F115305047C0d">0x73B6FcF8Ed6daEfE3775bC38949F115305047C0d</a></td><td>18</td></tr><tr><td>VET</td><td><a href="https://explorer.cronos.org/token/0xC9B5b981E7FFd630f456614d75230022F46fD03d">0xC9B5b981E7FFd630f456614d75230022F46fD03d</a></td><td>18</td></tr><tr><td>VTHO</td><td><a href="https://explorer.cronos.org/token/0x3F2Cec6455f874edC9d86E48312787CCb19e0f72">0x3F2Cec6455f874edC9d86E48312787CCb19e0f72</a></td><td>18</td></tr><tr><td>WEMIX</td><td><a href="https://explorer.cronos.org/token/0x2d1D4F5166441eDF0943328254f8a28AdE2124Ba">0x2d1D4F5166441eDF0943328254f8a28AdE2124Ba</a></td><td>18</td></tr><tr><td>XNO</td><td><a href="https://explorer.cronos.org/token/0x38e61f5D15B7985799cCcA3c0E1e549458C0c772">0x38e61f5D15B7985799cCcA3c0E1e549458C0c772</a></td><td>30</td></tr><tr><td>XRP</td><td><a href="https://explorer.cronos.org/token/0xb9Ce0dd29C91E02d4620F57a66700Fc5e41d6D15">0xb9Ce0dd29C91E02d4620F57a66700Fc5e41d6D15</a></td><td>6</td></tr><tr><td>GMX</td><td><a href="https://explorer.cronos.org/token/0x4F0271eed3D0163eF1951b2F09b25Bb967CF179B">0x4F0271eed3D0163eF1951b2F09b25Bb967CF179B</a></td><td>18</td></tr><tr><td>JOE</td><td><a href="https://explorer.cronos.org/token/0xC7f14C5E9365533b151bc29901cbcBF8B07af6e3">0xC7f14C5E9365533b151bc29901cbcBF8B07af6e3</a></td><td>18</td></tr><tr><td>BEAT</td><td><a href="https://explorer.cronos.org/token/0x39B9f8B9c0F37766dB1592F0294E01a39B52D46c">0x39B9f8B9c0F37766dB1592F0294E01a39B52D46c</a></td><td>18</td></tr><tr><td>ACS</td><td><a href="https://explorer.cronos.org/token/0x8011182dE19A1dA2CDAf80a66562b6E4aC746Fe1">0x8011182dE19A1dA2CDAf80a66562b6E4aC746Fe1</a></td><td>6</td></tr><tr><td>BONK</td><td><a href="https://explorer.cronos.org/token/0xA09e39D0d621fcd92d0b32DfEDDd7396d0E4Dcc7">0xA09e39D0d621fcd92d0b32DfEDDd7396d0E4Dcc7</a></td><td>5</td></tr><tr><td>MIR</td><td><a href="https://explorer.cronos.org/token/0x6ED54B7d694625d6652FE801A3e996D70C20fd5d">0x6ED54B7d694625d6652FE801A3e996D70C20fd5d</a></td><td>18</td></tr><tr><td>API3</td><td><a href="https://explorer.cronos.org/token/0xD7EaFAed164786010B7b2c4D592BAc1c9D941E2d">0xD7EaFAed164786010B7b2c4D592BAc1c9D941E2d</a></td><td>18</td></tr><tr><td>BUSD</td><td><a href="https://explorer.cronos.org/token/0xC74D59A548ecf7fc1754bb7810D716E9Ac3e3AE5">0xC74D59A548ecf7fc1754bb7810D716E9Ac3e3AE5</a></td><td>18</td></tr><tr><td>BOSON</td><td><a href="https://explorer.cronos.org/token/0x813EFfe620c71Bd1b522a8E6FA74C0e46C80DA2E">0x813EFfe620c71Bd1b522a8E6FA74C0e46C80DA2E</a></td><td>18</td></tr><tr><td>LDO</td><td><a href="https://explorer.cronos.org/token/0xA37b89C9fcdeE564b95d5cE6cE6D90Ad1038Ee92">0xA37b89C9fcdeE564b95d5cE6cE6D90Ad1038Ee92</a></td><td>18</td></tr><tr><td>WOO</td><td><a href="https://explorer.cronos.org/token/0x3Ff6184f97104323B5FD0d186F8B8bE91A91cE27">0x3Ff6184f97104323B5FD0d186F8B8bE91A91cE27</a></td><td>18</td></tr><tr><td>RARE</td><td><a href="https://explorer.cronos.org/token/0xD1c530d427E0421Cc585B23644c8a7A261699e3b">0xD1c530d427E0421Cc585B23644c8a7A261699e3b</a></td><td>18</td></tr><tr><td>MC</td><td><a href="https://explorer.cronos.org/token/0x0FBe22186FC31CD4220f81Aea7480bC6cF4FC001">0x0FBe22186FC31CD4220f81Aea7480bC6cF4FC001</a></td><td>18</td></tr><tr><td>SNT</td><td><a href="https://explorer.cronos.org/token/0x7e0497443D42Ae5CADcB69740FB80E02be7FDC1f">0x7e0497443D42Ae5CADcB69740FB80E02be7FDC1f</a></td><td>18</td></tr><tr><td>GAL</td><td><a href="https://explorer.cronos.org/token/0x13928f9d15698CFb6A29e648219D56606776a906">0x13928f9d15698CFb6A29e648219D56606776a906</a></td><td>18</td></tr><tr><td>ACH</td><td><a href="https://explorer.cronos.org/token/0x4168Ec9022C39d4d41513F26A7b0ca489d73549c">0x4168Ec9022C39d4d41513F26A7b0ca489d73549c</a></td><td>8</td></tr><tr><td>REP</td><td><a href="https://explorer.cronos.org/token/0xc48b39cD739cF638471082F5574856306943f054">0xc48b39cD739cF638471082F5574856306943f054</a></td><td>18</td></tr><tr><td>GODS</td><td><a href="https://explorer.cronos.org/token/0xa63e52B8D4adc613729BaF384b0001A1701Ed0C1">0xa63e52B8D4adc613729BaF384b0001A1701Ed0C1</a></td><td>18</td></tr><tr><td>UNFI</td><td><a href="https://explorer.cronos.org/token/0x920e031B66d2Deb9965618c915Bab3833744078B">0x920e031B66d2Deb9965618c915Bab3833744078B</a></td><td>18</td></tr><tr><td>MXC</td><td><a href="https://explorer.cronos.org/token/0x4547f6417499F87BF74193fc7EEde3fF0492AE00">0x4547f6417499F87BF74193fc7EEde3fF0492AE00</a></td><td>18</td></tr><tr><td>POND</td><td><a href="https://explorer.cronos.org/token/0x446D15794b136c20595cdc7B4A33A935E1d0B630">0x446D15794b136c20595cdc7B4A33A935E1d0B630</a></td><td>18</td></tr><tr><td>LOKA</td><td><a href="https://explorer.cronos.org/token/0x6BD07C35b4D53613e7B8910B2c457C02A688D58C">0x6BD07C35b4D53613e7B8910B2c457C02A688D58C</a></td><td>18</td></tr><tr><td>OGV</td><td><a href="https://explorer.cronos.org/token/0x95acd10B399d5679C33d7bE4614a8aD1e8dd33C2">0x95acd10B399d5679C33d7bE4614a8aD1e8dd33C2</a></td><td>18</td></tr><tr><td>OLE</td><td><a href="https://explorer.cronos.org/token/0x97a21A4f05b152a5D3cDf6273EE8b1d3D8fa8E40">0x97a21A4f05b152a5D3cDf6273EE8b1d3D8fa8E40</a></td><td>18</td></tr><tr><td>ANML</td><td><a href="https://explorer.cronos.org/token/0xdFD509F81864664533351ae0533fc790414fe35d">0xdFD509F81864664533351ae0533fc790414fe35d</a></td><td>18</td></tr><tr><td>PRQ</td><td><a href="https://explorer.cronos.org/token/0x0dE43564B9279fd94b1Fea72694E0D02D69223a0">0x0dE43564B9279fd94b1Fea72694E0D02D69223a0</a></td><td>18</td></tr><tr><td>ZED</td><td><a href="https://explorer.cronos.org/token/0x06780b8f6625721875e8a0f0397d9377bf1b1b71">0x06780b8f6625721875e8a0f0397d9377bf1b1b71</a></td><td>18</td></tr><tr><td>BONE</td><td><a href="https://explorer.cronos.org/token/0xaae84acbfd07c8650dd9dacc99c068ab420d0327">0xaae84acbfd07c8650dd9dacc99c068ab420d0327</a></td><td>18</td></tr><tr><td>FLOKI</td><td><a href="https://explorer.cronos.org/token/0xBf2C2a77Be1974853228EFB858e7e0547bbd686D">0xBf2C2a77Be1974853228EFB858e7e0547bbd686D</a></td><td>9</td></tr><tr><td>COS</td><td><a href="https://explorer.cronos.org/token/0xEb540106a1e006F6010fAe45Dc94ee5F4800D66d">0xEb540106a1e006F6010fAe45Dc94ee5F4800D66d</a></td><td>18</td></tr><tr><td>TOMI</td><td><a href="https://explorer.cronos.org/token/0x0369302aabbbe58443b3f17fa0b0d05d5dc9cb4e">0x0369302aabbbe58443b3f17fa0b0d05d5dc9cb4e</a></td><td>18</td></tr><tr><td>PEPE</td><td><a href="https://explorer.cronos.org/token/0xf868c454784048AF4f857991583E34243c92Ff48">0xf868c454784048AF4f857991583E34243c92Ff48</a></td><td>18</td></tr><tr><td>LMWR</td><td><a href="https://explorer.cronos.org/token/0x0DdB6540aFD29b14F7E02D1292BD675b5Ceea896">0x0DdB6540aFD29b14F7E02D1292BD675b5Ceea896</a></td><td>18</td></tr><tr><td>LADYS</td><td><a href="https://explorer.cronos.org/token/0x8540384C996056F1902c9785D85260612eb9Dc29">0x8540384C996056F1902c9785D85260612eb9Dc29</a></td><td>18</td></tr><tr><td>AXL</td><td><a href="https://explorer.cronos.org/token/0xB4E667FE769F36117bc259E05435c906EF4c1EeC">0xB4E667FE769F36117bc259E05435c906EF4c1EeC</a></td><td>6</td></tr><tr><td>FET</td><td><a href="https://explorer.cronos.org/token/0xBe2bd41D6b3fBe01eda6e1AddeD7a4b242e04528">0xBe2bd41D6b3fBe01eda6e1AddeD7a4b242e04528</a></td><td>18</td></tr><tr><td>AGIX</td><td><a href="https://explorer.cronos.org/token/0x753053956Bd46cFe000B0968d41f887149B19c41">0x753053956Bd46cFe000B0968d41f887149B19c41</a></td><td>8</td></tr><tr><td>DORA</td><td><a href="https://explorer.cronos.org/token/0x96b4C4b43976C6a1453A215AEaC82Ed0eb9B38f2">0x96b4C4b43976C6a1453A215AEaC82Ed0eb9B38f2</a></td><td>18</td></tr><tr><td>GOAT</td><td><a href="https://explorer.cronos.org/token/0xE7a2fFA3463c4e7Cab1907e5Ad8071Fa656d8391">0xE7a2fFA3463c4e7Cab1907e5Ad8071Fa656d8391</a></td><td>6</td></tr><tr><td>POPCAT</td><td><a href="https://explorer.cronos.org/token/0xA8D3288f4FE8650EC038c398Fc65B7c93540cc10">0xA8D3288f4FE8650EC038c398Fc65B7c93540cc10</a></td><td>9</td></tr><tr><td>BOME</td><td><a href="https://explorer.cronos.org/token/0xb588051e6De4E22Cb9680942Bf6a77a7Bc34A2F0">0xb588051e6De4E22Cb9680942Bf6a77a7Bc34A2F0</a></td><td>6</td></tr><tr><td>CDCETH</td><td><a href="https://explorer.cronos.org/token/0x7a7c9db510aB29A2FC362a4c34260BEcB5cE3446">0x7a7c9db510aB29A2FC362a4c34260BEcB5cE3446</a></td><td>18</td></tr><tr><td>CHILLGUY</td><td><a href="https://explorer.cronos.org/token/0xBc4944813D01bCcb6e8c4D7099943848C2Dc32DD">0xBc4944813D01bCcb6e8c4D7099943848C2Dc32DD</a></td><td>6</td></tr><tr><td>CORGIAI</td><td><a href="https://explorer.cronos.org/token/0x6b431B8a964BFcf28191b07c91189fF4403957D0">0x6b431B8a964BFcf28191b07c91189fF4403957D0</a></td><td>18</td></tr><tr><td>CROID</td><td><a href="https://explorer.cronos.org/token/0xCbF0ADeA24fd5f32c6e7f0474f0d1b94Ace4E2e7">0xCbF0ADeA24fd5f32c6e7f0474f0d1b94Ace4E2e7</a></td><td>18</td></tr><tr><td>FER</td><td><a href="https://explorer.cronos.org/token/0x39bC1e38c842C60775Ce37566D03B41A7A66C782">0x39bC1e38c842C60775Ce37566D03B41A7A66C782</a></td><td>18</td></tr><tr><td>FUL</td><td><a href="https://explorer.cronos.org/token/0x83aFB1C32E5637ACd0a452D87c3249f4a9F0013A">0x83aFB1C32E5637ACd0a452D87c3249f4a9F0013A</a></td><td>18</td></tr><tr><td>LCRO</td><td><a href="https://explorer.cronos.org/token/0x9Fae23A2700FEeCd5b93e43fDBc03c76AA7C08A6">0x9Fae23A2700FEeCd5b93e43fDBc03c76AA7C08A6</a></td><td>18</td></tr><tr><td>LUNA</td><td><a href="https://explorer.cronos.org/token/0x9278C8693e7328bef49804BacbFb63253565dffD">0x9278C8693e7328bef49804BacbFb63253565dffD</a></td><td>6</td></tr><tr><td>MOODENG</td><td><a href="https://explorer.cronos.org/token/0x449615AF353ffbF7c1d15b97A36d52ad7D6448d0">0x449615AF353ffbF7c1d15b97A36d52ad7D6448d0</a></td><td>6</td></tr><tr><td>MTD</td><td><a href="https://explorer.cronos.org/token/0x0224010BA2d567ffa014222eD960D1fa43B8C8E1">0x0224010BA2d567ffa014222eD960D1fa43B8C8E1</a></td><td>18</td></tr><tr><td>MYRO</td><td><a href="https://explorer.cronos.org/token/0x195c4583C58944cF3435c3097195Cd5452be33AC">0x195c4583C58944cF3435c3097195Cd5452be33AC</a></td><td>9</td></tr><tr><td>OSMO</td><td><a href="https://explorer.cronos.org/token/0x8B3692Ec3F458B28B166bDD79a7Fa9751e11e875">0x8B3692Ec3F458B28B166bDD79a7Fa9751e11e875</a></td><td>6</td></tr><tr><td>TRUMP</td><td><a href="https://explorer.cronos.org/token/0xd1D7A0Ff6Cd3d494038b7FB93dbAeF624Da6f417">0xd1D7A0Ff6Cd3d494038b7FB93dbAeF624Da6f417</a></td><td>6</td></tr><tr><td>SUI</td><td><a href="https://explorer.cronos.org/token/0x81710203A7FC16797aC9899228a87fd622df9706">0x81710203A7FC16797aC9899228a87fd622df9706</a></td><td>9</td></tr><tr><td>TONIC</td><td><a href="https://explorer.cronos.org/token/0xDD73dEa10ABC2Bff99c60882EC5b2B81Bb1Dc5B2">0xDD73dEa10ABC2Bff99c60882EC5b2B81Bb1Dc5B2</a></td><td>18</td></tr><tr><td>VNO</td><td><a href="https://explorer.cronos.org/token/0xdb7d0A1eC37dE1dE924F8e8adac6Ed338D4404E9">0xdb7d0A1eC37dE1dE924F8e8adac6Ed338D4404E9</a></td><td>18</td></tr><tr><td>VVSToken</td><td><a href="https://explorer.cronos.org/token/0x2D03bECE6747ADC00E1a131BBA1469C15fD11e03">0x2D03bECE6747ADC00E1a131BBA1469C15fD11e03</a></td><td>18</td></tr><tr><td>WIF</td><td><a href="https://explorer.cronos.org/token/0x25e8C72D267b96E757875d8b565A42c0e3B8f12f">0x25e8C72D267b96E757875d8b565A42c0e3B8f12f</a></td><td>6</td></tr><tr><td>MOVE</td><td><a href="https://explorer.cronos.org/token/0xB5ef02132752488E51BE4A0B23f1CC789BA1ddc9">0xB5ef02132752488E51BE4A0B23f1CC789BA1ddc9</a></td><td>8</td></tr><tr><td>PENGU</td><td><a href="https://explorer.cronos.org/token/0x769409037336430A1a5890065B7853f0D1D8b58f">0x769409037336430A1a5890065B7853f0D1D8b58f</a></td><td>6</td></tr><tr><td>ENA</td><td><a href="https://explorer.cronos.org/token/0x58aE37D7BB524Fa268d239662B9C1352194A884C">0x58aE37D7BB524Fa268d239662B9C1352194A884C</a></td><td>18</td></tr><tr><td>VIRTUAL</td><td><a href="https://explorer.cronos.org/token/0x101632377A2378F6A9bda0eAB990cf6382ab8c85">0x101632377A2378F6A9bda0eAB990cf6382ab8c85</a></td><td>18</td></tr></tbody></table>
{% endtab %}
{% endtabs %}


# dApp Creation

### Integration Guides

{% content-ref url="/pages/23Whb2D1vMBZxh0f7gFC" %}
[Free and commercial RPC endpoints](/for-dapp-developers/chain-integration/public-rpc-endpoints)
{% endcontent-ref %}

{% content-ref url="/pages/2gq7Cfvj81CCUqCWZPNO" %}
[Wallet integrations](/for-dapp-developers/chain-integration/web-extension-integration)
{% endcontent-ref %}

{% content-ref url="<https://github.com/crypto-org-chain/cronos-docs/blob/gitbook/for-dapp-developers/chain-integration/broken-reference/README.md>" %}
<https://github.com/crypto-org-chain/cronos-docs/blob/gitbook/for-dapp-developers/chain-integration/broken-reference/README.md>
{% endcontent-ref %}

{% content-ref url="/pages/0uBzRw9jKtEYziqKNi56" %}
[JSON-RPC methods](/for-dapp-developers/chain-integration/json-rpc)
{% endcontent-ref %}

### API Clients and Libraries

* [**TypeScript** library](https://github.com/crypto-org-chain/chain-jslib)
* [**Python** library](https://pypi.org/project/chainlibpy/#description)
* [**Rust** library](https://github.com/crypto-org-chain/chainlib-rs) (note that it is not feature complete)
* [@cosmjs/stargate](https://github.com/cosmos/cosmjs/tree/master/packages/stargate)

### Useful Links

* [Cronos website](https://cronos.com/)
* [GitHub Repository](https://github.com/crypto-org-chain/cronos)
* [Official Documentation](https://docs.cronos.com/)
* [Cronos Binaries](https://github.com/crypto-org-chain/cronos/releases)


# Free and commercial RPC endpoints

### Free RPC URLs for Cronos

{% hint style="danger" %}
Public RPCs URL Updates:

The Cronos RPC endpoints have been updated in March 2021 (shown as below) and it is recommended that all users update the endpoints. The old endpoints are still available for compatibility but maybe deprecated later.
{% endhint %}

{% hint style="info" %}
Request Limits on Public RPCs:

To provide a stable experience to users, there is a request rate limit on the public RPCs to ensure fair usage. If your application requires a higher usage, please consider setting up your own nodes or using a commercial node provider. You can also reach out to us on [Discord](https://discord.gg/cGtxgVfGMZ) for assistance.
{% endhint %}

{% hint style="info" %}
Public RPCs Integration Tips:

There are more than one machines serving the public RPC services. There is no guarantee that you are served by the same machine every time. For example, if you are broadcasting many transactions in a row, they will be sent to multiple machines that may not be perfectly in sync with respect to the account nonce, and this may cause your batch to fail.

If you are sending large numbers of transactions from your backend, consider setting up a single dedicated node.
{% endhint %}

{% tabs %}
{% tab title="Mainnet" %}

* **EVM HTTP JSON RPC (Web3 compatible)**
  * <https://evm.cronos.com/>
* **Block explorer**
  * <https://explorer.cronos.com/>
* **Tendermint RPC**
  * <https://rpc.cronos.com/>
* **Cosmos RESTful**
  * <https://rest.cronos.com/>
* **Cosmos gRPC Based**
  * <https://grpc.cronos.com/>
* **Swagger Rest API**
  * <https://rest.cronos.com/swagger/>
    {% endtab %}

{% tab title="Testnet" %}

* **EVM HTTP JSON RPC (Web3 compatible)**
  * <https://evm-t3.cronos.com/>
* **Block explorer**
  * <https://explorer.cronos.com/testnet>
* **Tendermint RPC**
  * <https://rpc-t3.cronos.com/>
* **Cosmos RESTful**
  * <https://rest-t3.cronos.com/>
* **Cosmos gRPC Based**
  * <https://grpc-t3.cronos.com/>
    {% endtab %}

{% tab title="3rd party" %}
**EVM HTTP JSON RPC (Web3 compatible)**

Mainnet

* <https://1rpc.io/cro> (automata)
* <https://cronos-mainnet-rpcaas.blockdaemon.tech/eth_rpc> (Blockdaemon)
  {% endtab %}
  {% endtabs %}

### Commercial node providers

{% hint style="info" %}
Disclaimer:

The RPC endpoints below are provided by third-party services. Please conduct thorough independent research and testing before use. The use of these endpoints is at the user's sole risk.
{% endhint %}

* Alchemy:&#x20;
  * [Cronos API Quickstart](https://www.alchemy.com/docs/reference/cronos-api-quickstart)
  * [Cronos API Overview](https://www.alchemy.com/docs/cronos/cronos-api-overview)
  * [Cronos API Endpoints](https://www.alchemy.com/docs/chains/cronos/cronos-api-endpoints/eth-accounts)
* Moralis:
  * [Moralis Nodes](https://moralis.io/nodes/?utm_source=cronos-docs\&utm_medium=partner-docs)
  * [Moralis YouTube Tutorials](https://www.youtube.com/@MoralisWeb3)
* Blockdaemon:
  * [Blockdaemon landing page](https://blockdaemon.com/protocols/cronos/)
* RockX:
  * [Guide to Cronos Free Access Node](https://help.rockx.com/en/articles/6153885-guide-to-cronos-free-access-node)
  * [Cronos Blockchain API for Web3 Builders](https://access.rockx.com/product/cronos-blockchain-api-for-web3-builders)
* Chainstack:
  * [Cronos documentation](https://docs.chainstack.com/operations/cronos/)
  * [Get started with Cronos Node on Chainstack](https://chainstack.com/build-better-with-cronos/)
  * [Build lottery smart contract on Cronos blockchain with Chainstack](https://chainstack.com/lottery-smart-contract-on-cronos-blockchain/)
  * [Chainstack announces support for Cronos](https://chainstack.com/chainstack-announces-support-for-cronos/)
* GetBlock:
  * [Cronos Shared Nodes](https://getblock.io/nodes/cro/)
* Automata:
  * [Automata 1RPC](https://docs.1rpc.io/overview/supported-networks#cronos)
* BlockPI:
  * [Distributed RPC Service](https://public.blockpi.io/)
* All That Node:
  * [Cronos Nodes](https://www.allthatnode.com/cronos.dsrv)
* Allnodes:
  * [RPC Gateway to Cronos](https://cronos.publicnode.com/)
* Dwellir:
  * [Connect your dApp or Web3 project with any blockchain](https://www.dwellir.com/networks/cronos)
* dRPC NodeCloud:
  * [Cronos Mainnet endpoints](https://drpc.org/chainlist/cronos-mainnet-rpc)
  * [Cronos Testnet endpoints](https://drpc.org/chainlist/cronos-testnet-rpc)
  * [Service Status](https://status.drpc.org/)


# Wallet integrations

## Overview

Cronos chain is supported by the following self-custodial wallets:

* Crypto.com Onchain Wallet
* Rabby (rabby.io)
* MetaMask (requires custom network configuration) (metamask.io)
* Trust Wallet

Crypto.com Onchain Wallet, Trust Wallet and MetaMask have mobile apps that include in-app dApp browsers. Users can access dApps on the go via these in-app browsers. We recommend that all dApp developers integrate with these 3 wallets at least, and more if possible.

## Basic tutorial

[Follow this link](/for-dapp-developers/chain-integration/web3-wallet) for a basic example on how to implement the main wallet connection methods available to Cronos dApp developers.

## Crypto.com Onchain Wallet

[Crypto.com Onchain Wallet ](https://crypto.com/sg/onchain)is a non-custodial wallet solution that enables users to store, earn, and grow their cryptocurrency holdings with complete control.

**Key Features:**

* Users maintain complete ownership of their crypto assets and private keys with no third-party custody
* Private keys are encrypted and stored locally on the user's mobile device for enhanced security
* Protected by biometric authentication and two-factor authentication (2FA) for comprehensive security

Integration with the Crypto.com Onchain Wallet provides dApp developers access to over 50 million Crypto.com customers with a seamless user experience.

**Users will be able to login with your dApp in several ways:**

* On Mobile: Users access your dApp through the in-app browser within the Crypto.com Onchain Wallet iOS or Android applications
* On Desktop: Users can install the Crypto.com Wallet Extension from the [Chrome Web Store](https://chromewebstore.google.com/category/extensions?utm_source=ext_sidebar\&hl=en-GB) into their Chrome, Edge or Brave browser.
* Hybrid Mode: The desktop extension can be connected to the Crypto.com Onchain Wallet mobile app (in which case the user will need to confirm each transaction on their mobile phone), or alternatively it can work as a standalone extension entirely in the browser.

To get your dApp listed on the dApp section of Crypto.com Onchain Wallet, follow these steps:

1. Get listed on DefiLlama: Submit your dApp following [How to list a DeFi Project](https://docs.llama.fi/list-your-project/submit-a-project)
2. Wait for synchronization: Allow 48 hours for data to sync between Crypto.com Onchain Wallet and DeFiLlama
3. Submit manual request if needed: If your dApp doesn't appear in the wallet UI after 48 hours, complete the [dApp Submission Form](https://airtable.com/app5F2H2Qp46Q9fGC/shr2pGmQR5lzoMOBh)

To get your dApp featured in the **Featured dApps** section of the Crypto.com Onchain Browser Extension:

1. Submit application: Complete the [dApp Submission Form](https://airtable.com/app5F2H2Qp46Q9fGC/shr2pGmQR5lzoMOBh) with your project details
2. Team review: Applications are reviewed at the discretion of the Crypto.com team for featured placement
3. Selection criteria: Listing in the featured section is subject to internal evaluation and approval processes

As a developer, if you would like to offer all the mobile and desktop connection options provided by the Crypto.com Onchain Wallet, the first step is to integrate your dApp with the Crypto.com Wallet Extension.

Once the Wallet Extension is working, all the other connection methods should start working as well, even on mobile, since they are supported by the same SDKs.

The Crypto.com Wallet Extension currently supports the following networks:

{% tabs %}
{% tab title="Mainnet" %}

* Cronos EVM Chain
* Cronos POS Chain
* Ethereum
* Bitcoin
* BNB Smart Chain
* Polygon
* Avalanche-C
* Cosmos
* Fantom
* Arbitrum
* Optimism
* Gnosis
* Aptos
* All other EVM-compatible networks (manual configuration)
  {% endtab %}

{% tab title="Testnet" %}

* Cronos Testnet
* Goerli Testnet
* Scroll Alpha Testnet
* Aptos Devnet
* Aptos Testnet
  {% endtab %}
  {% endtabs %}

The official repository and documentation of Crypto.com Wallet Extension are available at: <https://github.com/crypto-com/deficonnect-monorepo>.

**For most dApp developers,** the best way to integrate the Crypto.com Onchain Wallet Extension is to develop your application's front-end in React and to use the `DeFiWeb3Connector` object which is provided by the `@deficonnect/web3-connector` npm package as documented here: <https://github.com/crypto-com/deficonnect-monorepo/tree/develop/packages/web3-connector>.

Once the connector is activated, your dApp can retrieve the provider using `getProvider()` and subsequently use it via a common Web3 SDK like `ethers.js`.

**Some developers** may need to dig deeper into the documentation, for example if they are not using React or need more customization. In this case, please refer to:

* Github: <https://github.com/crypto-com/deficonnect-monorepo>
* Document: <https://github.com/crypto-com/deficonnect-monorepo/wiki/Chrome-Extension-Wallet-Integration>


# Web3-wallet

As browser injected wallets (Rabby, MetaMask, Trust Wallet), Crypto.com Onchain Wallet and WalletConnect use somewhat different front-end integration frameworks, it can be challenging for a developer to integrate all types of wallets with standardized code.

The open-source Web3-wallet package is used by many of the top dapps on Cronos, and makes it easy to do this in Typescript.

You can review the Web3-wallet documentation here: <https://web3-wallet.github.io/web3-wallet/docs/getting-started>

The following example project uses NextJS (version 13+) and Web3-wallet to demonstrate a simple dapp that integrates well with the top Cronos-compatible wallets: [project example](https://github.com/kentimsit/cronos-wallet-connections-v3).


# JSON-RPC methods

## Ethereum type JSON-RPC Methods

### Pre-requisite Readings

* [Ethereum JSON-RPC](https://ethereum.org/en/developers/docs/apis/json-rpc/)
* [Geth JSON-RPC APIs](https://geth.ethereum.org/docs/rpc/server)

Below is a list of Ethereum type JSON-RPC Methods where users can curl via local node.

### JSON-RPC Methods

#### Web3

<table><thead><tr><th width="249.3251953125">Method</th><th width="183.2529296875">Namespace</th><th width="189.2373046875">Implemented</th><th>Public</th></tr></thead><tbody><tr><td><code>web3_clientVersion</code></td><td>Web3</td><td>✔</td><td>✔</td></tr><tr><td><code>web3_sha3</code></td><td>Web3</td><td>✔</td><td>✔</td></tr></tbody></table>

#### Getting Blocks

<table><thead><tr><th width="248">Method</th><th width="180.05859375">Namespace</th><th width="188.6826171875">Implemented</th><th width="135.185546875">Public</th></tr></thead><tbody><tr><td><code>eth_getBalance</code></td><td>Eth</td><td>✔</td><td>✔</td></tr><tr><td><code>eth_getBlockByNumber</code></td><td>Eth</td><td>✔</td><td>✔</td></tr><tr><td><code>eth_getBlockByHash</code></td><td>Eth</td><td>✔</td><td>✔</td></tr><tr><td><code>eth_getBlockReceipts</code></td><td>Eth</td><td>✔</td><td>✔</td></tr></tbody></table>

{% hint style="info" %}
In versions prior to Cronos v0.7, a bug allowed duplicate transaction hashes to exist across different block heights. Standard RPC calls such as `eth_getBlockReceipts` , `eth_getBlockByNumber` and `eth_getTransactionReceipt` (below) may return inconsistent results when querying these legacy transactions. Developers building indexers or data pipelines over historical block data should implement custom reconciliation logic.

For full details, including remediation commands, see [here](https://docs.cronos.com/for-dapp-developers/chain-integration/pages/Dm7lwZIuV1bjAHJblSOO#id-2.-transaction-hash-uniqueness).
{% endhint %}

#### Read data

<table><thead><tr><th width="377.009765625">Method</th><th>Namespace</th><th width="121">Implemented</th><th>Public</th></tr></thead><tbody><tr><td><code>eth_call</code></td><td>Eth</td><td>✔</td><td>✔</td></tr><tr><td><code>eth_getTransactionByHash</code></td><td>Eth</td><td>✔</td><td>✔</td></tr><tr><td><code>eth_getTransactionCount</code></td><td>Eth</td><td>✔</td><td>✔</td></tr><tr><td><code>eth_getTransactionReceipt</code></td><td>Eth</td><td>✔</td><td>✔</td></tr><tr><td><code>eth_getBlockTransactionCountByNumber</code></td><td>Eth</td><td>✔</td><td>✔</td></tr><tr><td><code>eth_getBlockTransactionCountByHash</code></td><td>Eth</td><td>✔</td><td>✔</td></tr><tr><td><code>eth_getTransactionbyBlockNumberAndIndex</code></td><td>Eth</td><td>✔</td><td>✔</td></tr><tr><td><code>eth_getTransactionByBlockHashAndIndex</code></td><td>Eth</td><td>✔</td><td>✔</td></tr><tr><td><code>eth_sign</code></td><td>Eth</td><td>✔</td><td></td></tr><tr><td><code>eth_coinbase</code></td><td>Eth</td><td>✔</td><td></td></tr></tbody></table>

{% hint style="warning" %}
Do **NOT** expose `eth_sign` API to the public, due to [the security consideration](/for-node-hosts/running-nodes/cronos-node-best-practises#security-consideration).
{% endhint %}

#### Writing data

<table><thead><tr><th width="379.11328125">Method</th><th width="145">Namespace</th><th>Implemented</th><th>Public</th></tr></thead><tbody><tr><td><code>eth_sendTransaction</code></td><td>Eth</td><td>✔</td><td></td></tr><tr><td><code>eth_sendRawTransaction</code></td><td>Eth</td><td>✔</td><td>✔</td></tr><tr><td><code>eth_sendPrivateTransaction</code></td><td>Eth</td><td></td><td></td></tr><tr><td><code>eth_cancelPrivateTransaction</code></td><td>Eth</td><td></td><td></td></tr></tbody></table>

#### Account

<table><thead><tr><th width="260">Method</th><th>Namespace</th><th>Implemented</th><th>Public</th></tr></thead><tbody><tr><td><code>eth_getBalance</code></td><td>Eth</td><td>✔</td><td>✔</td></tr><tr><td><code>eth_getStorageAt</code></td><td>Eth</td><td>✔</td><td>✔</td></tr><tr><td><code>eth_getCode</code></td><td>Eth</td><td>✔</td><td>✔</td></tr><tr><td><code>eth_accounts</code></td><td>Eth</td><td>✔</td><td></td></tr><tr><td><code>eth_getProof</code></td><td>Eth</td><td>✔</td><td></td></tr></tbody></table>

#### Event Logs

<table><thead><tr><th width="367">Method</th><th>Namespace</th><th>Implemented</th><th>Public</th></tr></thead><tbody><tr><td><code>eth_getLogs</code></td><td>Eth</td><td>✔</td><td>✔</td></tr><tr><td><code>eth_getFilterChanges</code></td><td>Eth</td><td>✔</td><td></td></tr><tr><td><code>eth_getFilterLogs</code></td><td>Eth</td><td>✔</td><td></td></tr><tr><td><code>eth_newBlockFilter</code></td><td>Eth</td><td>✔</td><td></td></tr><tr><td><code>eth_newFilter</code></td><td>Eth</td><td>✔</td><td></td></tr><tr><td><code>eth_newPendingTransactionFilter</code></td><td>Eth</td><td>✔</td><td></td></tr><tr><td><code>eth_uninstallFilter</code></td><td>Eth</td><td>✔</td><td></td></tr></tbody></table>

#### Chain

<table><thead><tr><th width="303">Method</th><th>Namespace</th><th>Implemented</th><th>Public</th></tr></thead><tbody><tr><td><code>eth_protocolVersion</code></td><td>Eth</td><td>✔</td><td>✔</td></tr><tr><td><code>eth_gasPrice</code></td><td>Eth</td><td>✔</td><td>✔</td></tr><tr><td><code>eth_estimateGas</code></td><td>Eth</td><td>✔</td><td>✔</td></tr><tr><td><code>eth_feeHistory</code></td><td>Eth</td><td>✔</td><td>✔</td></tr><tr><td><code>eth_maxPriorityFeePerGas</code></td><td>Eth</td><td>✔</td><td>✔</td></tr><tr><td><code>eth_chainId</code></td><td>Eth</td><td>✔</td><td>✔</td></tr><tr><td><code>eth_syncing</code></td><td>Eth</td><td>✔</td><td>✔</td></tr><tr><td><code>eth_blockNumber</code></td><td>Eth</td><td>✔</td><td>✔</td></tr><tr><td><code>net_listening</code></td><td>Net</td><td>✔</td><td>✔</td></tr><tr><td><code>net_version</code></td><td>Net</td><td>✔</td><td>✔</td></tr><tr><td><code>net_peerCount</code></td><td>Net</td><td>✔</td><td>✔</td></tr></tbody></table>

#### Websocket

<table><thead><tr><th width="204">Method</th><th>Namespace</th><th>Implemented</th><th>Public</th></tr></thead><tbody><tr><td><code>eth_subscribe</code></td><td>Websocket</td><td>✔</td><td></td></tr><tr><td><code>eth_unsubscribe</code></td><td>Websocket</td><td>✔</td><td></td></tr></tbody></table>

{% hint style="info" %}
**Tip**\
Block Number can be entered as a Hex string, `"earliest"`, `"latest"` or `"pending"`.
{% endhint %}

{% hint style="info" %}
When using batch requests, we currently only allow 3 objects for Mainnet and 5 objects for Testnet
{% endhint %}

## JSON-RPC namespaces

### Pre-requisite Readings

* [Geth JSON-RPC Namespaces](https://geth.ethereum.org/docs/rpc/server)

### Ethereum Namespaces

<table><thead><tr><th width="164">Namespace</th><th width="377">Description</th><th width="122">Supported</th><th>Enabled by Default</th></tr></thead><tbody><tr><td><code>eth</code></td><td>Cronos provides several extensions to the standard <code>eth</code> JSON-RPC namespace.</td><td>✔</td><td>✔</td></tr><tr><td><code>web3</code></td><td>The <code>web3</code> API provides utility functions for the web3 client.</td><td>✔</td><td>✔</td></tr><tr><td><code>net</code></td><td>The <code>net</code> API provides access to network information of the node</td><td>✔</td><td>✔</td></tr><tr><td><code>clique</code></td><td>The <code>clique</code> API provides access to the state of the clique consensus engine. You can use this API to manage signer votes and to check the health of a private network.</td><td>❌</td><td></td></tr><tr><td><code>debug</code></td><td>The <code>debug</code> API gives you access to several non-standard RPC methods, which will allow you to inspect, debug and set certain debugging flags during runtime.</td><td>✔</td><td></td></tr><tr><td><code>les</code></td><td>The <code>les</code> API allows you to manage LES server settings, including client parameters and payment settings for prioritized clients. It also provides functions to query checkpoint information in both server and client mode.</td><td>❌</td><td></td></tr><tr><td><code>miner</code></td><td>The <code>miner</code> API allows you to remote control the node’s mining operation and set various mining specific settings.</td><td>✔</td><td>❌</td></tr><tr><td><code>txpool</code></td><td>The <code>txpool</code> API gives you access to several non-standard RPC methods to inspect the contents of the transaction pool containing all the currently pending transactions as well as the ones queued for future processing.</td><td>✔</td><td>❌</td></tr><tr><td><code>admin</code></td><td>The <code>admin</code> API gives you access to several non-standard RPC methods, which will allow you to have a fine grained control over your nodeinstance, including but not limited to network peer and RPC endpoint management.</td><td>❌</td><td></td></tr><tr><td><code>personal</code></td><td>The <code>personal</code> API manages private keys in the key store.</td><td>✔</td><td>❌</td></tr></tbody></table>

{% hint style="warning" %}
Do **NOT** expose `personal` API to the public, due to [the security consideration](/for-node-hosts/running-nodes/cronos-node-best-practises#security-consideration).
{% endhint %}


# Address Conversion

As explained in [Chain ID and Address Format](/cronos-chain-protocol/chain-id), Cronos uses the Bech32 address format.\
In order to convert between a Bech32 format address and an Ethereum format address, we provide the following sample code below:

### Python implementation

In order to convert from Bech32 `crc...` address to a Ethereum `0x...` address:

```python
import bech32

bech32_address = input("Please enter a crc address: ")
#bech32_address = "crc1gwqac243g2z3vryqsev6acq965f9ttwhw9r7vk"

_, bz = bech32.bech32_decode(bech32_address)
hexbytes=bytes(bech32.convertbits(bz, 5, 8))
eth_address = '0x' + hexbytes.hex()
print(eth_address)
#0x4381dc2ab14285160c808659aee005d51255add7
```

Vice versa, in order to convert from an Ethereum `0x...` to a Bech32 `crc...` address:

```python
import bech32

eth_address = input("Please enter a ETH address (0x...): ")
#eth_address = "0x4381dc2ab14285160c808659aee005d51255add7"
eth_address_bytes = bytes.fromhex(eth_address[2:])

bz = bech32.convertbits(eth_address_bytes, 8, 5)
bech32_address = bech32.bech32_encode("crc",bz)
print(bech32_address)
#crc1gwqac243g2z3vryqsev6acq965f9ttwhw9r7vk
```


# Dev Tools & Integrations

Visit `Overview of dev tools & integrations` below for an up-to-date list of dev tools & integrations that you can leverage as an application developer in the Cronos ecosystem (development frameworks, JSON-RPC providers, oracles, wallets, etc.).

{% content-ref url="/pages/PCRZ7y8p3xLLJPjzzRCN" %}
[All Dev Tools & Integrations](/for-dapp-developers/dev-tools-and-integrations/overview-of-dev-tools-and-integrations)
{% endcontent-ref %}

A few of these tools have dedicated pages as well, that you can review for more details.


# All Dev Tools & Integrations

List of dev tools and integrations. If anything is missing or if you would like to request an additional integration, please email contact\@cronoslabs.org.

Scroll right/left to see full contents.

<table><thead><tr><th width="185">Name</th><th width="397.62890625">Tagline</th><th width="213.68359375">Tag(s)</th><th width="391">URL(s)</th><th width="542">Comments</th></tr></thead><tbody><tr><td>Accointing</td><td>Track your net worth with our crypto tracking software. File your crypto taxes with our crypto tax software.</td><td>analytics</td><td>https://www.accointing.com/en-US<br><br>https://www.accointing.com/en-US/integrations/cronos</td><td></td></tr><tr><td>Allnodes</td><td>Fast RPC endpoint for the Cronos network. Connect reliably to Web3 with ease.</td><td>json-rpc</td><td><a href="https://cronos.publicnode.com/">https://cronos.publicnode.com/</a></td><td>RPC Gateway to Cronos</td></tr><tr><td>All That Node</td><td>One Platform, Multi–chain Support, Every Node API.</td><td>json-rpc</td><td><a href="https://www.allthatnode.com/cronos.dsrv">https://www.allthatnode.com/cronos.dsrv</a></td><td>Automagically connects to nodes based on latency</td></tr><tr><td>Automata 1RPC</td><td>Verifiable RPC relay for AI agents and blockchains<br>Provable attestations for agentic trust.</td><td>json-rpc</td><td><a href="https://docs.1rpc.io/using-the-web3-api/networks">https://docs.1rpc.io/using-the-web3-api/networks</a></td><td>A Trusted Execution Environment, or TEE, provides hardware-based isolation to ensure the confidentiality and integrity.</td></tr><tr><td>Band Protocol</td><td>Band Protocol is a cross-chain data oracle platform that aggregates and connects real-world data and APIs to smart contracts.</td><td>oracle</td><td><a data-mention href="/pages/x4qq50n0wkM8NdpggA3f">/pages/x4qq50n0wkM8NdpggA3f</a><br><br>https://bandprotocol.com/<br><br>https://docs.bandchain.org/band-standard-dataset/supported-blockchains.html</td><td></td></tr><tr><td>Banxa</td><td>Banxa is the leading global Web3 on-and-off ramp solution.</td><td>cronos-play, onramp</td><td><p><a data-mention href="/pages/bGrbK5aiSjpoOCDq1eIE">/pages/bGrbK5aiSjpoOCDq1eIE</a></p><p><br>https://banxa.com/<br><br>https://docs.banxa.com/docs</p></td><td>Supports CRO and major stable coins.</td></tr><tr><td>Blockdaemon</td><td>Supporting 50+ cutting edge blockchain networks with world-class institutional infrastructure. We power the blockchain economy with an easy-to-use, secure and scalable node management platform.</td><td>json-rpc</td><td>https://blockdaemon.com/</td><td>Only closed Beta for now. Contact your Blockdaemon account manager to inquire.</td></tr><tr><td>Blockscout</td><td>Blockscout is a tool for inspecting and analyzing EVM based blockchains. Blockchain explorer for Ethereum Networks.</td><td>chain-indexer</td><td><a href="https://explorer.cronos.com">https://explorer.cronos.com</a></td><td>Mainnet: https://explorer.cronos.com;<br>Testnet: https://explorer.cronos.com/testnet</td></tr><tr><td>BlockPi</td><td>Stronger Infrastructure Boost Your Web3 Journey</td><td>json-rpc, MEV protection, Account Abstraction</td><td><a href="https://public.blockpi.io/">https://public.blockpi.io/</a></td><td>Global distributed blockchain infrastructure RPC services, node and validator services, and account abstraction infrastructure services for Web3 builders.</td></tr><tr><td>C++</td><td>Cronos integration of the Chainsafe Gaming SDK for Unity gaming engine</td><td>cronos-play</td><td>https://github.com/cronos-labs/play-cpp-sdk</td><td></td></tr><tr><td>Caldera</td><td>Caldera specializes in building high-performance, customizable, and application-specific layer-two blockchains. You can contact Caldera to create a layer-2 network on top of Cronos EVM.</td><td>infrastructure</td><td><a data-mention href="/pages/9TTmDkPPhqNqfS83E7RA">/pages/9TTmDkPPhqNqfS83E7RA</a><br><br><a href="https://calderaxyz.gitbook.io/">https://calderaxyz.gitbook.io/</a></td><td></td></tr><tr><td>Chainlink (CCIP)</td><td>The backbone of blockchain. The standard for onchain finance</td><td>infrastructure</td><td><a href="https://chain.link/cross-chain">https://chain.link/cross-chain</a></td><td>Blockchain interoperability protocols are important for the Web3 ecosystem and traditional systems that need to interact with different blockchains.</td></tr><tr><td>Chainalysis (soon)</td><td>We create transparency for a global economy built on blockchains, enabling banks, businesses, and governments to have a common; understanding of how people use cryptocurrency.</td><td>analytics</td><td>https://www.chainalysis.com/</td><td></td></tr><tr><td>Chainspect</td><td>Web3's Top Blockchain Performance Tracker</td><td>analytics</td><td><a href="https://chainspect.app/">https://chainspect.app/</a></td><td>Real-time blockchain analytics for investors, researchers, and builders.<br>No paywalls, just data.</td></tr><tr><td>Chainstack</td><td>From startups to large enterprises, thousands of businesses of all sizes use Chainstack’s software and APIs to build, run, and scale blockchain applications.</td><td>json-rpc</td><td>https://chainstack.com/<br>https://docs.chainstack.com/operations/cronos/</td><td>Free and paid JSON-RPC endpoints. Mainnet and testnet.</td></tr><tr><td>Connext</td><td>Connext powers fast, secure bridging; between blockchains and rollups for; composable, trust minimized value.</td><td>bridge</td><td>https://www.connext.network/<br><br>https://docs.connext.network/0.1.x-legacy/developers/SystemOverview/chains</td><td>Use V1</td></tr><tr><td>Covalent</td><td>Covalent provides a unified API bringing visibility to billions of Web3 data points.</td><td>chain-indexer</td><td><a data-mention href="/pages/sZGbaX70szPFINfgBtRY">/pages/sZGbaX70szPFINfgBtRY</a><br><br>https://www.covalenthq.com/<br><br>https://www.covalenthq.com/docs/networks/cronos/</td><td>Tutorial: https://www.youtube.com/watch?v=f7ZHDByytFc</td></tr><tr><td>Cronos Chain Explorer</td><td>Welcome to Cronos Chain Explorer</td><td>chain-indexer, dev tools</td><td><a href="https://explorer.cronos.com/">https://explorer.cronos.com/</a></td><td>Blockchain Explorer</td></tr><tr><td>Cronos ID (ENS / Domain Service)</td><td>ENS implementation on Cronos</td><td>wallet</td><td>https://cronosid.xyz/<br><br>https://medium.com/cronos-chain/cronos-developer-series-how-to-integrate-your-dapp-with-cronos-id-domains-a0e274b95da8</td><td></td></tr><tr><td>Cronos Labs free JSON-RPC</td><td>Free JSON-RPC endpoint for the Cronos community</td><td>json-rpc</td><td>https://docs.cronos.com/<br><br>https://evm.cronos.com</td><td>Rate limited</td></tr><tr><td></td><td></td><td></td><td></td><td></td></tr><tr><td>Cronos Safe</td><td>Cronos Safe offers an easy-to-use implementation of the “Safe” Multisignature Wallet user interface and smart contracts on the Cronos chain.</td><td>wallet</td><td><a data-mention href="/pages/R32jLbIVsKk1rbQPJCjf">/pages/R32jLbIVsKk1rbQPJCjf</a><br><br><a href="https://https/cronos-safe.org">https:/cronos-safe.org</a></td><td></td></tr><tr><td>Crypto com Defi Wallet</td><td>A non-custodial multi-chain wallet that gives you access to a full suite of DeFi services and your NFTs in one place.</td><td>wallet</td><td>https://crypto.com/defi-wallet<br><br>https://medium.com/cronos-chain/cronos-developer-series-connect-your-dapp-with-defi-wallet-metamask-and-trust-wallet-77419fe696a5</td><td></td></tr><tr><td>Crypto com Tax</td><td>Full integration with popular exchanges &#x26; wallets and easy-to-use interface that gets the job done in no time.</td><td>analytics</td><td>https://tax.crypto.com/<br><br>https://tax.crypto.com/</td><td></td></tr><tr><td>DappRadar</td><td>The World’s Dapp Store</td><td>analytics</td><td><a href="https://dappradar.com/">https://dappradar.com/</a></td><td>DApp ecosystem analysis</td></tr><tr><td>Debank</td><td>Track cryptocurrency and Defi positions of any wallet address</td><td>chain-indexer</td><td>https://debank.com/<br><br>https://open.debank.com/</td><td></td></tr><tr><td>Dwellir</td><td>Access All Blockchain Networks</td><td>json-rpc</td><td><a href="https://www.dwellir.com/networks/cronos">https://www.dwellir.com/networks/cronos</a></td><td>Dwellir's scalable RPC nodes power Web3 developers with high-speed, affordable infrastructure.</td></tr><tr><td>Eat The Blocks</td><td>We teach Web3 development</td><td>education</td><td>https://eattheblocks.com/<br><br>https://www.youtube.com/watch?v=NqeeKEJiPZU</td><td></td></tr><tr><td>Etherscan</td><td>Ethereum block explorer</td><td>chain-indexer</td><td>https://explorer.cronos.com/<br><br>https://explorer-api-doc.cronos.org/mainnet/</td><td></td></tr><tr><td>Faucet (Testnet)</td><td>Testnet for TCRO (Test CRO)</td><td>dapp-development</td><td>https://faucet.cronos.com/</td><td></td></tr><tr><td>Flair</td><td>Real-time and historical custom data indexing for any evm chain.</td><td>analytics</td><td><a data-mention href="/pages/fqOl6AWGqBNTJuHg1zIw">/pages/fqOl6AWGqBNTJuHg1zIw</a><br><br><a href="https://docs.flair.dev/">https://docs.flair.dev/</a></td><td></td></tr><tr><td>Gelato Network</td><td>Set it and forget it, Your transactions will always; execute at the right time.</td><td>defi-tooling</td><td>https://www.gelato.network/<br><br>https://docs.gelato.network/developer-products/gelato-ops-smart-contract-automation-hub/contract-addresses</td><td></td></tr><tr><td>GetBlock</td><td>GetBlock developer tools and valuable insights guarantee a simple and reliable API access to multiple blockchains.</td><td>json-rpc</td><td>https://getblock.io/<br><br>https://account.getblock.io/</td><td>Free and paid JSON-RPC endpoints</td></tr><tr><td>Gnosis Safe</td><td>Cronos implementation of Gnosis Safe</td><td>wallet</td><td>https://cronos-safe.org<br><br>https://medium.com/cronos-chain/cronos-developer-series-use-the-safe-multisig-wallet-to-enhance-the-security-of-your-dapps-5041163703dc</td><td></td></tr><tr><td>Goldsky</td><td>Crypto Data Live-Streamed</td><td>indexer, analytics</td><td><a href="https://goldsky.com/">https://goldsky.com/</a></td><td>Goldsky powers hundreds of crypto businesses building rich, instant, data-driven experiences.</td></tr><tr><td>Google BigQuery</td><td>All Cronos EVM blocks, transactions and events are available for easy SQL query with Google BigQuery blockchain datasets.</td><td>analytics</td><td><a data-mention href="/pages/LkJeB6NRpq8lKJghwxIw">/pages/LkJeB6NRpq8lKJghwxIw</a><br><br><a href="https://cloud.google.com/application/web3/discover">https://cloud.google.com/application/web3/discover</a></td><td></td></tr><tr><td>AWS S3</td><td><p>Cronos public blockchain dataset is hosted on Amazon S3 and is freely queryable via Athena, ClickHouse, Presto/Trino, DuckDB, or any engine that supports S3-backed Parquet or CSV data.</p><p><br></p></td><td>analytics</td><td><a href="/pages/X7MkjsqL8N8T0DGZd9MT">AWS S3</a></td><td><p>The dataset is <strong>public</strong> and no credentials needed;</p><p>queryable by SQL;</p></td></tr><tr><td>Hardhat</td><td>Ethereum development environment for professionals</td><td>smart-contracts</td><td>https://hardhat.org/<br><br>https://medium.com/cronos-chain/cronos-developer-series-deploy-verify-your-contracts-using-hardhat-8b6ab6928986</td><td></td></tr><tr><td>IBC (Inter Blockchain Communication)</td><td>IBC is an interoperability protocol for communicating arbitrary data between arbitrary state machines, particularly between Cosmos SDK chains</td><td>bridge</td><td>https://ibcprotocol.org/</td><td></td></tr><tr><td>LayerZero</td><td>Build Anything Omnichain</td><td>bridge</td><td><a href="https://layerzero.network/">https://layerzero.network/</a></td><td>LayerZero is a technology that enables applications to move data across blockchains, supporting censorship-resistant messages and permissionless development through immutable smart contracts</td></tr><tr><td>Magic (ex Fortmatic)</td><td>User Authentication and Private Key Management Solution for Web3 and Web2</td><td>cronos-play, wallet</td><td>https://magic.link/<br><br>https://magic.link/docs/blockchains/cronos</td><td></td></tr><tr><td>MetaMask</td><td>A crypto wallet &#x26; gateway to blockchain apps; Start exploring blockchain applications in seconds. Trusted by over 30 million users worldwide.</td><td>wallet</td><td>https://metamask.io/<br><br>https://medium.com/cronos-chain/cronos-developer-series-connect-your-dapp-with-defi-wallet-metamask-and-trust-wallet-77419fe696a5</td><td></td></tr><tr><td>Mintscan</td><td>Mintscan.io is an interchain block explorer and data analytics platform</td><td>analytics, dev tools</td><td><a href="https://www.mintscan.io/">https://www.mintscan.io/</a></td><td>Blockchain explorer</td></tr><tr><td>Moralis</td><td>Moralis provides nodes and data APIs that enables developers to build engaging blockchain applications.</td><td>json-rpc, chain-indexer, cronos-play</td><td><a data-mention href="/pages/TZC7zRVTAaNS5DPEG1gC">/pages/TZC7zRVTAaNS5DPEG1gC</a><br><br>https://moralis.io/<br><br>https://docs.moralis.io/</td><td></td></tr><tr><td>Ormi</td><td>Subgraphs open-source solutions for indexing and accessing real-time blockchain data through GraphQL APIs.</td><td>GraphQL, analytics, Data API</td><td><a href="https://www.ormilabs.com/">https://www.ormilabs.com/</a></td><td>REST API solutions for standard and structured blockchain data access. GraphQL APIs.</td></tr><tr><td>OpenZeppelin</td><td>Reference library of standard smart contracts.</td><td>smart-contracts</td><td>https://www.openzeppelin.com/contracts<br><br>https://docs.openzeppelin.com/contracts/4.x/</td><td>The OpenZeppelin smart contracts work on Cronos like on any EVM chain.</td></tr><tr><td>OpenZeppelin Solidity Wizard</td><td>Use this interactive generator to bootstrap your contract and learn about the components offered in OpenZeppelin Contracts.</td><td>smart-contracts</td><td>https://wizard.openzeppelin.com/#<br><br>https://wizard.openzeppelin.com/#</td><td>See tutorial here: https://medium.com/cronos-chain/cronos-developer-series-create-deploy-a-smart-contract-with-openzeppelin-wizard-and-remix-5b6769fc8b93</td></tr><tr><td>Phalcon (Blocksec)</td><td>Powerful transaction explorer designed for DeFi community.</td><td>analytics</td><td>https://phalcon.blocksec.com/<br><br>https://phalcon.blocksec.com/</td><td></td></tr><tr><td>Pyth</td><td>Pyth Network is one of the largest first-party Oracle network, delivering real-time data across a vast number of chains.</td><td>oracle</td><td><a data-mention href="/pages/qpLCQVCodjQPEKd3BPGr">/pages/qpLCQVCodjQPEKd3BPGr</a></td><td></td></tr><tr><td>Relay</td><td>Relay is a cross-chain payments system</td><td>bridge, swap</td><td><a href="https://relay.link/bridge">https://relay.link/bridge</a></td><td>Bridge &#x26; transact across chains</td></tr><tr><td>Rabby</td><td>Multi-chain wallet</td><td>wallet</td><td>https://rabby.io/</td><td></td></tr><tr><td>RockX</td><td>Your gateway to crypto finance and blockchains</td><td>json-rpc</td><td>https://www.rockx.com/<br><br>https://access.rockx.com/</td><td>Free and paid JSON-RPC endpoints. Mainnet and testnet.<br>Tutorial: https://www.youtube.com/watch?v=gvY2vyYSZHs</td></tr><tr><td>Secret Network</td><td>Decentralized confidential computing (DeCC) enables privacy use cases like private voting for DAOs, secure random number generation for gaming, encrypted databases for various applications, encrypted data tied to NFTs, sealed-bid auctions, and encrypted order books for DeFi applications.</td><td>infrastructure</td><td><a data-mention href="/pages/ePO5bW8LiOateEAMfU6j">/pages/ePO5bW8LiOateEAMfU6j</a></td><td></td></tr><tr><td>Smart Contract Recipes</td><td>Deploy smart contracts in minutes. Library of standard smart contracts.</td><td>smart-contracts</td><td>https://www.smartcontract.recipes/<br><br>https://github.com/Breakthrough-Labs/btlcontracts</td><td>Paid service. Always check the code of the smart contract and get it verified on Cronos Explorer! Do not trust third party code without making your own verifications.</td></tr><tr><td>Stargate (Finance)</td><td>Move money onchain with Stargate</td><td>dex, defi</td><td><a href="https://stargate.finance/">https://stargate.finance</a></td><td>The global liquidity layer powering onchain capital movement for 70+ ecosystems - since 2022.</td></tr><tr><td>Stork</td><td>The Open Data Market</td><td>infrastructure, oracle</td><td><a href="https://www.stork.network/">https://www.stork.network/</a></td><td>Decentralized, low-latency, verifiable oracle protocol</td></tr><tr><td>Subquery</td><td>Query Decentralised Data. (An alternative to The Graph)</td><td>chain-indexer</td><td><a data-mention href="/pages/XRFR3XTBUrRUIcRZIAgF">/pages/XRFR3XTBUrRUIcRZIAgF</a><br><br>https://subquery.network/</td><td>Resources: https://academy.subquery.network/build/cosmos-evm.html; https://github.com/subquery/cosmos-subql-starter/tree/main/Cronos/cronos-evm-starter; https://crofam.me/devtips; https://academy.subquery.network/quickstart/quickstart_chains/cosmos.html; https://discord.com/invite/subquery (including technical support)</td></tr><tr><td>SupraOracles</td><td><p><a href="https://supraoracles.com">Supra</a> is a novel, high-throughput Oracle &#x26; IntraLayer: A vertically integrated toolkit of cross-chain solutions (data oracles, asset bridges, automation network, and more) that interlink all blockchains, public (L1s and L2s) or private (enterprises).</p><p><br></p></td><td>oracle</td><td><a href="https://supraoracles.com/docs/overview/">https://supraoracles.com/docs/overview/</a></td><td></td></tr><tr><td>Symbiosis</td><td>Independent cross-chain bridge protocol. Use at your own risks.</td><td>bridge</td><td><a href="https://app.symbiosis.finance/swap">https://app.symbiosis.finance/swap</a></td><td></td></tr><tr><td>The Graph</td><td>Fast, easy access to blockchain data</td><td>chain-indexer</td><td><a href="https://thegraph.com/">https://thegraph.com/</a></td><td>The Graph organizes and serves web3 data.</td></tr><tr><td>Thirdweb</td><td>Thirtdweb is a complete developer platform for Web3 app development.</td><td>infrastructure</td><td><a href="https://thirdweb.com/cronos">https://thirdweb.com/cronos</a><br><br><a href="https://thirdweb.com/cronos-testnet">https://thirdweb.com/cronos-testnet</a></td><td></td></tr><tr><td>Transak</td><td>Enable users to buy or sell crypto from your app.; Available across 100+ cryptocurrencies on 75+ blockchains via cards, bank transfers and other payment methods in 125+ countries.</td><td>cronos-play, onramp</td><td>https://global.transak.com/<br><br>https://global.transak.com/</td><td>Supports CRO at https://global.transak.com/.</td></tr><tr><td>Truffle / Ganache</td><td>The Truffle Suite gets developers from idea to dapp as comfortably as possible.</td><td>smart-contracts</td><td>https://trufflesuite.com/</td><td></td></tr><tr><td>Trust Wallet</td><td>Buy, store, collect NFTs, exchange &#x26; earn crypto. Join 25 million+ people using Trust Wallet.</td><td>wallet</td><td>https://trustwallet.com/<br><br>https://medium.com/cronos-chain/cronos-developer-series-connect-your-dapp-with-defi-wallet-metamask-and-trust-wallet-77419fe696a5</td><td></td></tr><tr><td>Unity</td><td>Cronos integration of the Chainsafe Gaming SDK for Unity gaming engine</td><td>cronos-play</td><td>https://github.com/ChainSafe/web3.unity</td><td></td></tr><tr><td>Unmarshal</td><td>The easiest way to query Blockchain data</td><td>chain-indexer</td><td>https://unmarshal.io/; https://docs.unmarshal.io/</td><td></td></tr><tr><td>Unreal</td><td>Cronos plugin for Unreal gaming engine</td><td>cronos-play</td><td>https://github.com/cronos-labs/play-cpp-sdk</td><td></td></tr><tr><td>UseWallet</td><td>useWallet() allows dapp users to connect to the provider of their choice in a way that is as straightforward as possible.</td><td>dapp-development</td><td>https://www.npmjs.com/package/use-wallet-btl<br><br>https://www.npmjs.com/package/use-wallet-btl</td><td>Github repo: https://github.com/Breakthrough-Labs/use-wallet;<br>This is a fork of: https://www.npmjs.com/package/use-wallet; with additional configuration options to support Cronos</td></tr><tr><td>Wallet Connect</td><td>Wallet Connect is an open source protocol for connecting decentralised applications to mobile wallets with QR code scanning or deep linking.</td><td>wallet</td><td>https://walletconnect.com/<br><br>https://docs.walletconnect.com/</td><td></td></tr><tr><td>Web3Auth</td><td>Simple self-custodial auth infra for Web3 apps and wallets</td><td>cronos-play, wallet</td><td>https://web3auth.io/<br><br>https://web3auth.io/docs/connect-blockchain/cronos</td><td>Unity SDK: https://github.com/Web3Auth/web3auth-unity-sdk;<br>Unreal SDK (WIP): https://github.com/Web3Auth/web3auth-unreal-sdk</td></tr><tr><td>Web3js / Ethersjs / Web3py, etc</td><td>A collection of libraries that allow you to interact with a local or remote ethereum node using HTTP, IPC or WebSocket.</td><td>dapp-development</td><td>Open page to view; Open page to view</td><td>Javascript: Recommended: https://docs.ethers.io/v5/;<br>Alernative: https://web3js.readthedocs.io/en/v1.7.4/;<br>Python: https://web3py.readthedocs.io/en/stable/</td></tr><tr><td>Witnet</td><td>Witnet enables your smart contracts to react to real world events with strong crypto-economic guarantees.</td><td>oracle</td><td><a data-mention href="/pages/ESHAf4H5tg9kajGZrC7Q">/pages/ESHAf4H5tg9kajGZrC7Q</a><br><br>https://witnet.io/<br><br>https://docs.witnet.io/smart-contracts/supported-chains</td><td>See tutorials here: https://medium.com/cronos-chain/random-number-generation-on-cronos-with-witnet-8b871beef59b; https://medium.com/@benjaminrokowski/46ec979aee3c; https://medium.com/witnet/how-to-deploy-a-price-feed-on-cronos-cro-ccf56438313; https://www.notion.so/0e6bc5ddbe4a4bf8a22c262dedfe268f</td></tr></tbody></table>


# Account Abstraction

## Introduction

Account Abstraction simplifies blockchain interactions by allowing smart contracts to serve as user accounts, merging contract capabilities with account management. The Titan upgrade opens the door for Account Abstraction to become reality on Cronos Testnet.\
\
Account Abstraction opens up possibilities for numerous use cases such as multi-signature transactions, social recovery, contract whitelisting, custom gas tokens, subsidizing gas fees, and much more. It expands the use-case potential of DApps and enables a more intuitive user experience.

Key components are provided to support Account Abstraction development:

* **User Operations:** A new transaction object type that includes additional data, allowing for custom transaction and security configurations.
* **JSON-RPC API debug\_traceCall:** Enables simulation of User Operations before they are executed on-chain.
* **Bundlers:** Crucial nodes that bundle unsigned User Operations into a single package for signing and subsequent publication on the mainnet. Bundlers estimate transaction fees.
* **Entry Point Contract:** an audited and trusted singleton contract, is functional and can process the execution and validating User Operations.

\
Account Abstraction is natively supported on Cronos, and developers can leverage these features for their own use cases. There are also application-level account abstraction solutions available for developers who need Account Abstraction functionality now. Please contact [Cronos Labs](https://cronoslabs.org) if you would like to be introduced to the relevant developer tool platforms.

## Send a UserOperation using `userop.js`

In this guide, we will go through how to send a userop transaction with subsidized gas fee.\
Here we are using [userop.js](https://github.com/stackup-wallet/userop.js) to send UserOperations but you can use any library you like, even using `curl` .

We will create a new project for sending transactions:

```bash
mkdir userop-test
cd userop-test
yarn init -y
yarn add userop  // the example code below is built on version: ^0.4.0-beta.5
yarn add dotenv
```

In the root directory, create a new file `.env` :

```
ENTRY_POINTS=0x5FF137D4b0FDCD49DcA30c7CF57E578a026d2789
ACCOUNT_FACTORY=0x9406Cc6185a346906296840746125a0E44976454
NODE_RPC_URL=http://localhost:8545
BUNDLER_RPC_URL=http://localhost:3000
SIGNER_PKEY=0x0000000000000000000000000000000000000000000000000000000000000003
```

{% hint style="info" %}
NOTE: The above addresses of ENTRY\_POINTS contract and ACCOUNT\_FACTORY contract are on Cronos Mainnet.

And here is the ENTRY\_POINTS contract address on Cronos Testnet: [0x84D2EF0545514BF121d81769d8E94b94770670Ef](https://explorer.cronos.com/address/0x84D2EF0545514BF121d81769d8E94b94770670Ef). Feel free to deploy your own ACCOUNT\_FACTORY contract on testnet.
{% endhint %}

Create a new `index.mjs` :

```javascript
import { ethers } from "ethers";
import { V06 } from "userop";
import { config } from "dotenv";

config();

const NODE_RPC_URL = process.env.NODE_RPC_URL;
const BUNDLER_RPC_URL = process.env.BUNDLER_RPC_URL;
const SIGNER_PKEY = process.env.SIGNER_PKEY;
const ENTRY_POINTS = process.env.ENTRY_POINTS;
const ACCOUNT_FACTORY = process.env.ACCOUNT_FACTORY;

async function main() {
  // Initialize providers and signer
  const provider = new ethers.JsonRpcProvider(NODE_RPC_URL);
  const bundlerProvider = new ethers.JsonRpcProvider(BUNDLER_RPC_URL);

  // signer is the owner of the smart account
  const signer = new ethers.Wallet(SIGNER_PKEY, provider);

  // Create the account instance
  // The base helper sets up the Common SimpleAccount ABI and logic
  const account = new V06.Account.Instance({
    ...V06.Account.Common.SimpleAccount.base(provider, signer),
    entryPointAddress: ENTRY_POINTS,
    factoryAddress: ACCOUNT_FACTORY,
    bundlerClient: bundlerProvider,
    onBuild: (op) => {
      console.log("Signed UserOperation:", op);
    },
  });

  // these two addresses are different
  // need to fund the smart account before running this script
  console.log(`Signer  address: ${signer.address}`);
  console.log(`Account address: ${await account.getSender()}`);

  // Build the execution call (transfer)
  await account.encodeCallData(
    "execute", 
    [
      "0xf39Fd6e51aad88F6F4ce6aB8827279cffFb92266", // to
      "100", // value (wei)
      "0x"   // data
    ]
  );

  // Send the UserOperation
  const res = await account.sendUserOperation();

  console.log(`UserOpHash: ${res.userOpHash}`);

  // !!! this step can get stuck in a local geth dev setup
  // because the bundler node is waiting for new block event to bundle the userops
  // try to send a new tx in the local geth dev setup to trigger bundle  console.log("Waiting for transaction...");
  const ev = await res.wait();

  console.log(`Transaction hash: ${ev?.receipt.transactionHash ?? null}`);
}

main().then(() => process.exit(0)).catch((error) => {
  console.error(error);
  process.exit(1);
});

```

Now send the userop by running:

<pre class="language-bash"><code class="lang-bash">$ node index.mjs

Signer  address: 0x6813Eb9362372EE...19671cBA69
Account address: 0xF249baC852124B9...1b6907FcAD
verification gas limit: 70000
verification gas limit: 1000000
<strong>Signed UserOperation: {
</strong>  sender: '0x6813Eb9362372EE...19671cBA69',
  nonce: '0xb',
  initCode: '0x',
  callData: '0xb61d27f6000000000000000000000000f39fd6e51aad88f6f...27279cfffb92266000000000000000000000000000000000000000000000000000000000000000100000000000000000000000000000000000000000000000000000000000000600000000000000000000000000000000000000000000000000000000000000000',
  callGasLimit: '0x4443',
  verificationGasLimit: '0xaba7',
  preVerificationGas: '0xbfb1',
  maxFeePerGas: '0x925761c3500',
  maxPriorityFeePerGas: '0xd27a99500',
  paymasterAndData: '0x',
  signature: '0xd42139cf71d00cd7ff...5461bbd949df9500413948fd06a284029e4a777247d6dd609e72b538d60d51b'
}
UserOpHash: 0xdc07e08d601ff82dd509c...34c7262ccf22463f10fb2191
Waiting for transaction...
Transaction hash: 0xcd54434b8c949...2580930cf14045cc3829ef09feb73ec9a
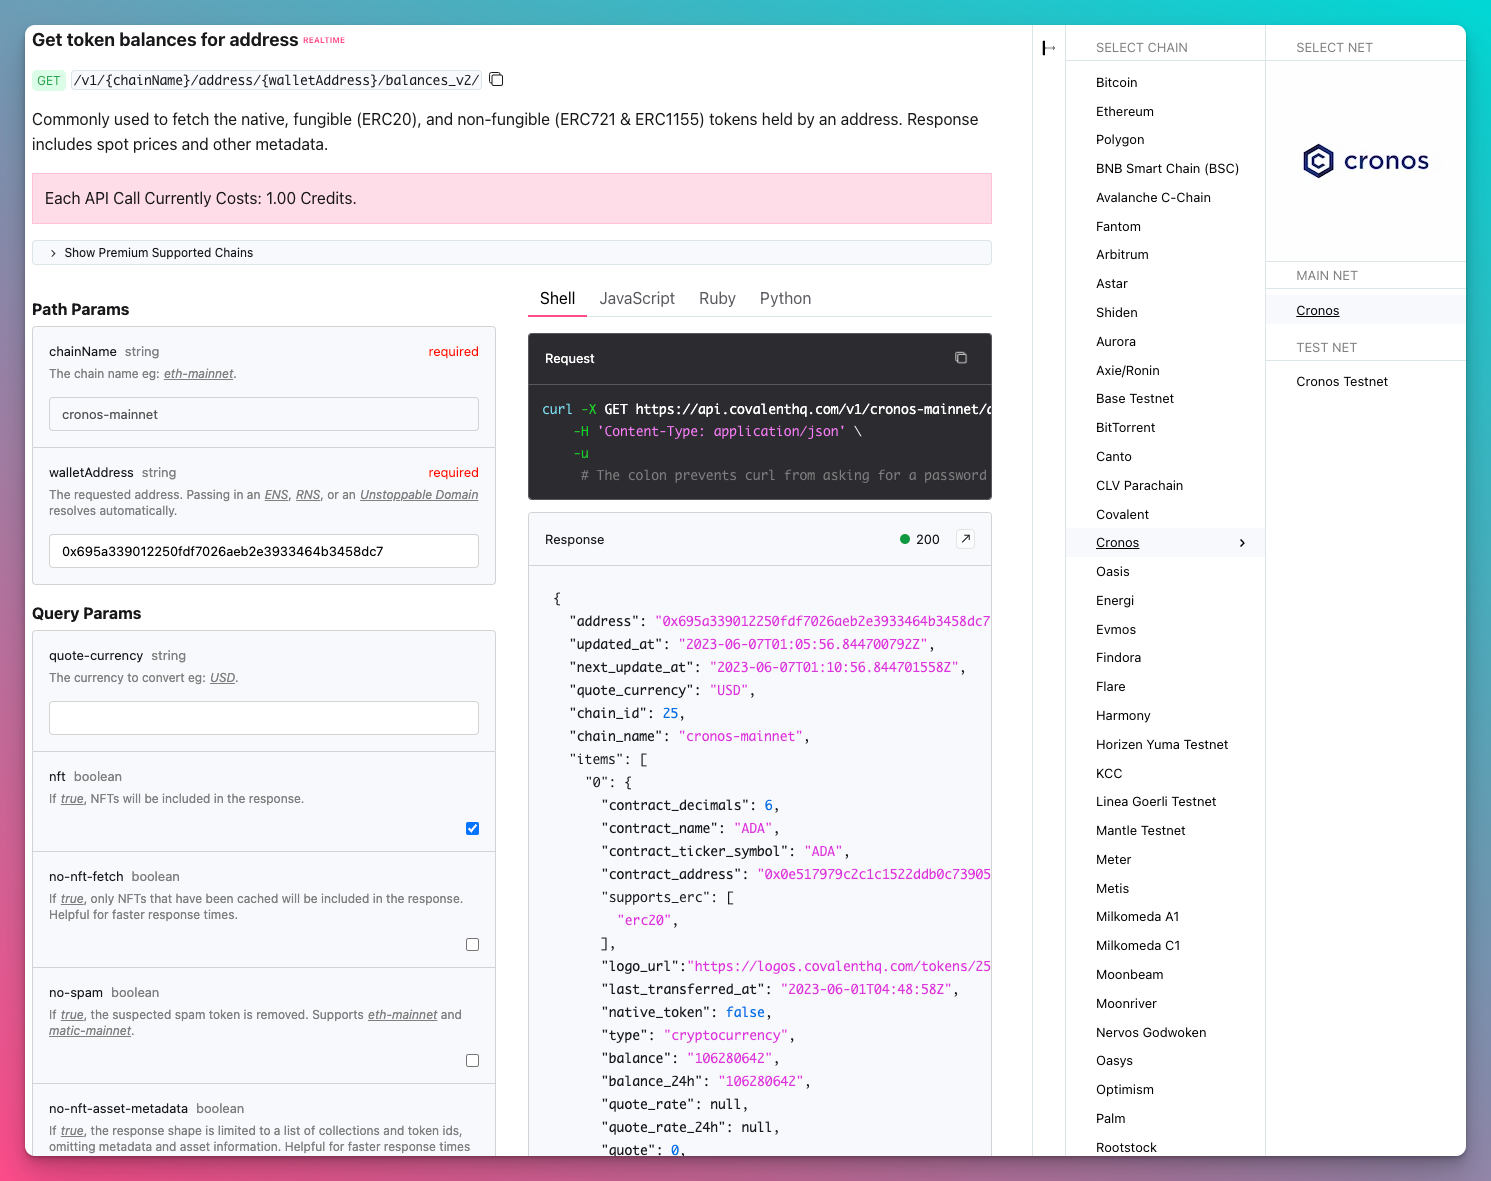

</code></pre>

If successful, you will see the above logs including transaction hash and userOpHash printed out.

We can now verify with this tx hash on the block explorer, that we have successfully sent out a TX, and the gas fees were funded by the account address 0x6813Eb9362372EE...19671cBA69.

<figure><img src="/files/7BbEleG7i1axS245pi6p" alt=""><figcaption></figcaption></figure>


# Band Protocol

### Introduction

Band is the data layer that trains AI engines and powers blockchain applications. By empowering DeFi, GameFi, and AI agents, it enables developers, institutions, and users to access real-time data with zero counterparty risk.

With Band’s open, battle-tested data infrastructure built for blockchains and LLMs, it ensures that real-time information is always accessible - fuelling everything from financial protocols to autonomous AI systems.

On Cronos, developers can integrate Band’s decentralized oracle services to access a wide range of cryptocurrency price feeds and bring real-world data directly into their applications.

### Currency Pair and Supported Currencies

A currency pair is the quotation of two different currencies, with the value of one currency being quoted against the other. The first listed currency of a currency pair is the *base currency*, and the second currency is called the *quote currency*. A currency pair compares the value of one currency to another — the *base currency* versus the *quote currency*. It indicates how much one unit of the *base currency* worths in the unit of the *quote currency*, or, in other words, how much of the *quote currency* is needed to purchase one unit of the *base currency*. For instance, in a currency pair `CRO/USD`, `CRO` is the cryptocurrency **Cronos** as the *base currency*, and `USD` is the fiat currency **U.S. Dollar** as the *quote currency*. The value of currency pair `CRO/USD` will indicate how much one `CRO` worths in **U.S. Dollar**.

Currently, one fiat currency - the **U.S. Dollar** - and the following list of cryptocurrencies are supported. Going forward, this token list will continue to expand based on developers' needs and community feedback.

| Token Name      | Symbol |
| --------------- | ------ |
| Cronos          | CRO    |
| Ethereum        | ETH    |
| Wrapped Bitcoin | WBTC   |
| Tether          | USDT   |
| USD Coin        | USDC   |
| Dai             | DAI    |

### Price Queries

Developers are able to query token prices from **Band**’s oracle through **Band**’s `StdReferenceProxy` contract on **Cronos Chain**. This contract exposes `getReferenceData` and `getReferenceDataBulk` functions, to query one currency pair and multiple currency pairs, respectively.

`getReferenceData` takes two strings as the inputs — the *base* and *quote* symbols respectively. It then queries the `StdReference` contract for the latest rate of the specified currency pair, *base* against *quote*. The query returns a `ReferenceData` struct, shown below:

```solidity
struct ReferenceData {
    uint256 rate; // base/quote exchange rate, multiplied by 1e18.
    uint256 lastUpdatedBase; // UNIX epoch of the last time when base price gets updated.
    uint256 lastUpdatedQuote; // UNIX epoch of the last time when quote price gets updated.
}
```

`getReferenceDataBulk` instead takes two lists as inputs: one for the *base currencies*, and one for the *quote currencies*. It then proceeds to query the rate for each *base*/*quote* pair at each index, and returns an array of `ReferenceData` structs.

For example, if we call `getReferenceDataBulk(['CRO','WBTC','ETH'], ['USD','ETH','DAI'])`, the returned `ReferenceData` array will contain information regarding the following currency pairs:

* `CRO/USD`
* `WBTC/ETH`
* `ETH/DAI`

### Example Usage

The contract code below demonstrates a simple example usage of **Band**'s `StdReferenceProxy` contract and its `getReferenceData` and `getReferenceDataBulk` functions.

```solidity
pragma solidity ^0.8.13;

interface IStdReference {
    /// A structure returned whenever someone requests for standard reference data.
    struct ReferenceData {
        uint256 rate; // base/quote exchange rate, multiplied by 1e18.
        uint256 lastUpdatedBase; // UNIX epoch of the last time when base price gets updated.
        uint256 lastUpdatedQuote; // UNIX epoch of the last time when quote price gets updated.
    }

    /// Returns the price data for the given base/quote pair. Revert if not available.
    function getReferenceData(string memory _base, string memory _quote)
        external
        view
        returns (ReferenceData memory);

    /// Similar to getReferenceData, but with multiple base/quote pairs at once.
    function getReferenceDataBulk(string[] memory _bases, string[] memory _quotes)
        external
        view
        returns (ReferenceData[] memory);
}

contract DemoOracleUSD {
    IStdReference ref;

    string[] public tokenList = ["CRO", "ETH", "WBTC", "USDT", "USDC", "DAI"];
    mapping(string => uint256) public lastPricesInUSD;

    modifier onlySupportedToken(string memory _token) {
        bool supported = false;
        for (uint i=0; i<tokenList.length; i++) {
            if ( keccak256(abi.encodePacked(_token)) == keccak256(abi.encodePacked(tokenList[i])) ) {
                supported = true;
            }
        }
        require(supported, "Token not supported.");
        _;
    }

    constructor(IStdReference _ref) {
        ref = _ref;
    }

    function getUSDPrice(string memory _token) public view onlySupportedToken(_token) returns (uint256 rate) {
        IStdReference.ReferenceData memory data = ref.getReferenceData(_token, "USD");
        rate = data.rate;
    }

    function getMultiUSDPrices(string[] memory _tokens) external view returns (uint256[] memory rates) {
        rates = new uint256[](_tokens.length);

        for (uint i=0; i<_tokens.length; i++) {
            rates[i] = getUSDPrice(_tokens[i]);
        }
    }

    function savePrice(string memory _token) external {
        lastPricesInUSD[_token] = getUSDPrice(_token);
    }
}
```

### Deploy above DemoOracleUSD to Cronos Testnet

1. Copy and paste the above contract into [Remix](https://remix.ethereum.org/), an online Ethereum IDE;
2. Specify `//SPDX-License-Identifier`, or put `// SPDX-License-Identifier: UNLICENSED` if unlicensed, at the first line of the above code;
3. Compile the contract with compiler version 0.8.13;
4. Switch to the **DEPLOY & RUN TRANSACTIONS** tab of [Remix](https://remix.ethereum.org/);
5. Select `Injected Web3` in the **ENVIRONMENT** dropdown in the top left to connect with MetaMask;
   * Make sure that MetaMask is connected to the Cronos testnet, you can refer to our [official documentation](/for-users/metamask);
6. Deploy the contract with the below Cronos testnet Band reference data proxy address;
   * `0xD0b2234eB9431e850a814bCdcBCB18C1093F986B`;
7. Hooray, you can now fetch the latest supported token prices from Band Protocol!

### Contract Addresses

| Network        | StdReference Contract Address                                                                                                    |
| -------------- | -------------------------------------------------------------------------------------------------------------------------------- |
| Cronos Mainnet | [`0xDA7a001b254CD22e46d3eAB04d937489c93174C3`](https://cronoscan.com/address/0xDA7a001b254CD22e46d3eAB04d937489c93174C3)         |
| Cronos Testnet | [`0xD0b2234eB9431e850a814bCdcBCB18C1093F986B`](https://testnet.cronoscan.com/address/0xD0b2234eB9431e850a814bCdcBCB18C1093F986B) |


# Banxa

### Introduction

Banxa powers the largest digital asset platforms by providing payments infrastructure and regulatory compliance across global markets. Our mission and vision is to build the bridge that provides people in every part of the world access to a fairer and more equitable financial system. Visit the [Banxa](https://docs.banxa.com/docs) documentation to find out more.

### API Host

<table><thead><tr><th width="166">Environment</th><th>API Host</th></tr></thead><tbody><tr><td>Sandbox</td><td>https://cronos.banxa-sandbox.com</td></tr><tr><td>Production</td><td>https://cronos.banxa.com</td></tr></tbody></table>

### NodeJS Examples

#### Generate HMAC Token

```typescript
const generateHmac = (signature: string, nonce: number): string => {
  const crypto = require("crypto");
  const key = "YOUR_BANXA_KEY";
  const secret = "YOUR_BANXA_SECRET_TOKEN";

  const localSignature = crypto
    .createHmac("SHA256", secret)
    .update(signature)
    .digest("hex");
  return `${key}:${localSignature}:${nonce}`;
};
```

{% hint style="info" %}
To get started using the Banxa APIs, please get in touch [here](https://banxa.com/talk-to-our-team/) with the Banxa team in order to get a user key and secret token.
{% endhint %}

#### Send Request

```typescript
const sendGetRequest = (query: string): void => {
  const hostname = "cronos.banxa-sandbox.com";
  const nonce = Date.now();
  const method = "GET";
  let data = method + "\n" + query + "\n" + nonce;

  const hmac = generateHmac(data, nonce);
  const https = require("https");
  const options = {
    hostname: hostname,
    path: query,
    method: method,
    headers: {
      "Content-Type": "application/json",
      Authorization: `Bearer ${hmac}`,
    },
  };

  const req = https.get(
    options,
    (res: {
      statusCode: string;
      headers: string;
      setEncoding: (arg0: string) => void;
      on: (arg0: string, arg1: { (chunk: string): void }) => void;
    }) => {
      console.log(`STATUS: ${res.statusCode}`);
      console.log(`HEADERS: ${JSON.stringify(res.headers)}`);
      res.setEncoding("utf8");
      res.on("data", (chunk: string) => {
        console.log(`BODY: ${chunk}`);
      });
      res.on("end", () => {
        console.log("No more data in response.");
      });
    }
  );

  req.on("error", (e: { message: string }) => {
    console.error(`problem with request: ${e.message}`);
  });
};
```

### **Resources**

Here are additional resources to help you get started with Banxa:

* [Introduction and how to get started with Banxa](https://docs.banxa.com/docs)
* [Generating HMAC Auth](https://docs.banxa.com/docs/step-1-prerequisites#authentication)
* [API References](https://docs.banxa.com/reference/get-fiat-currencies)
* [Changelog](https://docs.banxa.com/changelog)


# Blockdaemon

MPC Wallets and Vaults to Secure Digital Assets

## Introduction

Blockdaemon provides a family of institutional-grade digital asset security and management offerings. Options range from our turn-key API or UI driven Institutional Vault with advanced security, policy controls and services integration to Builder Vault software development kits (SDKs) providing the core key management and protection to build your custom wallet or wallets as a service.\
\
All Blockdaemon MPC Wallet and Vault offerings are based on our patented Advanced MPC™ (Multi-Party Computation) technology to provide the security foundation for your on-chain infrastructure and services.


# Chainstack

## Introduction

Chainstack is the leading Web3 infrastructure provider for top chains, including Subgraphs, and add-ons like Solana Geyser.


# Caldera

## What does Caldera do?

Caldera specializes in building high-performance, customizable, and application-specific layer-two blockchains. These custom-built blockchains **(Caldera Chains)** offer high throughput, low latency, and customizable features for optimizing the performance and user experience of decentralized applications, with the ability to process hundreds of transactions per second and sub-second confirmation times.

## How does Caldera do it?

We create ***Caldera Chains*** which are custom-built optimistic rollups. These rollups are:

1. **Fast:** Process hundreds of transactions per second with sub-second confirmation times
2. **Highly Customizable:** Features such as address whitelist or sustainable revenue generation.
3. **Ethereum Compatible:** Runs standard Ethereum smart contract code without modification

For more info on how Caldera works visit, the [Caldera docs](https://calderaxyz.gitbook.io/caldera-documentation/getting-started/overview)

## Getting Started with Caldera L2 Testnet

Let's take a look at how we can start using Caldera L2 Testnet, which is a rollup on the Cronos Testnet.

1. Visit: [Caldera Public Testnets](https://calderaxyz.gitbook.io/caldera-documentation/getting-started/caldera-public-testnets)
2. Add chains to metamask via the "add to metamask button"

<figure><img src="/files/ZOSU51AtSWTuLVhgKiEV" alt=""><figcaption></figcaption></figure>

3. Request testnet tokens via the faucet.\
   If you want to send transactions on Caldera, then choose **"Request Faucet funds on rollup"**,\
   if you want to send from Cronos to Caldera, then choose **"Request Faucet funds on Cronos "**\
   Now type in your address you wish to receive funds on and click "**receive Funds"**

<figure><img src="/files/BxyjrDBwtW3hAfOB1V2G" alt=""><figcaption></figcaption></figure>

4. When you send transactions via Metamask on the Caldera explorer, you can view these transactions using the caldera explorer: <https://cronos-testnet.calderaexplorer.xyz/>.\
   \
   For example the Faucet Transaction, which you may recognize is a similar interface to what other EVM blockscout explorers use:

<figure><img src="/files/tPaVHr6EEBGMFeRkjplQ" alt=""><figcaption></figcaption></figure>

5. From here on you can start building just like you would on another L2 optimistic rollup. You can deploy your application onto a Caldera Chain via the same means as any Ethereum-compatible blockchain. For more tutorials on how to deploy on Caldera, visit the [Caldera docs](https://calderaxyz.gitbook.io/caldera-documentation/getting-started/deploy-on-a-caldera-chain)\\
6. In order to deploy on mainnet, you can use:

* <https://cronos-mainnet.caldera.dev/>
* <https://cronos-mainnet.calderaexplorer.xyz/>\
  \\


# DWELLIR

## Introduction

DWELLIR provides reliable, scalable RPC infrastructure that connects your dApp or Web3 project to any blockchain network. With support for over 150 blockchains including Cronos, DWELLIR delivers high-speed, cost-effective infrastructure designed specifically for Web3 developers.

The platform eliminates the complexity of multi-chain integration by offering a single solution that spans 150+ blockchains with regular new network additions. DWELLIR's enterprise-grade infrastructure handles millions of daily requests while maintaining 99.99% uptime through redundant systems across multiple global regions.

With strategically distributed data centers ensuring sub-100ms latency and comprehensive monitoring tools, DWELLIR provides the performance and reliability needed for mission-critical Web3 applications. Whether you're managing traffic spikes or expanding to new chains, DWELLIR's scalable infrastructure grows with your project's needs.

## How does DWELLIR do it?

Reduced latency, lower costs, and more chains like Cronos — DWELLIR's scalable RPC nodes power Web3 developers with high-speed, affordable infrastructure.

<figure><img src="/files/QbTjACDE7KS5mF8Q417G" alt=""><figcaption></figcaption></figure>

## Getting Started with DWELLIR

#### **Sign UP**

<figure><img src="/files/CVl8LHRVNvp37mlPnjlN" alt=""><figcaption></figcaption></figure>

#### Login to the Dashboard

Search for an Endpoint

<figure><img src="/files/8IiZXpMVoCwIkXykqvXm" alt=""><figcaption></figcaption></figure>

Check the Usage Dashboard

<figure><img src="/files/IicPa9Awmtod9rSKAWF9" alt=""><figcaption></figcaption></figure>


# GetBlock

Web3 provider delivering APIs for every use case


# GoldRush

## Introduction

[GoldRush](https://goldrush.dev/) is a set of foundational multichain data APIs and toolkits for easy web3 development across 100+ chains. Powered by the [Covalent Network](https://www.covalenthq.com/), which is decentralized and cryptographically secure, GoldRush offers structured onchain data, through powerful APIs, SDKs and UI Kits, including:

* Token balances
* Historical transactions
* Decoded event logs
* Traces with internal transactions, state changes and input data (foundational chains only)

GoldRush maintains a full archival copy of every supported blockchain, meaning every balance, transaction, log event, and NFT asset data is available from the genesis block. This data is available via:

* GoldRush API (formerly known as the Unified API) - Incorporate blockchain data into your app with a familiar REST API
* Increment - Create and embed custom charts with no-code analytics

**Consider using GoldRush if you need:**

* Structured and enhanced on-chain data well beyond what you get from RPC providers
* Broad and deep multi-chain data at scale
* Enterprise-grade performance

[**Sign up to start building on Cronos**](https://goldrush.dev/platform/auth/login/)

## GoldRush API Features

### GoldRush API

<figure><img src="https://www.datocms-assets.com/86369/1686100423-example-api-response-json-cronos.png" alt=""><figcaption></figcaption></figure>

The GoldRush API is RESTful and offers the following for Cronos:

| **Features**                                    |                                                                                                                                                                                                                                                                                                                                                                                                                                                                                         |
| ----------------------------------------------- | --------------------------------------------------------------------------------------------------------------------------------------------------------------------------------------------------------------------------------------------------------------------------------------------------------------------------------------------------------------------------------------------------------------------------------------------------------------------------------------- |
| **Response Formats**                            | JSON                                                                                                                                                                                                                                                                                                                                                                                                                                                                                    |
| **Real-Time Data Latency**                      | 2 blocks                                                                                                                                                                                                                                                                                                                                                                                                                                                                                |
| **Batch Data Latency**                          | 30 minutes                                                                                                                                                                                                                                                                                                                                                                                                                                                                              |
| **Supported Networks (`chainName`, `chainId`)** | <p>Mainnet: <code>cronos-mainnet</code>, <code>25</code><br>Testnet: <code>cronos-testnet</code>, <code>338</code></p>                                                                                                                                                                                                                                                                                                                                                                  |
| **GoldRush Plans**                              | [Pricing Plans](https://goldrush.dev/pricing/)                                                                                                                                                                                                                                                                                                                                                                                                                                          |
| **API Categories**                              | <p><a href="https://goldrush.dev/docs/goldrush-apis#wallet-api">Balances</a><br><a href="https://goldrush.dev/docs/goldrush-apis#nft-api">NFTs</a><br><a href="https://goldrush.dev/docs/goldrush-apis#transactions-api">Transactions</a><br><a href="https://goldrush.dev/docs/goldrush-apis#security-api">Security</a><br><a href="https://goldrush.dev/docs/api-reference/utility/get-log-events-by-contract-address#get-log-events-by-contract-address">Log Events & Others</a></p> |

#### Get started

* [API Key](https://goldrush.dev/platform/auth/register/) - sign up for free
* [Quickstart](https://goldrush.dev/docs/quickstart) - summary of key resources to get you building immediately on blockchain
* [API Reference](https://goldrush.dev/docs/api-reference/overview) - try all the endpoints directly from your browser
* [Guides](https://goldrush.dev/guides/) - learn how to build dapps, fetch data and extend your Web3 knowledge

### Increment

<figure><img src="https://www.datocms-assets.com/86369/1684974544-increment-example-partner-docs.png" alt=""><figcaption></figcaption></figure>

Increment is a novel no-code charting and reporting tool powered by Covalent, revolutionizing how the Web3 space approaches analytics. Many analytics tools let you write SQL to create charts, but *Increment is the only one to encode business logic - Reach, Retention, and Revenue - into an SQL compiler that can write valid SQL for you.*

#### Increment use cases

Increment can be used for:

* [Analyzing Blockchain Networks](https://www.covalenthq.com/docs/increment/data-models/chain-gdp/?utm_source=cronos\&utm_medium=partner-docs)
* [Analyzing DEXs](https://goldrush.dev/guides/how-to-use-covalent-s-dex-api-for-defi-apps/)
* [Analyzing NFT Marketplaces](https://www.covalenthq.com/docs/increment/data-models/jpeg-analysis/?utm_source=cronos\&utm_medium=partner-docs)

For example, click on the following table to get the latest number of active wallets, transactions and tokens by day, week, month, or year for Cronos:

<figure><img src="https://www.datocms-assets.com/86369/1686100924-example_network_status_increment_general.png" alt=""><figcaption></figcaption></figure>

#### Get started

* [Increment](https://www.covalenthq.com/platform/increment/#/?utm_source=cronos\&utm_medium=partner-docs) - login via the Covalent Platform
* [Docs](https://www.covalenthq.com/docs/increment/?utm_source=cronos\&utm_medium=partner-docs) - learn how to use Increment to build dynamic, custom charts
* [Data Models Demo](https://www.covalenthq.com/docs/increment/data-models/model-intro/?utm_source=cronos\&utm_medium=partner-docs) - build analytics in 3 clicks
* [Explore Models. Seek Alpha.](https://www.covalenthq.com/platform/increment/#/pages/covalent/chain-gdp/?utm_source=cronos\&utm_medium=partner-docs) - browse all data models
* [Use Models. Become Alpha.](https://www.covalenthq.com/platform/increment/#/sql/query_b6c88fd8604f49d5920ca86fa7/?utm_source=cronos\&utm_medium=partner-docs) - use a data model

## Use Cases

The Covalent API supports a broad range of Web3 data use cases including:

* Gaming
* Defi Taxes
* KYC
* NFTs
* Wallets
* Dashboards
* Dao Data
* Dex & Trading
* and many more

Check out Covalent's collection of ready-to-ship [**Code Templates**](https://github.com/covalenthq/web3-resources?utm_source=cronos\&utm_medium=partner-docs) that you can use to build your Web3 data-powered dApps.

## Resources

Here are some additional resources to help you get started with the Covalent API:

* [Cronos Network Details](https://www.covalenthq.com/docs/networks/cronos/?utm_source=cronos\&utm_medium=partner-docs)
* [Covalent API Reference](https://covalenthq.com/docs/api/?utm_source=cronos\&utm_medium=partner-docs)
* [API FAQs](https://www.covalenthq.com/docs/unified-api/faq/)
* [Discord Support](https://www.covalenthq.com/discord/?utm_source=cronos\&utm_medium=partner-docs)


# Cronos Safe

## Introduction

DApp developers can protect themselves against the potentially disastrous consequences of the compromise of a single private key, by assigning a multi-signature smart contract wallet as the owner and admin of a dApp.

With the open-source community support from Protofire, [Cronos Safe](https://cronos-safe.org) offers an easy-to-use implementation of the “Safe” Multisig Wallet user interface and smart contracts on the Cronos chain, which is a perfect tool for DApp developers to Enhance the Security of your dApps.

While you can verify independently that the Cronos Safe smart contracts are identical to the official Safe smart contracts, please note that you are using them at your own risk. Cronos Safe is not officially supported by Cronos or Cronos Labs.

## Design the Governance of the Wallet

Each Safe wallet is going to require a set of owners, and a transaction approval policy:

1\) The owner set is the list of wallet addresses who are authorized to sign confirmations for any transaction emanating from the Safe wallet. 2) The transaction approval policy specifies how many confirmations are needed to authorize a transaction. For example, the policy may specify that 3 confirmations out of 5 owners are needed in order to authorize a transaction.

It is important to be thoughtful about the approval policy and the operational measures in place in order to safeguard the security of the private keys of each of the owner addresses.

## Setting up a Cronos Safe wallet

You can visit Cronos Safe (cronos-safe.org) to access the user interface of the Safe deployment on Cronos chain.

Click “Create Safe”, connect your wallet, and follow the instructions. You can connect to the Cronos Safe dApp with MetaMask, or with the Crypto.com Onchain Wallet via WalletConnect.

<figure><img src="/files/zNgtf0Mh3UM1TjAW5XA4" alt=""><figcaption></figcaption></figure>

<figure><img src="/files/USfqf7QVXYIFOMP6vjVW" alt=""><figcaption></figcaption></figure>

<figure><img src="/files/nvSDEOmqMPzt9Wj7OWL7" alt=""><figcaption></figcaption></figure>

<figure><img src="/files/PNBDJx20cgECRT2Mxyt7" alt=""><figcaption></figcaption></figure>

In the next step, you will review the details of your Safe on Cronos and will have to confirm a transaction with your currently connected wallet. The creation will cost approximately 2.58267 CRO. The exact amount will be determined by your wallet.

<figure><img src="/files/J0JU24FIfYeajGXpTf1N" alt=""><figcaption></figcaption></figure>

<figure><img src="/files/GNkz6Oq5eO1PvkxQbIwv" alt=""><figcaption></figcaption></figure>

Now you would be able to use the newly created Safe on Cronos. If you send assets on other networks to this address, you will not be able to access them.

As an additional safety measure, please make sure that you check the addresses of the smart contracts that you are interacting with when you are asked to sign transactions.

## **Integrate the Safe with your dApp**

The Cronos Safe dashboard shows the Cronos address and balance of your newly created Safe.

<figure><img src="/files/bwUOTDir2puFzMvXM5iT" alt=""><figcaption></figcaption></figure>

Test a few small transfers on your end to verify that you are able to control the Safe wallet. You can now send more funds to this address, or assign this address as owner/admin of your dApp smart contracts as required. When you click on “New transaction” the Safe user interface allows you to send CRO, ERC20 tokens or NFTs. You can also call smart contract methods by declaring the ABI of your smart contract:

<figure><img src="/files/kPiWAk7hCdtio5TnqsWg" alt=""><figcaption></figcaption></figure>

<figure><img src="/files/KbrZ24X0HDYARSP4ImB5" alt=""><figcaption></figcaption></figure>

## **Cronos Safe smart contracts**

Cronos Safe smart contracts were deployed using a deterministic deployment proxy factory and create2 op\_code. The address of each smart contract is calculated based on the proxy address and the contract bytecode. As a result, Cronos Safe contract addresses are the same as on the other chains that have Gnosis Safe deployments, which means that their bytecodes are identical.

The addresses of deployed contracts can be found in Gnosis Safe deployments [repository](https://github.com/safe-global/safe-deployments/tree/main/src/assets/v1.3.0). The smart contracts deployed to Cronos mainnet have been verified on Cronoscan.

***

## Resources

Here are several additional resources related to Cronos Safe:

* [Cronos Safe Twitter account](https://twitter.com/cronossafe)
* [Gnosis Safe deployments repository](https://github.com/safe-global/safe-deployments/tree/main/src/assets/v1.3.0)


# Flair

Real-time and historical custom data indexing for any evm chain.

## 🔮 Flair <a href="#user-content--flair" id="user-content--flair"></a>

Real-time and historical custom data indexing for any evm chain.

[Flair](https://docs.flair.dev/) offers reusable **indexing primitives** (such as fault-tolerant RPC ingestors, custom processors, re-org aware database integrations) to make it easy to receive, transform, store and access your on-chain data.

<figure><img src="/files/JEKU4W8NUPlYDEcCmQlO" alt=""><figcaption></figcaption></figure>

### Why Flair? <a href="#user-content-why-flair" id="user-content-why-flair"></a>

Compared to other alternatives the main reasons why are:

* 🚀 Adopting **parallel and distributed processing** paradigm means high scalability and resiliency for your indexing stack. Instead of constrained sequential processing (e.g Subgraph).
* 🧩 Work out-of-box with **any EVM chain**, you plug-in an RPC and indexer starts.
* 🚄 Native **real-time stream processing** for certain data workload (such as aggregations, rollups) for things like total volume per pool.
* **☁️ Managed** cloud services avoid DevOps and irrelevant engineering costs for dApp developers.

{% embed url="<https://youtu.be/rUczQjRnDaM>" %}

#### Features <a href="#features" id="features"></a>

* ✅ Listen to **any EVM chain** with just an RPC URL.
  * Free managed RPC URLs for +8 popular chains already included.
  * Works with both websocket and https-only RPCs.
* ✅ Track and ingest **any contract** for **any event topic.**
  * Auto-track new contracts deployed from factory contracts.
* ✅ **Custom processor scripts** with Javascript runtime (with **Typescript** support)
  * Make external API or Webhook calls to third-party or your backend.
  * Get current or historical USD value of any ERC20 token amount of any contract address on any chain
  * Use any external NPM library.
* ✅ **Stream** any stored data to your destination database (Postgres, MognoDB, Kafka, Elasticsearch, Timescale, etc)

### Getting Started <a href="#user-content-getting-started" id="user-content-getting-started"></a>

1️⃣ Clone the [starter boilerplate](https://github.com/flair-sdk/starter-boilerplate) template and follow the instructions

```
git clone https://github.com/flair-sdk/starter-boilerplate.git
# ... follow instructions in README.md
```

{% hint style="info" %}
Boilerplate instructions will create a **new cluster**, generate **an API Key**, and set up a manifest.yml to index your **first contract** with **sample custom processor** scripts.

Learn more about the [structure of manifest.yml](https://docs.flair.dev/reference/manifest.yml).
{% endhint %}

2️⃣ Configure Cronos RPC nodes

Set a unique namespace, Cronos chainId and RPC endpoint in your config. Remember that you can add up to 10 RPC endpoints for resiliency.

```
{
  "cluster": "dev",
  "namespace": "my-awesome-cronos-indexing-dev",
  "indexers": [
    {
      "chainId": 25,
      "enabled": true,
      "ingestionFilterGroup": "default",
      "processingFilterGroup": "default",
      "sources": [
        # Highly-recommended to have at least 1 websocket endpoint
        "wss://XXX",
        # You can put multiple endpoints for failover
        "https://evm.cronos.com"
      ]
    }
  ]
}
```

3️⃣ Sync some historical data using [backfill command](https://docs.flair.dev/reference/backfilling). Remember that `enabled: true` flag in your `config` enabled your indexer to capture data in real-time already.

```
# backfill certain contracts or block ranges
pnpm flair backfill --chain 25 --address 0x6911dE03899e040745bdAC855333E294B927945D -d backward --max-blocks 10000

# backfill for a specific block number, if you have certain events you wanna test with
pnpm flair backfill --chain 25 -b 10329277

# backfill for the recent data in the last X minute
pnpm flair backfill --chain 25 --min-timestamp="30 mins ago" -d backward
```

4️⃣ [Query](https://docs.flair.dev/#getting-started) your custom indexed data.

5️⃣ Stream the data to your [own database](https://docs.flair.dev/reference/database#your-own-database).

### Examples <a href="#user-content-examples" id="user-content-examples"></a>

Explore real-world usage of Flair indexing primitives for various use-cases.

#### DeFi <a href="#user-content-defi" id="user-content-defi"></a>

* [Aggregate protocol fees in USD across multiple chains](https://github.com/flair-sdk/examples/tree/main/aggregate-protocol-fees-in-usd)
* [Calculate "Health Factor" of positions with contract factory tracking](https://github.com/flair-sdk/examples/tree/main/health-factor-with-factory-tracking)
* [Index Uniswap v2 swaps with USD price for all addresses](https://github.com/flair-sdk/examples/tree/main/uniswap-v2-events-from-all-contracts-with-usd-price)

#### NFT <a href="#user-content-nft" id="user-content-nft"></a>

* [Index ERC721 and ERC1155 NFTs on any EVM chain with an RPC URL](https://github.com/flair-sdk/examples/tree/main/erc721-and-erc1155-nft-indexing)

### Need help? <a href="#user-content-need-help" id="user-content-need-help"></a>

[Our engineers](https://docs.flair.dev/talk-to-an-engineer) are available to help you at any stage.


# Google Bigquery

Introduction

Google Cloud's Blockchain Analytics offers indexed blockchain data made available through [BigQuery](https://cloud.google.com/bigquery/docs) for easy analysis through SQL.

[Visit the Google Web3 portal](https://cloud.google.com/application/web3/discover) to retrieve all available datasets.

Blockchain Analytics offers you access to reliable data without the overhead of operating nodes or developing and maintaining an indexer. You can now query the full history of blocks, transactions, logs and receipts for Cronos.

By leveraging datasets in BigQuery, you can access blockchain data as easily as your internal data. By joining chain data with application data, you can get a complete picture of your users and your business.

### How are these datasets different from the existing public dataset? <a href="#how_are_these_datasets_different_from_the_existing_public_dataset" id="how_are_these_datasets_different_from_the_existing_public_dataset"></a>

Like the existing public blockchain datasets, customers are not charged for storage of the data, only for querying the data based on [BigQuery pricing](https://cloud.google.com/bigquery/pricing).

### Quickstart

1. [Go to Cronos dataset](https://console.cloud.google.com/marketplace/product/bigquery-public-data/blockchain-analytics-cronos-mainnet-us?_ga=2.57494312.344001667.1705466080-1066618470.1698651784&_gac=1.157920072.1705465933.CjwKCAiA75itBhA6EiwAkho9e8myknN2EhHAyk2F9H-eciNzXDhip1AUtZ6GiBaCllmrfHni5MMy3BoCKroQAvD_BwE) and click on one of the [samples](https://console.cloud.google.com/bigquery?sq=650023896125:07dd7c4b273c45639c8f38983b9b7de0).
2. You will get to the console and see the Cronos dataset on the left in the explorer

<figure><img src="/files/5pQWp2opo6SCArzmTCc7" alt=""><figcaption></figcaption></figure>

{% hint style="warning" %}
**Please note**\
BigQuery charges are based on the amount of data processed by your queries, so running the query may incur charges to your account. You can find the consumption estimate in the top right corner similar to the warning of "This query will process 65.73 MB when run."
{% endhint %}

3. If you see on the sample you should get the BigQuery SQL code to query:\
   [Which wallets had the most number of interactions with the Wrapped Cronos contract in the past 30 days?](https://console.cloud.google.com/bigquery?sq=650023896125:07dd7c4b273c45639c8f38983b9b7de0)

   Let's click the big `RUN` button.\
   (To save costs, replace the existing query with the one below, using a "1 day" interval instead of "30 days" in the BigQuery console).\
   \
   To start developing your own BigQuery SQL code, we refer to the following [syntax](https://cloud.google.com/bigquery/docs/reference/standard-sql/query-syntax).\
   For the Cronos data schema we refer to the [Google Cloud Cronos schema](https://cloud.google.com/blockchain-analytics/docs/schema#cronos_mainnet).

```sql
SELECT
 t.from_address AS address,
 CONCAT("https://cronoscan.com/address/", t.from_address) AS cronoscan_link,
 COUNT(t.from_address) AS num_transactions
FROM
 `bigquery-public-data.goog_blockchain_cronos_mainnet_us.transactions` AS t
INNER JOIN
 bigquery-public-data.goog_blockchain_cronos_mainnet_us.blocks AS b
ON
 b.block_hash = t.block_hash
WHERE
 t.to_address = LOWER("0x5C7F8A570d578ED84E63fdFA7b1eE72dEae1AE23") -- Wrapped CRO
AND
 b.block_timestamp > (CURRENT_TIMESTAMP() - INTERVAL 1 HOUR)
AND
 t.block_timestamp > (CURRENT_TIMESTAMP() - INTERVAL 1 HOUR)
GROUP BY
 t.from_address
ORDER BY
 COUNT(t.from_address) DESC
;
```

4. We can now query the results in the results tab below, further explore by exporting the results or visualizing in another tool such as Google sheets or Looker.

| Row | address                                    | cronoscan\_link                                                            | num\_transactions |
| --- | ------------------------------------------ | -------------------------------------------------------------------------- | ----------------- |
| 1   | 0x3270c9a4558774cc8f2a19708edc190366028b96 | <https://cronoscan.com/address/0x3270c9a4558774cc8f2a19708edc190366028b96> | 1                 |
| 2   | 0xbeaf1c7fed452be2dcfd2a8fe1fcd74b241acfc7 | <https://cronoscan.com/address/0x693fb96fdda3c382fde7f43a622209c3dd028b98> | 1                 |
| 3   | 0xddb162b31f562f1be0fa585d3ca6a55786e59af3 | <https://cronoscan.com/address/0x6614d26064d762922c7bc7a00337713d5169ae7c> | 1                 |

### Example queries

#### 1. Latest indexed block

```sql
SELECT
  MIN(block_number) AS `First block`,
  MAX(block_number) AS `Newest block`,
  COUNT(1) AS `Total number of blocks`
FROM
  `bigquery-public-data.goog_blockchain_cronos_mainnet_us.blocks` AS t
```

| Row | First block | Newest block | Total number of blocks |   |
| --- | ----------- | ------------ | ---------------------- | - |
| 1   | 1           | 12134627     | 12134627               |   |

#### 2. Daily **transactions in the last 10 days**

```sql
SELECT
  DATE(block_timestamp) AS date,
  COUNT(*) AS num_transactions
FROM
  `bigquery-public-data.goog_blockchain_cronos_mainnet_us.transactions`
WHERE
  block_timestamp >= TIMESTAMP_SUB(CURRENT_TIMESTAMP(), INTERVAL 10 DAY)
GROUP BY
  1
ORDER BY
  1 DESC;
```

<table><thead><tr><th width="188.33333333333331">Row</th><th width="260">date</th><th>num_transactions</th></tr></thead><tbody><tr><td>1</td><td>2024-01-18</td><td>10250</td></tr><tr><td>2</td><td>2024-01-17</td><td>47747</td></tr><tr><td>3</td><td>2024-01-16</td><td>49717</td></tr><tr><td>4</td><td>2024-01-15</td><td>47099</td></tr><tr><td>5</td><td>2024-01-14</td><td>47051</td></tr></tbody></table>

#### 3. View the blocks with largest CRO value transfer in the past hour

```sql
SELECT block_hash, SUM(value.bignumeric_value / 1000000000000000000) value_total
FROM `bigquery-public-data.goog_blockchain_cronos_mainnet_us.transactions` AS t
 JOIN `bigquery-public-data.goog_blockchain_cronos_mainnet_us.receipts` AS r USING (block_hash, transaction_hash)
WHERE status = 1
AND
 t.block_timestamp > (CURRENT_TIMESTAMP() - INTERVAL 1 HOUR)
AND
 r.block_timestamp > (CURRENT_TIMESTAMP() - INTERVAL 1 HOUR)
GROUP BY block_hash
ORDER BY value_total DESC
LIMIT 5
```

<table data-header-hidden><thead><tr><th width="93.33333333333331"></th><th width="366"></th><th></th></tr></thead><tbody><tr><td><strong>Row</strong></td><td><strong>block_hash</strong></td><td><strong>value_total</strong></td></tr><tr><td>1</td><td>0x7cac0bbf3909902a8670f962fbc9721391178850a2672d82b75c5a79b332a4f8</td><td>36836.840925000000000001</td></tr><tr><td>2</td><td>0xb53bd2c1a1d136e9b4dda4af47c488d278a0ee450adecd991cf13b187ce17a93</td><td>36729</td></tr><tr><td>3</td><td>0x28e0d8c31625ca43b565f1202b91e6cb20b709e25bea65185dcda7a3d176957d</td><td>33359.85627</td></tr><tr><td>4</td><td>0xfe8e732779101854cfaeed2404f7b53d3b64879069b5d8e8372f64d1cfe4a47f</td><td>22577.325273500000000015</td></tr><tr><td>5</td><td>0xd0b81821a57dc939dce80b29e9642f4a39e4bd2d346b5943a2532e69f191de57</td><td>22231.469422733370862931</td></tr></tbody></table>

#### 4. Top 10 wallets by number of transactions in the last hour

```sql
SELECT
 from_address,
 COUNT(*) AS num_transactions
FROM `bigquery-public-data.goog_blockchain_cronos_mainnet_us.transactions` as t
WHERE
t.block_timestamp > (CURRENT_TIMESTAMP() - INTERVAL 1 HOUR)
GROUP BY from_address
ORDER BY num_transactions DESC
LIMIT 10;
```

<table><thead><tr><th width="85.33333333333331">Row</th><th width="447">from_address</th><th>num_transactions</th></tr></thead><tbody><tr><td>1</td><td>0x25aa97464f38a1506a16160bbc03cfc6dd863da3</td><td>211</td></tr><tr><td>2</td><td>0x227f6757289a86c13eee2e91c2e6eb03f2ed11a6</td><td>136</td></tr><tr><td>3</td><td>0x95d49a8a2d69b2a2de4a00655d05ee39f9c41108</td><td>134</td></tr><tr><td>4</td><td>0x15d190dd8a1ed39cf5b790e2ffed1f365e9c865b</td><td>116</td></tr><tr><td>5</td><td>0xc9219731adfa70645be14cd5d30507266f2092c5</td><td>80</td></tr><tr><td>6</td><td>0x6614d26064d762922c7bc7a00337713d5169ae7c</td><td>65</td></tr><tr><td>7</td><td>0x34cfa46732692ab062f0453036cd5a4f5b771473</td><td>59</td></tr><tr><td>8</td><td>0x693fb96fdda3c382fde7f43a622209c3dd028b98</td><td>50</td></tr><tr><td>9</td><td>0x71f0cdb17454ad7eeb7e26242292fe0e0189645a</td><td>50</td></tr><tr><td>10</td><td>0x518a9d51ba8841046859a7722e75f92ffdadd0c4</td><td>37</td></tr></tbody></table>

#### 5. All USDT activity in the past hour

```sql
-- UDF for easier string manipulation.
CREATE TEMP FUNCTION ParseSubStr(hexStr STRING, startIndex INT64, endIndex INT64)
RETURNS STRING
LANGUAGE js
AS r"""
 if (hexStr.length < 1) {
   return hexStr;
 }
 return hexStr.substring(startIndex, endIndex);
""";
-- UDF to convert hex to decimal.
CREATE TEMP FUNCTION HexToDecimal(hexStr STRING)
RETURNS INT64
LANGUAGE js
AS r"""
 return parseInt(hexStr, 16);
""";

SELECT
 t.transaction_hash,
 t.from_address AS from_address,
 CONCAT("0x", ParseSubStr(l.topics[OFFSET(2)], 26, LENGTH(l.topics[OFFSET(2)]))) AS to_address,
 (HexToDecimal(l.data) / 1000000) AS usdt_transfer_amount
FROM
 `bigquery-public-data.goog_blockchain_cronos_mainnet_us.transactions` AS t
INNER JOIN
 `bigquery-public-data.goog_blockchain_cronos_mainnet_us.logs` AS l
ON
 l.transaction_hash = t.transaction_hash
WHERE
 t.to_address = LOWER("0x66e428c3f67a68878562e79a0234c1f83c208770") -- USDT
AND
 t.block_timestamp >= (CURRENT_TIMESTAMP() - INTERVAL 1 HOUR) 
AND
 l.block_timestamp >= (CURRENT_TIMESTAMP() - INTERVAL 1 HOUR) 
AND
 ARRAY_LENGTH(l.topics) > 0
AND
 -- Transfer(address indexed src, address indexed dst, uint wad)
 l.topics[OFFSET(0)] = LOWER("0xddf252ad1be2c89b69c2b068fc378daa952ba7f163c4a11628f55a4df523b3ef") -- Transfer
;
```

<table data-header-hidden><thead><tr><th width="87"></th><th width="262"></th><th width="231"></th><th width="233"></th><th></th></tr></thead><tbody><tr><td><strong>Row</strong></td><td><strong>transaction_hash</strong></td><td><strong>from_address</strong></td><td><strong>to_address</strong></td><td><strong>usdt_transfer_amount</strong></td></tr><tr><td>1</td><td>0xa3b78f79dee6970f3abc763b52f24a6d46aeba3e2370943f8eb2d68ff00d788a</td><td>0xc9219731adfa70645be14cd5d30507266f2092c5</td><td>0x539b85a6853e8740cd918009197c799d205787eb</td><td>309.82</td></tr><tr><td>2</td><td>0xc2abd163669a703ee850e432ac7c1a744b63bb1ff8e9b4cdee3ec2d95768fc75</td><td>0xc9219731adfa70645be14cd5d30507266f2092c5</td><td>0xc041126c1d07b72ee0f366e1fca339b4fed537cb</td><td>9.38</td></tr><tr><td>3</td><td>0x214cdef8263b4f8cc517d09673c126375c682b9b83d55c7ad889055c57533390</td><td>0xc9219731adfa70645be14cd5d30507266f2092c5</td><td>0xfca38e2882d8a549c660ccb17a8fe0463fab060e</td><td>11.82</td></tr><tr><td>4</td><td>0x40e24cc93abc746aa7c96482144772421412b9a733210644bab6ff6290996a1e</td><td>0xc9219731adfa70645be14cd5d30507266f2092c5</td><td>0x67b652172633b451a826aac6da7ed63693133fd2</td><td>11.26</td></tr><tr><td>5</td><td>0xb211dcb87ec8bbb115a4c6eae6c5a8861e04557b8b502e5a5858e70ae512183b</td><td>0x539b85a6853e8740cd918009197c799d205787eb</td><td>0x8995909dc0960fc9c75b6031d683124a4016825b</td><td>309.82</td></tr></tbody></table>

#### 6. For Dapps - Count the total number of unique transactions and users interaction with a specific smart contract on a given day

```sql
SELECT
 COUNT(DISTINCT transaction_hash) AS total_transactions,
 COUNT(DISTINCT from_address) AS unique_users,date(block_Timestamp) as date
FROM
`bigquery-public-data.goog_blockchain_cronos_mainnet_us.transactions`
WHERE
 to_address = '0x9fae23a2700feecd5b93e43fdbc03c76aa7c08a6'
 AND block_timestamp BETWEEN TIMESTAMP('2023-01-01 00:00:00') AND TIMESTAMP('2023-01-02 00:00:00')
GROUP BY
date
```

<table data-header-hidden><thead><tr><th width="146">Row</th><th></th><th></th><th></th></tr></thead><tbody><tr><td><strong>Row</strong></td><td><strong>total_transactions</strong></td><td><strong>unique_users</strong></td><td><strong>date</strong></td></tr><tr><td>1</td><td>288</td><td>131</td><td>2023-01-01</td></tr></tbody></table>

#### 7. \[DApp] Top 5 addresses with the highest number of transactions sent to the contract at a specific contract within the specified date range

```sql
SELECT
 from_address,
 COUNT(transaction_hash) AS transaction_count,
FROM
 `bigquery-public-data.goog_blockchain_cronos_mainnet_us.transactions`
WHERE
 to_address = '0x9fae23a2700feecd5b93e43fdbc03c76aa7c08a6'
 AND block_timestamp BETWEEN TIMESTAMP('2024-05-01 00:00:00 UTC') AND TIMESTAMP('2024-07-31 23:59:59 UTC')
GROUP BY
 from_address
ORDER BY
 transaction_count DESC
LIMIT 5
```

<table data-header-hidden><thead><tr><th width="137"></th><th width="417"></th><th></th></tr></thead><tbody><tr><td><strong>Row</strong></td><td><strong>from_address</strong></td><td><strong>transaction_count</strong></td></tr><tr><td>1</td><td>0x8c0ec5772bd92d55edd1325d022ec07e54ae1b0e</td><td>3515</td></tr><tr><td>2</td><td>0x849c34e2bcd65a861dfaefe415aafb2826c46b96</td><td>224</td></tr><tr><td>3</td><td>0xc9219731adfa70645be14cd5d30507266f2092c5</td><td>129</td></tr><tr><td>4</td><td>0xfe5b12a84019dcd8178a4c684885a8e685bef238</td><td>72</td></tr><tr><td>5</td><td>0x254b5fed7b453831e89e566a2e02678636e9f010</td><td>46</td></tr></tbody></table>


# AWS S3 - Cronos EVM Public Dataset

Cronos Public Dataset - AWS S3 Access Guide

The Cronos public blockchain dataset is hosted on Amazon S3 and is freely queryable via Athena, ClickHouse, Presto/Trino, DuckDB, or any engine that supports S3-backed Parquet or CSV data.

### Dataset Overview

**Base S3 path:**

```
s3://aws-public-blockchain/v1.1/cronos/evm/
```

**Public index page:** <https://aws-public-blockchain.s3.us-east-2.amazonaws.com/index.html#v1.1/cronos/evm/>

**Region:** `us-east-2` **Update frequency:** Nightly sync at **+2 UTC**

### Available Tables

| Table            | Description                                                                  |
| ---------------- | ---------------------------------------------------------------------------- |
| `blocks`         | One row per block — includes block metadata like hash, miner, and gas usage. |
| `transactions`   | One row per transaction — includes sender, recipient, gas, and value.        |
| `receipts`       | One row per transaction receipt — includes status, gas used, and logs count. |
| `logs`           | One row per emitted EVM log — includes address, topics, and data.            |
| `decoded_events` | Human-readable decoded events (topics and data mapped to ABI definitions).   |

### Common Prerequisites (Step 0)

Before you start, make sure you:

* Have internet access (dataset is **public**, no credentials needed).
* Use **region `us-east-2`** for AWS-based tools.
* Have a basic understanding of SQL (optional).

### Option 1: Amazon Athena (Console Method)

#### Step 0 — Create or Log In to AWS Account

Sign in at <https://aws.amazon.com/>.

#### Step 1 — Open Athena in the `us-east-2` Region

Go to <https://console.aws.amazon.com/athena/>.

#### Step 2 — Create a Database

```sql
CREATE DATABASE IF NOT EXISTS cronos;
USE cronos;
```

#### Step 3 — Create Tables

**blocks**

```sql
CREATE EXTERNAL TABLE IF NOT EXISTS blocks (
  block_hash          string,
  block_number        bigint,
  block_timestamp     bigint,
  parent_hash         string,
  gas_limit           bigint,
  gas_used            bigint,
  miner               string,
  size                bigint,
  extra_data          string,
  base_fee_per_gas    bigint,
  logs_bloom          string,
  state_root          string,
  transactions_root   string,
  receipts_root       string
)
PARTITIONED BY (date string)
STORED AS PARQUET
LOCATION 's3://aws-public-blockchain/v1.1/cronos/evm/'
TBLPROPERTIES (
  'parquet.compression'='SNAPPY',
  'projection.enabled'='true',
  'projection.date.type'='date',
  'projection.date.format'='yyyy-MM-dd',
  'projection.date.range'='2021-11-01,NOW',
  'storage.location.template'='s3://aws-public-blockchain/v1.1/cronos/evm/blocks/date=${date}/'
);
```

**transactions**

```sql
CREATE EXTERNAL TABLE IF NOT EXISTS transactions (
  block_hash                 string,
  block_number               bigint,
  block_timestamp            bigint,
  transaction_hash           string,
  transaction_index          int,
  nonce                      string,
  from_address               string,
  to_address                 string,
  value                      string,
  input                      string,
  gas                        string,
  gas_price                  string,
  transaction_type           tinyint
)
PARTITIONED BY (date string)
STORED AS PARQUET
LOCATION 's3://aws-public-blockchain/v1.1/cronos/evm/'
TBLPROPERTIES (
  'parquet.compression'='SNAPPY',
  'projection.enabled'='true',
  'projection.date.type'='date',
  'projection.date.format'='yyyy-MM-dd',
  'projection.date.range'='2021-11-08,NOW',
  'storage.location.template'='s3://aws-public-blockchain/v1.1/cronos/evm/transactions/date=${date}/'
);
```

**receipts**

```sql
CREATE EXTERNAL TABLE IF NOT EXISTS receipts (
  block_hash            string,
  block_number          bigint,
  block_timestamp       bigint,
  transaction_hash      string,
  transaction_index     int,
  from_address          string,
  to_address            string,
  contract_address      string,
  cumulative_gas_used   string,
  gas_used              string,
  effective_gas_price   string,
  status                tinyint
)
PARTITIONED BY (date string)
STORED AS PARQUET
LOCATION 's3://aws-public-blockchain/v1.1/cronos/evm/'
TBLPROPERTIES (
  'parquet.compression'='SNAPPY',
  'projection.enabled'='true',
  'projection.date.type'='date',
  'projection.date.format'='yyyy-MM-dd',
  'projection.date.range'='2021-11-08,NOW',
  'storage.location.template'='s3://aws-public-blockchain/v1.1/cronos/evm/receipts/date=${date}/'
);
```

**logs**

```sql
CREATE EXTERNAL TABLE IF NOT EXISTS logs (
  block_hash            string,
  block_number          bigint,
  block_timestamp       bigint,
  transaction_hash      string,
  transaction_index     int,
  log_index             int,
  address               string,
  data                  string,
  topics                array<string>,
  removed               boolean
)
PARTITIONED BY (date string)
STORED AS PARQUET
LOCATION 's3://aws-public-blockchain/v1.1/cronos/evm/'
TBLPROPERTIES (
  'parquet.compression'='SNAPPY',
  'projection.enabled'='true',
  'projection.date.type'='date',
  'projection.date.format'='yyyy-MM-dd',
  'projection.date.range'='2021-11-08,NOW',
  'storage.location.template'='s3://aws-public-blockchain/v1.1/cronos/evm/logs/date=${date}/'
);
```

**decoded\_events**

```sql
CREATE EXTERNAL TABLE IF NOT EXISTS decoded_events (
  block_hash            string,
  block_number          bigint,
  block_timestamp       bigint,
  transaction_hash      string,
  transaction_index     int,
  log_index             int,
  address               string,
  event_hash            string,
  event_signature       string,
  topics                array<string>,
  args                  array<struct<key:string,value:string>>,
  removed               boolean
)
PARTITIONED BY (date string)
STORED AS PARQUET
LOCATION 's3://aws-public-blockchain/v1.1/cronos/evm/'
TBLPROPERTIES (
  'parquet.compression'='SNAPPY',
  'projection.enabled'='true',
  'projection.date.type'='date',
  'projection.date.format'='yyyy-MM-dd',
  'projection.date.range'='2021-11-08,NOW',
  'storage.location.template'='s3://aws-public-blockchain/v1.1/cronos/evm/decoded-events/date=${date}/'
);
```

#### Step 4 — Query Examples

```sql
SELECT COUNT(*) FROM blocks;
SELECT * FROM transactions WHERE to_address IS NOT NULL LIMIT 10;
SELECT event_name, COUNT(*) FROM decoded_events GROUP BY 1 ORDER BY 2 DESC;
```

### Option 2: ClickHouse

#### Step 0 — Install ClickHouse

```sql
docker run -d \
  --name clickhouse-server \
  -p 8123:8123 -p 9000:9000 \
  -e CLICKHOUSE_PASSWORD='YOUR_PASSWORD' \
  clickhouse/clickhouse-server
```

or

```bash
brew install clickhouse
```

#### Step 1 — Connect

```bash
clickhouse-client
```

#### Step 2 — Query Public Parquet Data

```sql
SELECT block_number, miner
FROM s3(
  'https://aws-public-blockchain.s3.us-east-2.amazonaws.com/v1.1/cronos/evm/blocks/date=*/*.parquet',
  'Parquet'
)
WHERE block_number = 20000000
ORDER BY block_number DESC;
```

```sql
SELECT block_number, miner
FROM s3(
  'https://aws-public-blockchain.s3.us-east-2.amazonaws.com/v1.1/cronos/evm/blocks/date=2025-01-01/*.parquet',
  'Parquet'
)
ORDER BY block_number DESC
LIMIT 5;
```

Repeat similarly for other tables by adjusting the path:

* `/transactions/date=*/*.parquet`
* `/receipts/date=*/*.parquet`
* `/logs/date=*/*.parquet`
* `/decoded_events/date=*/*.parquet`

No credentials or setup required.

### Option 3: Presto / Trino

#### Step 0 — Install

Follow: <https://trino.io/docs/current/installation.html>

#### Step 1 — Configure Hive Connector

Edit `etc/catalog/hive.properties`:

```bash
connector.name=hive
hive.s3.path-style-access=true
hive.s3.region=us-east-2
```

#### Step 2 — Start Trino

```bash
bin/launcher start
```

#### Step 3 — Create Schema & Tables

**blocks**

```sql
CREATE SCHEMA IF NOT EXISTS cronos;
USE cronos;

CREATE TABLE blocks (
  block_hash VARCHAR,
  block_number BIGINT,
  block_timestamp BIGINT,
  parent_hash VARCHAR,
  gas_limit BIGINT,
  gas_used BIGINT,
  miner VARCHAR,
  size BIGINT,
  extra_data VARCHAR,
  base_fee_per_gas BIGINT,
  logs_bloom VARCHAR,
  state_root VARCHAR,
  transactions_root VARCHAR,
  receipts_root VARCHAR,
  date VARCHAR
)
WITH (
  external_location = 's3a://aws-public-blockchain/v1.1/cronos/evm/blocks/',
  format = 'PARQUET',
  partitioned_by = ARRAY['date']
);
```

**transactions**

```sql
CREATE TABLE transactions (
  block_hash VARCHAR,
  block_number BIGINT,
  block_timestamp BIGINT,
  transaction_hash VARCHAR,
  transaction_index INTEGER,
  nonce VARCHAR,
  from_address VARCHAR,
  to_address VARCHAR,
  value VARCHAR,
  input VARCHAR,
  gas VARCHAR,
  gas_price VARCHAR,
  transaction_type TINYINT,
  date VARCHAR
)
WITH (
  external_location = 's3a://aws-public-blockchain/v1.1/cronos/evm/transactions/',
  format = 'PARQUET',
  partitioned_by = ARRAY['date']
);
```

**receipts**

```sql
CREATE TABLE receipts (
  block_hash VARCHAR,
  block_number BIGINT,
  block_timestamp BIGINT,
  transaction_hash VARCHAR,
  transaction_index INTEGER,
  from_address VARCHAR,
  to_address VARCHAR,
  contract_address VARCHAR,
  cumulative_gas_used VARCHAR,
  gas_used VARCHAR,
  effective_gas_price VARCHAR,
  status TINYINT,
  date VARCHAR
)
WITH (
  external_location = 's3a://aws-public-blockchain/v1.1/cronos/evm/receipts/',
  format = 'PARQUET',
  partitioned_by = ARRAY['date']
);
```

**logs**

```sql
CREATE TABLE logs (
  block_hash VARCHAR,
  block_number BIGINT,
  block_timestamp BIGINT,
  transaction_hash VARCHAR,
  transaction_index INTEGER,
  log_index INTEGER,
  address VARCHAR,
  data VARCHAR,
  topics ARRAY<VARCHAR>,
  removed BOOLEAN,
  date VARCHAR
)
WITH (
  external_location = 's3a://aws-public-blockchain/v1.1/cronos/evm/logs/',
  format = 'PARQUET',
  partitioned_by = ARRAY['date']
);
```

**decoded events**

```sql
CREATE TABLE decoded_events (
  block_hash VARCHAR,
  block_number BIGINT,
  block_timestamp BIGINT,
  transaction_hash VARCHAR,
  transaction_index INTEGER,
  log_index INTEGER,
  address VARCHAR,
  event_hash VARCHAR,
  event_signature VARCHAR,
  topics ARRAY<VARCHAR>,
  args ARRAY<ROW(key VARCHAR, value VARCHAR)>,
  removed BOOLEAN,
  date VARCHAR
)
WITH (
  external_location = 's3a://aws-public-blockchain/v1.1/cronos/evm/decoded-events/',
  format = 'PARQUET',
  partitioned_by = ARRAY['date']
);
```

#### Step 4 — Query

```sql
SELECT COUNT(*) FROM blocks;
SELECT * FROM transactions WHERE date = '2025-10-08' LIMIT 5;
SELECT block_number, COUNT(*) FROM receipts GROUP BY block_number ORDER BY block_number DESC LIMIT 10;
```

### Option 4: DuckDB (Local)

#### Step 0 — Install

```python
pip install duckdb
```

#### Step 1 — Run Query (CLI)

```bash
duckdb -c "
SELECT block_number, miner
FROM read_parquet('https://aws-public-blockchain.s3.us-east-2.amazonaws.com/v1.1/cronos/evm/blocks/date=2025-01-01/*.parquet')
ORDER BY block_number DESC
LIMIT 5;
"
```

#### Step 2 — Python Example

```python
import duckdb
con = duckdb.connect()
con.sql("""
  SELECT block_number, miner
  FROM read_parquet('https://aws-public-blockchain.s3.us-east-2.amazonaws.com/v1.1/cronos/evm/blocks/date=2025-01-01/*.parquet')
  ORDER BY block_number DESC
  LIMIT 5;
""").show()
```

Works out-of-the-box — no AWS setup needed.

### Option 5: Other Tools

| Tool                  | Connection Example                                                                       |
| --------------------- | ---------------------------------------------------------------------------------------- |
| **Spark**             | `spark.read.parquet("s3a://aws-public-blockchain/v1.1/cronos/evm/transactions/date=*/")` |
| **Dask / Polars**     | `dd.read_parquet("https://.../*.parquet")` or `pl.scan_parquet()`                        |
| **AWS Glue**          | Create crawler with `s3://aws-public-blockchain/v1.1/cronos/evm/`                        |
| **Redshift Spectrum** | Create external schema and map Parquet tables to S3 paths                                |

### Summary

| Engine             | Auth Needed | Works With     | Notes                     |
| ------------------ | ----------- | -------------- | ------------------------- |
| **Athena**         | No          | AWS Console    | Easiest for browser users |
| **ClickHouse**     | No          | Local or Cloud | Fast columnar queries     |
| **Presto / Trino** | No          | Cluster setup  | Integrates with Hive      |
| **DuckDB**         | No          | Local, Python  | Lightweight and portable  |

## Data Model — Cronos Public Dataset

The Cronos dataset consists of five interrelated tables:

```
blocks
│
├── transactions
│     └── receipts
│          └── logs
│               └── decoded_events
```

Each layer represents a deeper level of blockchain execution — from the block level down to decoded smart contract events.

### Relationship Diagram (Text-Based)

```
+----------------------+
|       blocks         |
|----------------------|
| block_number (PK)    |
| block_hash           |
| block_timestamp      |
+----------------------+
           │
           │ 1 : N
           ▼
+----------------------+
|    transactions      |
|----------------------|
| transaction_hash (PK)|
| block_number (FK)    |
| from_address         |
| to_address           |
+----------------------+
           │
           │ 1 : 1
           ▼
+----------------------+
|      receipts        |
|----------------------|
| transaction_hash (PK)|
| block_number (FK)    |
| status               |
| gas_used             |
+----------------------+
           │
           │ 1 : N
           ▼
+----------------------+
|        logs          |
|----------------------|
| transaction_hash (FK)|
| log_index (PK)       |
| address              |
| topics               |
| data                 |
+----------------------+
           │
           │ 1 : 1
           ▼
+----------------------+
|   decoded_events     |
|----------------------|
| transaction_hash (FK)|
| log_index (FK)       |
| event_signature      |
| args (key/value)     |
+----------------------+

```

### Key Relationships

| Parent         | Child                                  | Join Columns                    | Relationship                      |
| -------------- | -------------------------------------- | ------------------------------- | --------------------------------- |
| `blocks`       | `transactions`                         | `block_number`                  | One block has many transactions   |
| `transactions` | `receipts`                             | `transaction_hash`              | One-to-one                        |
| `transactions` | `logs`                                 | `transaction_hash`              | One-to-many                       |
| `logs`         | `decoded_events`                       | `transaction_hash`, `log_index` | One-to-one                        |
| `blocks`       | `receipts` / `logs` / `decoded_events` | `block_number`                  | Cross-layer link for time context |


# Moralis

## **Introduction**

Moralis helps leading cryptocurrency and blockchain companies to grow and innovate faster with high-quality and insightful data tools on Cronos and other major EVM chains. By using Moralis, you can focus on growing your product and your business while minimizing the time and money you spend on data infrastructure.

Moralis offers APIs and real-time data Streams for NFT data, token data, wallet data, raw blockchain data, as well as market insights and discovery data.

## Getting Started

In order to use any of the Moralis APIs, you need to [register](https://admin.moralis.io/register?utm_source=cronos-docs) for a free Moralis account and get your API key.

You will find your API key under your account settings.

## Moralis APIs

Below you'll find details about the different APIs that Moralis offers and some examples of the endpoints available.

### NFT API

The Moralis [NFT API](https://moralis.io/api/nft/) can be used to quickly build NFT functionality in your wallet, portfolio application or to spin up an NFT marketplace. You can use it to fetch NFTs owned by particular wallets, or get NFT transfers and sales, or track prices of recent NFT sales.

The NFT API automatically indexes all NFTs and metadata across all available chains.

#### Endpoints

* [Get Multiple NFTs](https://docs.moralis.io/web3-data-api/evm/reference/get-multiple-nfts)
* [Get NFTs by Wallet](https://docs.moralis.io/web3-data-api/evm/reference/get-wallet-nfts)
* [Get NFTs by Contract](https://docs.moralis.io/web3-data-api/evm/reference/get-contract-nfts)
* [Get NFT Metadata](https://docs.moralis.io/web3-data-api/evm/reference/get-nft-metadata)
* [Get NFT Transfers by Wallet](https://docs.moralis.io/web3-data-api/evm/reference/get-wallet-nft-transfers)
* [Get NFT Transfers by Contract](https://docs.moralis.io/web3-data-api/evm/reference/get-nft-contract-transfers)
* [Get NFT Transfers in a block](https://docs.moralis.io/web3-data-api/evm/reference/get-nft-transfers-by-block)
* [Get NFT Transfers in a block range](https://docs.moralis.io/web3-data-api/evm/reference/get-nft-transfers-from-to-block)
* [Get NFT Transfer by Token ID](https://docs.moralis.io/web3-data-api/evm/reference/get-nft-transfers)
* [Get NFT Collections by Wallet](https://docs.moralis.io/web3-data-api/evm/reference/get-wallet-nft-collections)
* [Get NFT Collection Metadata](https://docs.moralis.io/web3-data-api/evm/reference/get-nft-contract-metadata)
* [Get NFT Owners by Contract](https://docs.moralis.io/web3-data-api/evm/reference/get-nft-owners)
* [Get NFT Owners by Token ID](https://docs.moralis.io/web3-data-api/evm/reference/get-nft-token-id-owners)
* [Get NFT Trades by Marketplace](https://docs.moralis.io/web3-data-api/evm/reference/get-nft-trades)
* [Get NFT Lowest Price](https://docs.moralis.io/web3-data-api/evm/reference/get-nft-lowest-price)
* [Get NFT Stats](https://docs.moralis.io/web3-data-api/evm/reference/get-nft-token-stats)
* [Get NFT Collection Stats](https://docs.moralis.io/web3-data-api/evm/reference/get-nft-collection-stats)

#### Example call

Below is an example where we call the Get NFTs by Wallet endpoint ( `{wallet_address}/nft`) with the Moralis JS SDK.

```js
  const response = await Moralis.EvmApi.nft.getWalletNFTs({
    "chain": "0x1",
    "format": "decimal",
    "mediaItems": false,
    "address": "0x1f9090aaE28b8a3dCeaDf281B0F12828e676c326"
  });
```

```json
{
  "page": 1,
  "page_size": 100,
  "cursor": null,
  "result": [
    {
      "token_address": "0xbd3531da5cf5857e7cfaa92426877b022e612cf8",
      "token_id": "8165",
      "owner_of": "0x3e18e3987b3b73f4e7cb80e2b25776df7a30bb8b",
      "block_number": "18333219",
      "block_number_minted": "12878275",
      "token_hash": "f7d53f87dc31367e148b2ec957cb585b",
      "amount": "1",
      "possible_spam": false,
      "contract_type": "ERC721",
      "name": "PudgyPenguins",
      "symbol": "PPG",
      "token_uri": "https://ipfs.moralis.io:2053/ipfs/bafybeibc5sgo2plmjkq2tzmhrn54bk3crhnc23zd2msg4ea7a4pxrkgfna/8165",
      "metadata": "{\"attributes\":[{\"trait_type\":\"Background\",\"value\":\"Tangerine\"},{\"trait_type\":\"Skin\",\"value\":\"Normal\"},{\"trait_type\":\"Body\",\"value\":\"Kimono Orange\"},{\"trait_type\":\"Face\",\"value\":\"Squad\"},{\"trait_type\":\"Head\",\"value\":\"Cowboy Hat\"}],\"description\":\"A collection 8888 Cute Chubby Pudgy Penquins sliding around on the freezing ETH blockchain.\",\"image\":\"ipfs://QmNf1UsmdGaMbpatQ6toXSkzDpizaGmC9zfunCyoz1enD5/penguin/8165.png\",\"name\":\"Pudgy Penguin #8165\"}",
      "last_token_uri_sync": "2023-09-26T22:39:34.136Z",
      "last_metadata_sync": "2023-10-13T10:22:08.029Z",
      "minter_address": "0xbff79922fcbf93f9c30abb22322b271460c6bebb",
      "normalized_metadata": {
        "name": "Pudgy Penguin #8165",
        "description": "A collection 8888 Cute Chubby Pudgy Penquins sliding around on the freezing ETH blockchain.",
        "animation_url": null,
        "external_link": null,
        "image": "ipfs://QmNf1UsmdGaMbpatQ6toXSkzDpizaGmC9zfunCyoz1enD5/penguin/8165.png",
        "attributes": [
          {
            "trait_type": "Background",
            "value": "Tangerine",
            "display_type": null,
            "max_value": null,
            "trait_count": 0,
            "order": null
          },
          {
            "trait_type": "Skin",
            "value": "Normal",
            "display_type": null,
            "max_value": null,
            "trait_count": 0,
            "order": null
          },
          {
            "trait_type": "Body",
            "value": "Kimono Orange",
            "display_type": null,
            "max_value": null,
            "trait_count": 0,
            "order": null
          },
          {
            "trait_type": "Face",
            "value": "Squad",
            "display_type": null,
            "max_value": null,
            "trait_count": 0,
            "order": null
          },
          {
            "trait_type": "Head",
            "value": "Cowboy Hat",
            "display_type": null,
            "max_value": null,
            "trait_count": 0,
            "order": null
          }
        ]
      },
      "media": {
        "mimetype": "image/png",
        "parent_hash": "0x9b326b3d983984f6cfc60a88d16ed3ed5774cc12f230c753509cf2e34485685d",
        "status": "success",
        "updatedAt": "2023-10-13T10:22:07.684Z",
        "media_collection": {
          "low": {
            "height": 100,
            "width": 100,
            "url": "https://nft-preview-media.s3.us-east-1.amazonaws.com/evm/0x1/0xbd3531da5cf5857e7cfaa92426877b022e612cf8/0x96a9919f09d1df24d87658f4a8962c297587e2d4aab98e551081023b86c9d463/low.png"
          },
          "medium": {
            "height": 250,
            "width": 250,
            "url": "https://nft-preview-media.s3.us-east-1.amazonaws.com/evm/0x1/0xbd3531da5cf5857e7cfaa92426877b022e612cf8/0x96a9919f09d1df24d87658f4a8962c297587e2d4aab98e551081023b86c9d463/medium.png"
          },
          "high": {
            "height": 500,
            "width": 500,
            "url": "https://nft-preview-media.s3.us-east-1.amazonaws.com/evm/0x1/0xbd3531da5cf5857e7cfaa92426877b022e612cf8/0x96a9919f09d1df24d87658f4a8962c297587e2d4aab98e551081023b86c9d463/high.png"
          }
        },
        "original_media_url": "ipfs://QmNf1UsmdGaMbpatQ6toXSkzDpizaGmC9zfunCyoz1enD5/penguin/8165.png"
      },
      "verified_collection": true
    }
  ],
  "status": "SYNCED"
}
```

### Token API

The Moralis [Token API](https://moralis.io/api/token/?utm_source=cronos-docs) has all the information you need about ERC20 tokens, including ownership, transfers and token prices. Use it to add ERC20 support in your wallet or enrich your token pages with in-depth token metadata.

The Token API includes token logos and spam detection.

#### Endpoints

* [Get ERC20 Token Balance By Wallet](https://docs.moralis.com/web3-data-api/solana/reference/get-spl-token-balances?network=mainnet\&address=EJpLyTeE8XHG9CeREeHd6pr6hNhaRnTRJx4Z5DPhEJJ6)
* [Get ERC20 Metadata by Contract](https://docs.moralis.io/web3-data-api/evm/reference/get-token-metadata)
* [Get ERC20 Metadata by Symbol](https://docs.moralis.io/web3-data-api/evm/reference/get-token-metadata-by-symbol)
* [Get ERC20 Token Prices](https://docs.moralis.io/web3-data-api/evm/reference/get-multiple-token-prices)
* [Get ERC20 Token Allowance](https://docs.moralis.io/web3-data-api/evm/reference/get-token-allowance)
* [Get ERC20 Token Transfers By Wallet](https://docs.moralis.io/web3-data-api/evm/reference/get-wallet-token-transfers)
* [Get ERC20 Token Transfers By Contract](https://docs.moralis.io/web3-data-api/evm/reference/get-token-transfers)
* [Get DEX Token Pair Reserves](https://docs.moralis.io/web3-data-api/evm/reference/get-pair-reserves)
* [Get DEX Token Pair Address](https://docs.moralis.io/web3-data-api/evm/reference/get-pair-address)
* [Get ERC20 Token Stats](https://docs.moralis.io/web3-data-api/evm/reference/get-token-stats)

#### Example call

```js
  const response = await Moralis.EvmApi.token.getWalletTokenBalances({
    "chain": "0x1",
    "address": "0x1f9090aaE28b8a3dCeaDf281B0F12828e676c326"
  });
```

```json
{
  "token_address": "0x2d30ca6f024dbc1307ac8a1a44ca27de6f797ec22ef20627a1307243b0ab7d09",
  "name": "Kylin Network",
  "symbol": "KYL",
  "logo": "https://cdn.moralis.io/eth/0x67b6d479c7bb412c54e03dca8e1bc6740ce6b99c.png",
  "thumbnail": "https://cdn.moralis.io/eth/0x67b6d479c7bb412c54e03dca8e1bc6740ce6b99c_thumb.png",
  "decimals": "",
  "balance": "123456789",
  "possible_spam": false,
  "verified_collection": false
}
```

### Market Data API

The Moralis [Market Data API](https://moralis.io/api/market-data/?utm_source=cronos-docs) helps you retrieve top coins and NFT collection based on market cap and trading volume. You can use it to build market discovery pages, coin listing pages or displaying winners and losers.

#### Endpoints

* [Get the top ERC20 tokens by market cap](https://docs.moralis.com/web3-data-api/evm/how-to-get-the-top-erc20-tokens-by-market-cap)
* [Get the top ERC20 tokens by price change](https://docs.moralis.com/web3-data-api/evm/how-to-get-the-top-erc20-tokens-by-price-change)
* [Get the top NFT collections by market cap](https://docs.moralis.com/web3-data-api/evm/how-to-get-the-top-nft-collections-by-market-cap)
* [Get the top NFT collections by trading volume](https://docs.moralis.com/web3-data-api/evm/how-to-get-the-top-nft-collections-by-trading-volume)

#### Example call

```js
const response = await Moralis.EvmApi.marketData.getTopERC20TokensByMarketCap({});
```

```json
[
  {
    "rank": "1",
    "token_name": "Wrapped Ether",
    "token_symbol": "WETH",
    "token_logo": "https://cdn.moralis.io/eth/0xc02aaa39b223fe8d0a0e5c4f27ead9083c756cc2.png",
    "token_decimals": "18",
    "contract_address": "0xc02aaa39b223fe8d0a0e5c4f27ead9083c756cc2",
    "price_usd": "0.0285",
    "price_24h_percent_change": "0.0285",
    "price_7d_percent_change": "0.0285",
    "market_cap_usd": "0.0285"
  }
]
```

### Blockchain API

Using the Moralis [Blockchain API](https://moralis.io/api/block/?utm_source=cronos-docs) you can fetch basic data about blocks, transactions, logs and events. The Blockchain API also supports transaction decoding, which automtically decodes the transaction logs for you, without submitting any ABIs.

#### Endpoints

* [Get Block by Block number or Block Hash](https://docs.moralis.io/web3-data-api/evm/reference/get-block)
* [Get Block by Date](https://docs.moralis.io/web3-data-api/evm/reference/get-date-to-block)
* [Get Transaction by Transaction Hash](https://docs.moralis.io/web3-data-api/evm/reference/get-transaction)
* [Get Native Transactions by Wallet](https://docs.moralis.io/web3-data-api/evm/reference/get-wallet-transactions)
* [Get Decoded Transactions by Transaction Hash](https://docs.moralis.io/web3-data-api/evm/reference/get-decoded-transaction)
* [Get Decoded Transactions by Wallet](https://docs.moralis.io/web3-data-api/evm/reference/get-decoded-wallet-transaction)
* [Get Internal Transactions by Transaction Hash](https://docs.moralis.io/web3-data-api/evm/reference/get-internal-transactions)
* [Get Logs by Contract](https://docs.moralis.io/web3-data-api/evm/reference/get-contract-logs)
* [Get Events by Contract](https://docs.moralis.io/web3-data-api/evm/reference/get-contract-events)
* [Get Block Stats](https://docs.moralis.io/web3-data-api/evm/reference/get-block-stats)

#### Example call

```js
  const response = await Moralis.EvmApi.transaction.getTransactionVerbose({
    "chain": "0x1",
    "transactionHash": "0x012b9b98e21664117ec0b499d726a39f492ac8bd402cca8bebcbd163b9f75760"
  });
```

```json
{
  "hash": "0x1ed85b3757a6d31d01a4d6677fc52fd3911d649a0af21fe5ca3f886b153773ed",
  "nonce": "1848059",
  "transaction_index": "108",
  "from_address": "0x267be1c1d684f78cb4f6a176c4911b741e4ffdc0",
  "to_address": "0x003dde3494f30d861d063232c6a8c04394b686ff",
  "from_address_label": "Binance 1",
  "to_address_label": "Binance 2",
  "value": "115580000000000000",
  "gas": "30000",
  "gas_price": "52500000000",
  "input": "0x",
  "receipt_cumulative_gas_used": "4923073",
  "receipt_gas_used": "21000",
  "receipt_status": "1",
  "block_timestamp": "2021-05-07T11:08:35.000Z",
  "block_number": "12386788",
  "block_hash": "0x9b559aef7ea858608c2e554246fe4a24287e7aeeb976848df2b9a2531f4b9171",
  "logs": {
    "log_index": "273",
    "transaction_hash": "0xdd9006489e46670e0e85d1fb88823099e7f596b08aeaac023e9da0851f26fdd5",
    "transaction_index": "204",
    "address": "0x3105d328c66d8d55092358cf595d54608178e9b5",
    "data": "0x00000000000000000000000000000000000000000000000de05239bccd4d537400000000000000000000000000024dbc80a9f80e3d5fc0a0ee30e2693781a443",
    "topic0": "0x2caecd17d02f56fa897705dcc740da2d237c373f70686f4e0d9bd3bf0400ea7a",
    "topic1": "0x000000000000000000000000031002d15b0d0cd7c9129d6f644446368deae391",
    "topic2": "0x000000000000000000000000d25943be09f968ba740e0782a34e710100defae9",
    "block_timestamp": "2021-05-07T11:08:35.000Z",
    "block_number": "12386788",
    "block_hash": "0x9b559aef7ea858608c2e554246fe4a24287e7aeeb976848df2b9a2531f4b9171",
    "decoded_event": {
      "signature": "Transfer(address,address,uint256)",
      "label": "Transfer",
      "type": "event",
      "params": [
        {
          "name": "from",
          "value": "0x26C5011483Add49801eA8E3Ee354fE013895aCe5",
          "type": "address"
        }
      ]
    }
  },
  "decoded_call": {
    "signature": "transfer(address,uint256)",
    "label": "transfer",
    "type": "function",
    "params": [
      {
        "name": "_to",
        "value": "0x1CA455A55108874A95C84620dDA2566c54D17953",
        "type": "address"
      }
    ]
  },
  "internal_transactions": {
    "transaction_hash": "0x057Ec652A4F150f7FF94f089A38008f49a0DF88e",
    "block_number": 12526958,
    "block_hash": "0x0372c302e3c52e8f2e15d155e2c545e6d802e479236564af052759253b20fd86",
    "type": "CALL",
    "from": "0xd4a3BebD824189481FC45363602b83C9c7e9cbDf",
    "to": "0xa71db868318f0a0bae9411347cd4a6fa23d8d4ef",
    "value": "650000000000000000",
    "gas": "6721975",
    "gas_used": "6721975",
    "input": "0x",
    "output": "0x"
  }
}
```

## Moralis Streams

[Moralis Streams](https://moralis.io/streams/?utm_source=cronos-docs) is an API for real-time blockchain data, sent over webhooks. Using Streams you can avoid polling of other APIs and instead only be notified when something has actually happened. You can configure the Stream to notify you only when specific things happen on-chain, like transactions, transfers, mints, or any other custom event. Streams support custom events and customer filters.

Streams can be created either in the [Streams User Interface](https://admin.moralis.io/streams) once you're signed into the Moralis Admin Panel, or through the [API](https://docs.moralis.io/streams-api/evm).

### Moralis Streams Guides

* [How to listen to all ERC20 transfers over certain amount sent by specific address](https://docs.moralis.io/streams-api/evm/how-to-listen-to-all-erc20-contract-transfers-over-certain-amount-sent-by-specific-address)
* [How to listen all NFT transfers](https://docs.moralis.io/streams-api/evm/how-to-listen-all-nft-transfers)
* [How to monitor ENS Domain Registrations](https://docs.moralis.io/streams-api/evm/how-to-monitor-ens-domain-registrations)
* [How to monitor for ERC20 token burns or mints](https://docs.moralis.io/streams-api/evm/how-to-monitor-for-erc20-token-burns-or-mints)
* [How to Monitor Crypto Wallet Addresses with Streams](https://www.youtube.com/watch?v=pnmVhxdUBao)

## **Other Resources**

Here are additional resources to help you get started with the Moralis:

* [Moralis Documentation](https://docs.moralis.io)
* [Moralis Account Login](https://admin.moralis.io/login)
* [Moralis Tutorials](https://www.youtube.com/@MoralisWeb3)
* [Tutorial: Build a DEX with Moralis](https://www.youtube.com/watch?v=t8U7GRrlYW8)
* [Tutorial: Get Any Token Price with Moralis](https://www.youtube.com/watch?v=laDsODyofVU)


# Pyth

## Overview

[Pyth Network](https://pyth.network/) is one of the largest first-party Oracle networks, delivering real-time data across [a vast number of chains](https://docs.pyth.network/price-feeds/contract-addresses). The network comprises some of the world's [largest exchanges, market makers, and financial services providers](https://pyth.network/publishers). These publish proprietary data on-chain for aggregation and distribution to smart contract applications.

Pyth offers two oracle products: [Pyth Core](https://docs.pyth.network/price-feeds/core) for standard price feeds, and [Pyth Pro](https://docs.pyth.network/price-feeds/pro) for more advanced data needs. Only [Pyth Pro](https://docs.pyth.network/price-feeds/pro) is supported in Cronos network.

## Using Pyth as a PULL Oracle

[Pyth Pro](https://docs.pyth.network/price-feeds/pro) follow a [pull oracle model](https://docs.pyth.network/price-feeds/core/pull-updates): rather than an oracle operator periodically updating prices on-chain, anyone can fetch the latest signed price data from an off-chain service and submit it on-chain as part of their transaction. The smart contract then verifies and reads the price within that same transaction.

### Pyth Pro Quick Guide

[Pyth Pro](https://docs.pyth.network/price-feeds/pro) (formerly Pyth Lazer) is a high-performance, enterprise-grade, low-latency service that delivers customizable real-time price data from first-party publishers, with configurable update schedules.

#### Example

**Backend: Fetch Price Updates**

The following example shows how to subscribe to Pyth Pro price updates using the [`@pythnetwork/pyth-lazer-sdk`](https://www.npmjs.com/package/@pythnetwork/pyth-lazer-sdk). The returned payload includes a verified binary that can be submitted on-chain.

* **Config API Key**

  Request a Pyth Pro API key by following the steps on the [Acquire an API key](https://docs.pyth.network/price-feeds/pro/acquire-api-key) page. Once obtained, set it as an environment variable:

  ```shellscript
  export PYTH_PRO_API_KEY=your_api_key_here
  ```
* **Install the SDK**

  ```shellscript
  npm install --save @pythnetwork/pyth-lazer-sdk
  ```
* **Subscribe to price updates**

  ```javascript
  import { PythLazerClient } from "@pythnetwork/pyth-lazer-sdk";

  // Create a client connected to all three endpoints for redundancy, a single endpoint may go down briefly during deployments.
  const client = await PythLazerClient.create({
    urls: [
      "wss://pyth-lazer-0.dourolabs.app/v1/stream",
      "wss://pyth-lazer-1.dourolabs.app/v1/stream",
      "wss://pyth-lazer-2.dourolabs.app/v1/stream",
    ],
    token: process.env.PYTH_PRO_API_KEY,
  });

  // The message listener is called every time a new message is received.
  client.addMessageListener((message) => {
    // Add your logic to consume messages here
    console.log("got message:", message);
  });

  // Subscribe to price feeds (price feed IDs from Pyth Pro price feed list)
  client.subscribe({
    type: "subscribe",
    subscriptionId: 1,
    priceFeedIds: [1, 2],
    properties: ["price", "feedUpdateTimestamp"],
    formats: ["evm"],
    channel: "fixed_rate@200ms",
    ignoreInvalidFeeds: true,
  });
  ```

Refer to the [Pyth Pro documentation](https://docs.pyth.network/price-feeds/pro/subscribe-to-prices) for the full list of subscription parameters, channels. See the [Payload Reference](https://docs.pyth.network/price-feeds/pro/payload-reference) for details on the payload structure, and the [Price Feed IDs](https://docs.pyth.network/price-feeds/pro/price-feed-ids) page for supported feeds.

**Smart Contract: Verify and Parse Price Data**

Here is a working example of a contract that verifies and parses a Pyth Pro price update. You have to pass [Pyth's contract address](https://docs.pyth.network/price-feeds/pro/contract-addresses) for Cronos EVM mainnet/testnet.

```solidity
// SPDX-License-Identifier: Apache-2.0
pragma solidity ^0.8.13;

import {console} from "forge-std/console.sol";
import {PythLazer} from "pyth-lazer/PythLazer.sol";
import {PythLazerLib} from "pyth-lazer/PythLazerLib.sol";
import {PythLazerStructs} from "pyth-lazer/PythLazerStructs.sol";

/// @title ExampleReceiver
/// @notice Example contract demonstrating how to parse and log Pyth Lazer price updates
/// @dev This contract shows how to use PythLazerLib helper methods (hasX/getX pattern)
///      to safely extract price feed properties from Pyth Lazer updates.
contract ExampleReceiver {
    PythLazer public pythLazer;

    constructor(address pythLazerAddress) {
        pythLazer = PythLazer(pythLazerAddress);
    }

    /// @notice Parse and log price data from a Pyth Lazer update
    /// @dev Demonstrates the use of PythLazerLib helper methods to safely extract feed properties
    /// @param update The raw update bytes from Pyth Lazer (includes signature and payload)
    function updatePrice(bytes calldata update) public payable {
        // Step 1: Pay the verification fee and verify the update signature
        uint256 verificationFee = pythLazer.verification_fee();
        require(msg.value >= verificationFee, "Insufficient fee provided");

        (bytes memory payload,) = pythLazer.verifyUpdate{value: verificationFee}(update);

        // Refund excess payment
        if (msg.value > verificationFee) {
            (bool success,) = payable(msg.sender).call{value: msg.value - verificationFee}("");
            require(success, "Refund failed");
        }

        // Step 2: Parse the payload using the helper function (converts memory to calldata)
        PythLazerStructs.Update memory parsedUpdate = this.parsePayload(payload);

        console.log("Timestamp: %d", parsedUpdate.timestamp);
        console.log("Channel: %d", uint8(parsedUpdate.channel));
        console.log("Number of feeds: %d", parsedUpdate.feeds.length);

        // Step 3: Iterate through all feeds and log their properties
        for (uint256 i = 0; i < parsedUpdate.feeds.length; i++) {
            PythLazerStructs.Feed memory feed = parsedUpdate.feeds[i];

            // Get the feed ID
            uint32 feedId = PythLazerLib.getFeedId(feed);
            console.log("--- Feed ID: %d ---", feedId);

            // Use hasPrice/getPrice pattern to safely extract price
            if (PythLazerLib.hasPrice(feed)) {
                int64 price = PythLazerLib.getPrice(feed);
                console.log("Price:", int256(price));
            }

            // Use hasExponent/getExponent pattern to get decimal places
            if (PythLazerLib.hasExponent(feed)) {
                int16 exponent = PythLazerLib.getExponent(feed);
                console.log("Exponent:", int256(exponent));
            }

            // Use hasPublisherCount/getPublisherCount pattern for data quality
            if (PythLazerLib.hasPublisherCount(feed)) {
                uint16 publisherCount = PythLazerLib.getPublisherCount(feed);
                console.log("Publisher count: %d", publisherCount);
            }

            // Use hasConfidence/getConfidence pattern for confidence interval
            if (PythLazerLib.hasConfidence(feed)) {
                uint64 confidence = PythLazerLib.getConfidence(feed);
                console.log("Confidence: %d", confidence);
            }

            // Use hasBestBidPrice/getBestBidPrice pattern for bid price
            if (PythLazerLib.hasBestBidPrice(feed)) {
                int64 bestBidPrice = PythLazerLib.getBestBidPrice(feed);
                console.log("Best bid price:", int256(bestBidPrice));
            }

            // Use hasBestAskPrice/getBestAskPrice pattern for ask price
            if (PythLazerLib.hasBestAskPrice(feed)) {
                int64 bestAskPrice = PythLazerLib.getBestAskPrice(feed);
                console.log("Best ask price:", int256(bestAskPrice));
            }
        }
    }

    /// @notice Helper to convert memory bytes to calldata for the library
    function parsePayload(bytes calldata payload) external pure returns (PythLazerStructs.Update memory) {
        return PythLazerLib.parseUpdateFromPayload(payload);
    }
}
```

This [package](https://github.com/pyth-network/pyth-examples/tree/main/lazer/evm) provides a working example contract that parses and consumes price updates from Pyth Pro on EVM, along with the Solidity SDK used to verify and parse payloads.

### Pyth on Cronos EVM

#### Pyth Pro Contract Addresses

* Mainnet: [0xACeA761c27A909d4D3895128EBe6370FDE2dF481](https://explorer.cronos.com/address/0xACeA761c27A909d4D3895128EBe6370FDE2dF481)
* Testnet: [0xACeA761c27A909d4D3895128EBe6370FDE2dF481](https://explorer.cronos.com/testnet/address/0xACeA761c27A909d4D3895128EBe6370FDE2dF481)

## Using Pyth as a PUSH Oracle

Pyth Core Oracle can be used as a Push oracle by running a scheduler which can update the prices in the backend. Checkout the open source [price pusher](https://github.com/pyth-network/pyth-crosschain/tree/main/apps/price_pusher) app to get started with the scheduler.

### Developers and community

Check out the following links to get started with Pyth.

* [Pyth Pro Price Feeds](https://docs.pyth.network/price-feeds/pro)
* [Pyth Pro Examples](https://github.com/pyth-network/pyth-examples/tree/main/lazer)
* [Website](https://pyth.network/)
* [Twitter](https://x.com/PythNetwork)


# RockX


# Secret Network

## Introduction

On blockchains, all data is public by default.

Decentralized confidential computing (DeCC) enables use cases like private voting for DAOs, secure random number generation for gaming, encrypted databases for various applications, encrypted data tied to NFTs, sealed-bid auctions, and encrypted order books for DeFi applications. All of this can be built on Cronos by utilizing [Secret Network](https://scrt.network/)’s Confidential Computing Layer, as long as these use cases are permitted by your country's laws and regulations.

### Integrating Secret's Confidential Computing Layer​[​](https://docs.kakarot.org/ecosystem/confidential-computing/secret/#integrating-secrets-confidential-computing-layer)

You can integrate Secret’s CCL into an existing Cronos application, or design a new application from the ground up to take advantage of the unique use-cases it enables. To start, check out Secret Network’s [Confidential Computing Layer](https://scrt.network/confidential-computing-layer) landing page to get an overview of how it works, and example use-cases for inspiration. From there you’ll find multiple links to Secret's CCL documentation:

1. [Basics](https://docs.scrt.network/secret-network-documentation/confidential-computing-layer/ethereum-evm-developer-toolkit/basics) - explains the cross-chain communication technologies used, and how to connect a MetaMask wallet to Secret Network.
2. [Use-cases](https://docs.scrt.network/secret-network-documentation/confidential-computing-layer/ethereum-evm-developer-toolkit/usecases) - provides tutorials showing how to build various types of EVM applications using Secret’s CCL. All of these tutorials can be used to deploy a contract on Cronos EVM.
3. [Supported Networks](https://docs.scrt.network/secret-network-documentation/confidential-computing-layer/ethereum-evm-developer-toolkit/supported-networks) - provides a list of gateway contract addresses. This is how your Cronos EVM application will communicate with Secret.

### Get Support[​](https://docs.kakarot.org/ecosystem/confidential-computing/secret/#get-support)

To get CCL development help, you can join the Secret Network [Discord](https://discord.com/invite/secret-network-360051864110235648) or [Telegram](https://t.me/SCRTCommunity). You can also [get in touch](mailto:info@scrt.network) with the Secret Network team directly.


# SubQuery

## SubQuery Indexer

### Introduction

SubQuery is a leading blockchain data indexer that provides developers with fast, flexible, universal, open source and decentralised APIs for web3 projects. SubQuery SDK allows developers to get rich indexed data and build intuitive and immersive decentralised applications in a faster and more efficient way. SubQuery supports 100+ ecosystems including Cronos, Cosmos, Ethereum, Polygon, Polkadot, Algorand, NEAR, and Avalanche.

Another one of SubQuery's competitive advantages is the ability to aggregate data not only within a chain but across multiple blockchains all within a single project. This allows the creation of feature-rich dashboard analytics, multi-chain block scanners, or projects that index IBC transactions across zones.

Other advantages include superior performance with multiple RPC endpoint configurations, multi-worker capabilities and a configurable caching architecture. To find out more, visit our [documentation](https://academy.subquery.network/).

**Useful resources**:

* SubQuery Docs: [SubQuery Academy (Documentation)](https://academy.subquery.network/)
* Intro Quick Start Guide: [1. Create a New Project](https://academy.subquery.network/quickstart/quickstart.html)
* [Cronos Quick Start Guide](https://academy.subquery.network/quickstart/quickstart_chains/cosmos-cronos.html#cronos-quick-start)
* For technical questions and support reach out to us <start@subquery.network>

### Getting Started

Take a look at this SubQuery Starter Project that introduces SubQuery's Cronos support by indexing [Cronos](https://github.com/subquery/cosmos-subql-starter/tree/main/Cronos).

You can also follow along this [step by step guide](https://academy.subquery.network/quickstart/quickstart.html) to get familiar with SubQuery.

### Running and Hosting your Cronos SubQuery APIs

SubQuery is open-source, meaning you have the freedom to run it in the following three ways:

* Locally on your own computer (or a cloud provider of your choosing), [view the instructions on how to run SubQuery Locally](https://academy.subquery.network/run_publish/run.html).
* You can publish it to SubQuery's enterprise-level [Managed Service](https://managedservice.subquery.network/), where we'll host your SubQuery project in production ready services for mission critical data with zero-downtime blue/green deployments. There even is a generous free tier. [Find out how](https://academy.subquery.network/run_publish/publish.html).
* You can publish it to the decentralised [SubQuery Network](https://subquery.network/network), the most open, performant, reliable, and scalable data service for dApp developers. The SubQuery Network indexes and services data to the global community in an incentivised and verifiable way and supports Cronos from launch.


# Witnet

Random Number Generation on Cronos with Witnet

## **Introduction**

Witnet is a decentralized oracle protocol that provides reliable data to autonomous smart contracts. It works as a trustable source of randomness for creating unpredictability in various use cases, such as games and NFTs. Witnet has been live on the Cronos Mainnet and Testnet for several months, and the Witnet Random Number Generator is[ deployed on the Cronos](https://docs.witnet.io/smart-contracts/witnet-randomness-oracle/contract-addresses#cronos) blockchain. In this post, we are going to introduce the purpose of the Witnet randomness generator and walk through a smart contract sample.

## Randomness Oracle in Smart Contracts

Random numbers can be useful in decentralized applications. The use cases can be NFTs, video games, or anything else that requires unpredictability at the smart contract level. For example, a smart contract that automatically generates collectibles inside an NFT collection will need a source of randomness to assign different traits. This allows for a variety of unique NFTs to be generated for a certain collection.

However, the execution of smart contracts is deterministic, and smart contract developers do not have access to native random number generation functions natively in Solidity. The randomness must come from outside of the blockchain. This is where an oracle comes in: the job of an oracle is to import number series from off-chain into the blockchain, in a way that provably fulfills certain properties.

Witnet provides a solution to generate randomness on EVM-compatible chains, including Cronos. Every time that a block is created on Cronos, the oracle’s nodes (called witnesses) generate random numbers independently, and these numbers are assembled into a single random number which is stored in the Witnet smart contract on Cronos.

At each block height of the blockchain, any other smart contract can query the next random number from the Witnet smart contract, called the WitnetRandomness contract (also known as the Witnet Randomness Oracle). The WitnetRandomness contract offers a user-friendly interface to developers. It is the easiest way to generate reliable randomness for smart contracts.

WitnetRandomness can be used by practically any dApp, as it has already been deployed by the Witnet Foundation. The WitnetRandomness contract uses an instance of the low-level `WitnetRequestRandomness`. The same instance can also be used by other applications running within the same chain. The best way to interact with the WitnetRandomness contract is through the IWitnetRandomness interface, which is readily available through the [witnet-solidity-bridge npm package](https://www.npmjs.com/package/witnet-solidity-bridge).

## Generate Random Numbers with Witnet

You can start by checking out the [Witnet documentation](https://docs.witnet.io/).

In this section, we will walk through random number generation using a sample smart contract. Please ensure that you have some CRO (or TestCRO) stored in your crypto address to pay transaction fees. If you are deploying on Cronos testnet, simply use the [test-token faucet](https://faucet.cronos.com/) to obtain the testnet TCRO tokens.

Firstly, we need to import the interface of the WitnetRandomness .sol file into our smart contract in order to be able to interact with it. This is done with: import "[witnet-solidity-bridge/contracts/interfaces/IWitnetRandomness.sol](https://github.com/witnet/witnet-solidity-bridge/blob/master/contracts/interfaces/IWitnetRandomness.sol)";

This is a full example of the basic smart contract that makes use of randomness (credits to Witnet for the example):

```
// SPDX-License-Identifier: MIT
pragma solidity >=0.7.0 <0.9.0;
import "witnet-solidity-bridge/contracts/interfaces/IWitnetRandomness.sol";
contract MyContract {
uint32 public randomness;
uint256 public latestRandomizingBlock;
IWitnetRandomness immutable public witnet;
 
/// @param _witnetRandomness Address of the WitnetRandomness contract.
constructor (IWitnetRandomness _witnetRandomness) {
assert(address(_witnetRandomness) != address(0));
witnet = _witnetRandomness;
}
 
receive () external payable {}
 
function requestRandomNumber() external payable {
latestRandomizingBlock = block.number;
uint _usedFunds = witnet.randomize{ value: msg.value }();
if (_usedFunds < msg.value) {
payable(msg.sender).transfer(msg.value - _usedFunds);
}
}
 
function fetchRandomNumber() external {
assert(latestRandomizingBlock > 0);
randomness = witnet.random(type(uint32).max, 0, latestRandomizingBlock);
}
}

```

This contract involves a two-step workflow:

* **Step 1** - the user should call `requestRandomNumber()`. This initiates an asynchronous request to the WitnetRandomness contract to generate a new random number associated with the current block number. If you need any user input/action to be recorded before the random number is known, you should do it at this workflow step (for example, a bet). You can see that requestRandomNumber is payable, this means that you need to send some CRO or TCRO when you call this function. Some of the balance will be used to pay transaction fees during the asynchronous process, the rest will be transferred back to your address.
* **Step 2** - the user should call `fetchRandomNumber()`, which will retrieve the random number from WitnetRandomness and store it in the randomness variable of your smart contract.

You should deploy the contract to the Cronos network. The contract constructor requires the address of the WitnetRandomness contract on the blockchain network. You can retrieve the addresses on Cronos [here](https://docs.witnet.io/smart-contracts/witnet-randomness-oracle/contract-addresses#cronos-chain). For this example, you can use the Cronos Testnet address (`0x0017A464A86f48B342Cae3b8Fe29cFCDaA7b0643`).

*Remark: make sure that you are using the* [*Cronos WitnetRandomness address*](https://docs.witnet.io/smart-contracts/witnet-randomness-oracle/contract-addresses#cronos-chain)*, not the* [*Cronos WitnetRequestBoard address*](https://docs.witnet.io/smart-contracts/witnet-web-oracle/contracts-addresses#cronos-chain)*.*

In case a gas estimation error appears when executing `requestRandomNumber()`, increasing the gas allowance will solve the problem. Since randomisation requests will take some time to complete, calling `fetchRandomNumber()` right after `requestRandomNumber()` will most likely cause the transaction to revert. Therefore, you should wait for 5 to 10 minutes before executing `fetchRandomNumber()`.

See the following screenshot from remix.ethereum.org:

<figure><img src="https://lh5.googleusercontent.com/FCESj_Ls4xgSh6EpdDQXWJoXuzhqMuENSwX3uZfP0pH04ZaBaXHvV_gd79gVnrNl1EAZm0MqgX2RKeAghQEo3ZZgiHMn2eMHWstG1p4kboEeJgMXCik9wV61ZAcEL8WlMD4Zc1GYfAIInnMdMo2__zAO525VhOLp-Vrz5Q-SGX_zlX5wKQNy_fBDBQ" alt=""><figcaption></figcaption></figure>

After executing `fetchRandomNumber()`, you can then query the value of the randomness variable within Remix. The screenshot below shows that the random `uint32` value is “`1345667621`.”

```
Decode output {
	"0": "uint32: 1345667621"
}
```

<figure><img src="https://lh3.googleusercontent.com/OSmsr1GqjtlrhWouD1Xvnes7nQqleLxHirGad5jfJqFaOqE8qORmQx4lfLO-FvQdq9TDl-w_KXfYjYF_ZDuiBkSqlD39bZ4TBK_9jtmqugUy94VV-yaUmiVmL8AA-lJQmoWezNIe9STV_IHW_FG7E5X8Msza85P00kC6OAEAo4SskBmkjQ-Gj30j2g" alt=""><figcaption></figcaption></figure>

![](https://lh6.googleusercontent.com/BYwhL506ZusNpz826P8p6aWu55nn-EIb3AnmXaFFaFtbQESwuhY4FwP44BeXZMmGQW27z1kZFnCZhtPxY08wCv7rM6dAErkLSSjuG3jwdtiOgjDG_I8jkHxF8DnIrAC8AnkxvUP6yAM_7Njeu0ivT3E-2vtddU6EbnqPIF462ggDelhwsWP8bttHdQ)

If you would like to generate another random number, you need to execute the same two steps again:

![](https://lh5.googleusercontent.com/DW1LJgzPinuOV0DWEYKOyE8GxGQeHWY3QvcW5x4m5j7fUa-m0MGSRtYsEA5Ui794XJd4x-fLC6X8peThAewaWWViOup1X-8WPuFejqK5tz4PYfNtjMbncd6eji-xBkYhZrTBfXxPQ8Mcvzx9RF3hCIs-xLlHv3JXeNGOsc7hz3E9VNeyOeyxwStH6Q)

As usual, you can review your transaction details on [Cronos Explorer](https://explorer.cronos.com/)/[Cronos Testnet Explorer](https://explorer.cronos.com/testnet).

### Resources

Here are several additional resources to help you get started with Witnet random number generation:

* [**Witnet Randomness Oracle Page**](https://docs.witnet.io/smart-contracts/witnet-randomness-oracle/randomness-contract#best-practices)
* [**WitnetRandomness Contract page**](https://docs.witnet.io/smart-contracts/witnet-randomness-oracle/randomness-contract)
* [**Witnet Solidity Bridge Contract**](https://github.com/witnet/witnet-solidity-bridge/tree/master/contracts)
* [**Witnet Discord Support**](https://discord.com/invite/witnet)


# Crypto.com AI Agent SDK

<figure><img src="/files/maMRnstZjprwGJ7JjV29" alt=""><figcaption></figcaption></figure>

*Empower your dApp with AI-driven blockchain interactions*

Crypto.com AI Agent SDK is a powerful tool that enables developers to seamlessly integrate AI capabilities into their Web3 projects.

With the PyPi and NPM packages, you can create AI agents that can create blockchain interactions, opening up a world of possibilities for your applications.

***

### Overview

*Best-in-class AI Blockchain Tool*

* ***Effortlessly Create AI-Driven Features***

  Our embedded LLM models serve as an intermediary layer, intelligently matching and executing the right functions and calls for both developers and end-users. This empowers non-technical users to engage with complex blockchain actions seamlessly.
* ***Seamless integration with the Cronos Ecosystem***

  The SDK is designed to integrate effortlessly with existing Cronos services, including public RPC endpoints, in-house explorers, and their APIs, providing a comprehensive toolkit for developers.
* ***Simplified Development***\
  Our SDK allows for seamless integration with a wide range of client-side applications, including frontend apps, messaging platforms like Telegram and Discord, and even terminal interfaces. This flexibility empowers developers to choose their preferred frontend solution, streamlining the integration process and enabling them to focus on building innovative applications.

### Use Cases

Our AI agent product is revolutionizing the way we interact with blockchain technology. By harnessing the power of natural language processing and machine learning, we're enabling developers to build innovative applications that simplify complex blockchain actions. Here are just a few examples of the exciting use cases our product makes possible:

1. **Blockchain Data Queries**\
   Imagine being able to ask questions like "What's the current market capitalization of Ethereum?" or "What's the average transaction fee on the Bitcoin network?" and receiving accurate, up-to-date answers in seconds. Crypto.com AI agent can transform user questions into actionable blockchain queries, generating valuable insights on market trends and implications.
2. **Wallet Management**\
   Managing cryptocurrency wallets can be a daunting task, especially for newcomers to the space. Crypto.com AI agent makes it easy to create crypto wallets, execute transfers, and manage addresses using simple text commands. In the future, we'll also be adding support for multi-signature wallets and account abstraction.
3. **Portfolio Management**\
   With our SDK, developers can create and deploy smart contracts that interact directly with AI-driven trading insights. This enables automated execution of trades based on real-time market analysis, giving users a significant edge in the market. For example, imagine building a portfolio management application that uses machine learning algorithms to analyze market trends and automatically execute trades when certain conditions are met.
4. ***Content Monetization***\
   Our AI agent product also enables developers to extend their current AI functionalities to include blockchain features. Imagine being able to embed crypto payments into shopping, travel services, subscriptions, and more. For instance, a travel booking platform could use our AI agent to accept cryptocurrency payments and automatically convert them into fiat currency, streamlining the booking process for users.

These are just a few examples of the many exciting use cases our AI agent product makes possible. By harnessing the power of AI-driven blockchain interactions, developers can build innovative applications that simplify complex blockchain actions and unlock new possibilities for users.\
\\

## Cronos EVM Networks Resources

### Explorer API keys

Explorer API keys for the Cronos EVM Chain is required to query block chain data, kindly follow the following instruction to obtain the API key for: [API key for Cronos EVM](https://docs.cronos.com/block-explorers/block-explorer-and-api-keys)

### Cronos EVM Mainnet URLs <a href="#cronos-zkevm-sepolia-testnet-urls" id="cronos-zkevm-sepolia-testnet-urls"></a>

* Chain ID: `25`
* JSON RPC AP&#x49;**:** <https://evm.cronos.com>
* Block explore&#x72;**:** <https://explorer.cronos.com/>

***

### Cronos EVM Testnet URLs <a href="#cronos-zkevm-sepolia-testnet-urls" id="cronos-zkevm-sepolia-testnet-urls"></a>

* Chain ID: `338`
* JSON RPC API: <https://evm-t3.cronos.com/>
* Block explore&#x72;**:** <https://explorer.cronos.com/testnet>

### Get Started

To start building with the AI Agent SDK, simply install the NPM/PyPi package and follow our comprehensive documentation [Crypto.com AI Agent Client](https://ai-agent-sdk-docs.crypto.com/outdated-contents/crypto.com-ai-agent-client).\
\
Visit the [Crypto.com AI SDK documentation by clicking here](https://ai-agent-sdk-docs.crypto.com/).


# Running Nodes

This section explains how to build, run, and maintain Cronos nodes across Mainnet, Testnet, and Devnet. It covers key areas such as compiling `cronosd`, configuring validators and full nodes, managing upgrades, and optimizing synchronization with tools like snapshots, local state sync, VersionDB and MemlAVL. The aim is to provide node operators with clear guidance to keep their infrastructure stable and efficient.

Whether you’re launching a validator, hosting infrastructure, or contributing to the network, this page walks you through everything from initial setup to advanced optimizations.

{% content-ref url="/pages/FGCPNouBUvChBf1Hswy6" %}
[Cronos EVM Mainnet](/for-node-hosts/running-nodes/cronos-mainnet)
{% endcontent-ref %}

{% content-ref url="/pages/U2nzjpwFntAxO2sH6QpO" %}
[Cronos EVM Testnet](/for-node-hosts/running-nodes/cronos-testnet)
{% endcontent-ref %}

{% content-ref url="/pages/XaaCYaa3kwYe3NK68l5z" %}
[Cronos EVM Snapshots](/for-node-hosts/running-nodes/cronos-evm-snapshots)
{% endcontent-ref %}

{% content-ref url="/pages/fzlQD2xzwlTVvdiyiIOG" %}
[Devnet](/for-node-hosts/running-nodes/local-devnet)
{% endcontent-ref %}

{% content-ref url="/pages/Z6kWkHpzXsutnps82vZl" %}
[Local State Sync](/for-node-hosts/running-nodes/local-state-sync)
{% endcontent-ref %}

{% content-ref url="/pages/Bhk7Ftj73t41VpdhGGFF" %}
[Cronosd build with Nix](/for-node-hosts/running-nodes/cronosd-build-with-nix)
{% endcontent-ref %}

{% content-ref url="/pages/CGwivZmzKuzn58sCy2KJ" %}
[VersionDB](/for-node-hosts/running-nodes/versiondb)
{% endcontent-ref %}

{% content-ref url="/pages/Ey0ZKfw1osQbCEbnqJvY" %}
[MemIAVL](/for-node-hosts/running-nodes/memiavl)
{% endcontent-ref %}

{% content-ref url="/pages/dpkK0npXur1XlKqjttKd" %}
[Best Practices](/for-node-hosts/running-nodes/cronos-node-best-practises)
{% endcontent-ref %}


# Cronos EVM Mainnet

This is a detailed documentation for setting up a full node on Cronos mainnet `cronosmainnet_25-1`.

## Pre-requisites

### Supported OS

We officially support macOS, Windows, and Linux only. Other platforms may work but there is no guarantee. We will extend our support to other operating systems after we have stabilised our current architecture.

### Prepare your machine

To run Cronos Mainnet nodes, you will need a machine with the following minimum requirements to run different types of nodes:

* Pruned node (setting pruning=everything)
  * Storage: \~50G\*
  * RAM: 32G (LevelDB) or 64G RAM (RocksDB)\*\*\*
  * CPU: 4-core
* Default full node (setting pruning=default)
  * Storage: \~1T\*\*
  * RAM: 32G (LevelDB) or 64G RAM (RocksDB)\*\*\*
  * CPU: 4-core
* Archive node (setting pruning=nothing)
  * Storage: \~6T (LevelDB) or \~4.5T (RocksDB)
  * RAM: 32G (LevelDB) or 64G RAM (RocksDB)\*\*\*
  * CPU: 4-core

*\*Only in case state-sync enabled.*\
\&#xNAN;*\*\* e.g. Note that size of snapshots from Quicksync will keep growing.*\
\&#xNAN;*\*\*\* Note that during a state-sync the node might require higher RAM than 3GB but, returns to normal after state-sync has finished.*

{% hint style="info" %}
Note that all depends on the type of node you are running and settings will vary depending on your usage.
{% endhint %}

{% tabs %}
{% tab title="Mainnet" %}

* [Seeds for Fullnode](https://github.com/crypto-org-chain/cronos-mainnet#seed-nodes)
* [Genesis files](https://raw.githubusercontent.com/crypto-org-chain/cronos-mainnet/master/cronosmainnet_25-1/genesis.json)
* Binaries for [Linux](https://github.com/crypto-org-chain/cronos/releases/download/v0.6.5/cronos_0.6.5_Linux_x86_64.tar.gz), Mac ([Intel x86](https://github.com/crypto-org-chain/cronos/releases/download/v0.6.5/cronos_0.6.5_Darwin_x86_64.tar.gz) / [M1](https://github.com/crypto-org-chain/cronos/releases/download/v0.6.5/cronos_0.6.5_Darwin_arm64.tar.gz)) and [Windows](https://github.com/crypto-org-chain/cronos/releases/download/v0.6.5/cronos_0.6.5_Windows_x86_64.zip)
  {% endtab %}
  {% endtabs %}

## Step 0 : Notes on Network Upgrade

Before we start, please note that there was "*Huygen*" network upgrade at the block height `2,693,800`, which requires the node operator to update their Cronos Mainnet binary `cronosd` from `v0.6.*` to `v0.7.0`.

For the host who would like to build a Full Node with complete blockchain data from scratch, one would need to:

<table><thead><tr><th width="270">Block Height</th><th width="196">Binary Version</th><th>Instruction</th></tr></thead><tbody><tr><td><code>1 ~ 2693800</code></td><td><a href="https://github.com/crypto-org-chain/cronos/releases?page=3"><code>cronos_v0.6.*</code></a></td><td>Start the node with the older binary version <a href="https://github.com/crypto-org-chain/cronos/releases?page=3"><code>cronos_v0.6.*</code></a>.<br>Sync-up with the blockchain until it reaches the target upgrade block height <code>2,693,800</code></td></tr><tr><td><code>2693800 ~ 3982500</code></td><td><a href="https://github.com/crypto-org-chain/cronos/releases/tag/v0.7.0"><code>cronos_v0.7.0</code></a></td><td>After it reaches the block height <code>2,693,800</code>, update <code>app.toml</code> with <a href="https://github.com/crypto-org-chain/cronos/releases/tag/v0.7.0">new config items</a>.<br><br>Update the binary to <a href="https://github.com/crypto-org-chain/cronos/releases/tag/v0.7.0"><code>cronos_v0.7.0</code></a>.<br><br>Restart the node.</td></tr><tr><td><code>3982500</code></td><td><a href="https://github.com/crypto-org-chain/cronos/releases/tag/v0.8.3"><code>cronos_v0.8.3</code></a></td><td>After reaching block height, update <a href="https://github.com/crypto-org-chain/cronos/releases/tag/v0.8.2"><code>iavl-disable-fastnode</code></a><code>in app.toml</code><br><br>Update the binary to <a href="https://github.com/crypto-org-chain/cronos/releases/tag/v0.8.3"><code>cronos_v0.8.3</code></a> and restart the node</td></tr><tr><td><code>6542800</code></td><td><a href="https://github.com/crypto-org-chain/cronos/releases/tag/v1.0.2"><code>cronos_v1.0.2</code></a></td><td><p>After reaching block height, update <a href="https://github.com/crypto-org-chain/cronos/releases/tag/v1.0.2"><code>app-db-backend</code></a> in <code>app.toml</code>. For<code>[evm]max-tx-gas-wanted</code>, it's recommended for validators to make the value as <code>500000</code>.<br><br>Update the binary to <code>cronos_v1.0.2</code>.<br></p><p>Restart the node.</p></td></tr><tr><td><code>11608760</code></td><td><a href="https://github.com/crypto-org-chain/cronos/releases/tag/v1.0.15"><code>cronos v1.0.15</code></a></td><td><p>After reaching block height, update the binary to <code>v1.0.15</code>.</p><p>Note: auto-pause the node before the upgrade height, we can restart cronosd with the flag <code>--halt-height 11608759</code>.</p><p><br>Restart the node.</p></td></tr><tr><td><code>13184000</code></td><td><a href="https://github.com/crypto-org-chain/cronos/releases/tag/v1.1.0"><code>cronos v1.1.0</code></a></td><td>After reaching block height, update the binary to <code>v1.1.0</code><br><br>Please refer to the <a href="https://github.com/crypto-org-chain/cronos/releases/tag/v1.1.0">release note</a> for config changes.<br><br>Restart the node.</td></tr><tr><td><code>13520000</code></td><td><a href="https://github.com/crypto-org-chain/cronos/releases/tag/v1.2.0"><code>cronos v1.2.0</code></a></td><td><p>After reaching block height, update the binary to <code>v1.2.0</code>.</p><p>Restart the node.</p></td></tr><tr><td><code>14920000</code></td><td><a href="https://github.com/crypto-org-chain/cronos/releases/tag/v1.3.0"><code>cronos v1.3.0</code></a></td><td><p>After reaching block height, update the binary to <code>v1.3.0</code>.</p><p>Restart the node.</p></td></tr><tr><td><code>17155000</code></td><td><a href="https://github.com/crypto-org-chain/cronos/releases/tag/v1.4.0"><code>cronos v1.4.0</code></a></td><td><p>After reaching block height, update the binary to <code>v1.4.0</code><br></p><p>For config changes, please refer to the <a href="https://github.com/crypto-org-chain/cronos/releases/tag/v1.4.0">release note</a> for config changes.</p><p>Restart the node.</p></td></tr><tr><td><code>38432212</code></td><td><a href="https://github.com/crypto-org-chain/cronos/releases/tag/v1.5.1"><code>cronos v1.5.1</code></a></td><td><p>After reaching block height, update the binary to <code>cronos v1.5.1</code><br></p><p>Update <code>query-gas-limit = "100000000</code> in <code>app.toml</code>.<br></p><p>Restart the node.</p></td></tr><tr><td><code>45062800</code></td><td><a href="https://github.com/crypto-org-chain/cronos/releases/tag/v1.6.1"><code>cronos v1.6.1</code></a></td><td><p>After reaching block height, update the binary to <code>cronos v1.6.1</code><br></p><p>For config changes, please refer to the <a href="https://github.com/crypto-org-chain/cronos/releases/tag/v1.6.1">release note</a> for config changes.</p><p>Restart the node.</p></td></tr><tr><td><code>58825800</code></td><td><a href="https://github.com/crypto-org-chain/cronos/releases/tag/v1.7.0">cronos v1.7.0</a></td><td><p>After reaching block height, update the binary to <code>cronos v1.7.0</code>.</p><p>Restart the node.</p></td></tr></tbody></table>

Users can refer to the [upgrade guide of "Huygen"](/for-node-hosts/running-nodes/cronos-mainnet/upgrade-guide/huygen) for the detailed upgrade steps.

{% hint style="info" %}
To patch "unlucky" transactions, follow this guide on [patching unlucky tx](/for-node-hosts/running-nodes/cronos-mainnet/patching-unlucky-tx)
{% endhint %}

## Step 1. Get the Cronos Mainnet Binary

{% hint style="info" %}
Remarks:

The following is the minimal setup for a **validator node** / **full node**.
{% endhint %}

To simplify the following step, we will be using **Linux** (Intel x86) for illustration.\
Binaries for **Mac** ([Intel x86](https://github.com/crypto-org-chain/cronos/releases/download/v0.6.5/cronos_0.6.5_Darwin_x86_64.tar.gz) / [M1](https://github.com/crypto-org-chain/cronos/releases/download/v0.6.5/cronos_0.6.5_Darwin_arm64.tar.gz)) and [Windows](https://github.com/crypto-org-chain/cronos/releases/download/v0.6.5/cronos_0.6.5_Windows_x86_64.zip) are also available.

* To install released **Cronos Mainnet binaries** from github:
* Create a new folder for the Install e.g. (cronosmainnet):

<pre class="language-bash"><code class="lang-bash"><strong>$ cd cronosmainnet
</strong>$ curl -LOJ https://github.com/crypto-org-chain/cronos/releases/download/v0.6.11/cronos_0.6.11_Linux_x86_64.tar.gz
$ tar -zxvf cronos_0.6.11_Linux_x86_64.tar.gz
</code></pre>

Afterward, you can check the version of `cronosd` by:

```bash
$ cd cronosmainnet/bin
$ ./cronosd version
0.6.11
```

## Step 2. Configure `cronosd`

### Step 2-0 (Optional) Clean up the old blockchain data

* If you have joined `cronostestnet_338-3` before, you would have to clean up the old blockchain data and start over again, it can be done by running:

  ```bash
  $ ./cronosd unsafe-reset-all
  ```

  and remove the old genesis file by

  ```bash
  $ rm ~/.cronos/config/genesis.json
  ```

Before kick-starting your node, we will have to configure your node so that it connects to the Cronos mainnet:

### Step 2-1 Initialize `cronosd`

* First of all, you can initialize cronosd by:

  ```bash
    $ ./cronosd init [moniker] --chain-id cronosmainnet_25-1
  ```

  This `moniker` will be the displayed id of your node when connected to Cronos Chain network.

  When providing the moniker value, make sure you drop the square brackets since they are not needed. The example below shows how to initialize a node named `pegasus-node` :

  ```bash
    $ ./cronosd init pegasus-node --chain-id cronosmainnet_25-1
  ```

{% hint style="info" %}
Note:

* Depending on your cronosd home setting, the cronosd configuration will be initialized to that home directory. To simply the following steps, we will use the default cronosd home directory `~/.cronos/` for illustration.
* You can also put the `cronosd` to your binary path and run it by `cronosd`
  {% endhint %}

### Step 2-2 Configure cronosd

* Download and replace the Cronos Mainnet `genesis.json` by:

  ```bash
  $ curl https://raw.githubusercontent.com/crypto-org-chain/cronos-mainnet/master/cronosmainnet_25-1/genesis.json > ~/.cronos/config/genesis.json
  ```
* Verify sha256sum checksum of the downloaded `genesis.json`. You should see `OK!` if the sha256sum checksum matches.

  ```bash
  $ if [[ $(sha256sum ~/.cronos/config/genesis.json | awk '{print $1}') = "58f17545056267f57a2d95f4c9c00ac1d689a580e220c5d4de96570fbbc832e1" ]]; then echo "OK"; else echo "MISMATCHED"; fi;
  OK!
  ```

{% hint style="info" %}
NOTE

For Mac environment, `sha256sum` was not installed by default. In this case, you may setup `sha256sum` with this command:

```bash
function sha256sum() { shasum -a 256 "$@" ; } && export -f sha256sum
```

{% endhint %}

* For network configuration, in `~/.cronos/config/config.toml`, validator nodes need to modify the configurations of `seed`, `create_empty_blocks_interval` and `timeout_commit`

  ```bash
  $ sed -i.bak -E 's#^(seeds[[:space:]]+=[[:space:]]+).*$#\1"0d5cf1394a1cfde28dc8f023567222abc0f47534@seed-0.cronos.com:26656,3032073adc06d710dd512240281637c1bd0c8a7b@seed-1.cronos.com:26656,04f43116b4c6c70054d9c2b7485383df5b1ed1da@seed-2.cronos.com:26656,337377dcda43d79c537d2c4d93ad3b698ce9452e@bd-cronos-mainnet-seed-node-01.bdnodes.net:26656"#' ~/.cronos/config/config.toml
  $ sed -i.bak -E 's#^(create_empty_blocks_interval[[:space:]]+=[[:space:]]+).*$#\1"5s"#' ~/.cronos/config/config.toml
  $ sed -i.bak -E 's#^(timeout_commit[[:space:]]+=[[:space:]]+).*$#\1"5s"#' ~/.cronos/config/config.toml
  ```
* If you would like to build an **archive node** that allows you to query all the historical block data - kindly update the pruning setting to `"nothing"` by

  ```bash
  $ sed -i.bak -E 's#^(pruning[[:space:]]+=[[:space:]]+).*$#\1"nothing"#' ~/.cronos/config/app.toml
  ```

{% hint style="info" %}
NOTE

For Mac environment, if `jq` is missing, you may install it by: `brew install jq`
{% endhint %}

## Step 3. Run everything

{% hint style="warning" %}
CAUTION

This page only shows the minimal setup for validator / full node.

Furthermore, you may want to run full nodes as sentries (see [Tendermint](https://docs.tendermint.com/master/tendermint-core/running-in-production.html)), restrict your validator connections to only connect to your full nodes, test secure storage of validator keys etc.
{% endhint %}

Once `cronosd` has been configured, we are ready to start the node and sync the blockchain data:

* Start cronosd, e.g.:

```bash
  $ ./cronosd start
```

{% hint style="info" %}
Remarks:

If you see errors saying `too many files opened...`, then you need to set a higher number for maximum open file descriptors in your OS.

If you are on OSX or Linux, then the following could be useful:

```bash
# Check current max fd
$ ulimit -n

# Set a new max fd
$ ulimit -Sn [NEW_MAX_FILE_DESCRIPTOR]

# Example
$ ulimit -Sn 4096
```

{% endhint %}

* *(Optional for Linux)* Start cronosd with systemd service, e.g.:

```bash
  $ curl -s https://raw.githubusercontent.com/crypto-org-chain/cronos-docs/master/systemd/create-service.sh -o create-service.sh && curl -s https://raw.githubusercontent.com/crypto-org-chain/cronos-docs/master/systemd/cronosd.service.template -o cronosd.service.template

  $ chmod +x ./create-service.sh && ./create-service.sh

  $ sudo systemctl start cronosd

  # view log

  $ journalctl -u cronosd -f
```

{% hint style="info" %}
Example: /etc/systemd/system/cronosd.service created by script

```bash
# /etc/systemd/system/cronosd.service

[Unit]
Description=cronosd
ConditionPathExists=/usr/local/bin/cronosd
After=network.target


[Service]
Type=simple
User=ubuntu
WorkingDirectory=/usr/local/bin
ExecStart=/usr/local/bin/cronosd start --home /home/ubuntu/.cronos
Restart=on-failure
RestartSec=10
LimitNOFILE=50000


[Install]
WantedBy=multi-user.target
```

{% endhint %}

It should begin fetching blocks from the other peers.

* You can query the node syncing status by

  ```bash
  $ ./cronosd status 2>&1 | jq '.SyncInfo.catching_up'
  ```

  If the above command returns `false`, It means that your node **is fully synced**; otherwise, it returns `true` and implies your node is still catching up.
* One can check the current block height by querying the public full node by:

  ```bash
  curl -s https://rpc.cronos.com/commit | jq "{height: .result.signed_header.header.height}"
  ```

  and you can check your node's progress (in terms of block height) by

  ```bash
  $ ./cronosd status 2>&1 | jq '.SyncInfo.latest_block_height'
  ```

## Different ways to sync Cronos with snapshots

The above outlines how to set up a node from scratch. Alternatively, you can set up a node using snapshots:

{% content-ref url="/pages/ev21Aic78SUp9betN4M1" %}
[Cronos Native Snapshots](/for-node-hosts/running-nodes/cronos-evm-snapshots/cronos-native-snapshots)
{% endcontent-ref %}

{% content-ref url="/pages/rskqAEhJNgFyIcwNd5LJ" %}
[State Sync](/for-node-hosts/running-nodes/cronos-evm-snapshots/state-sync)
{% endcontent-ref %}

{% content-ref url="/pages/wECOEFpZZBnVBO5wWQUR" %}
[Public Node](/for-node-hosts/running-nodes/cronos-evm-snapshots/public-node)
{% endcontent-ref %}

{% content-ref url="/pages/sxoICm9l76Kq8T10B5bh" %}
[KSYNC](/for-node-hosts/running-nodes/cronos-evm-snapshots/ksync)
{% endcontent-ref %}


# Upgrade Guide


# The "Huygen" upgrade guide (v0.6.\* to v0.7.\*)

{% hint style="warning" %}
The Cronos v0.7.0 - Huygen upgrade is proposed to be scheduled at the block height of 2,693,800. Referencing estimated time can be found on <https://explorer.cronos.com/block/countdown/2693800>

**DO NOT UPGRADE to the binary v0.7.0 before that suggested upgrade schedule.**

You might check the current block height by the [Cronos Explorer](https://explorer.cronos.com/) or using

```bash
curl -s https://rpc-cronos.crypto.org:443/commit | jq "{height: .result.signed_header.header.height}"
```

{% endhint %}

## Step 0 - Don't panic

At the point of the proposed upgrade, user will see the error message on the `cronosd` similar to the below:

```bash
ERR UPGRADE "v0.7.0" NEEDED at height: 2693800: {\"binaries\":{...."}}
```

**Don't panic** - The Chain will be paused to allow the majority of validators to upgrade. Validators and full node hosts will have to upgrade your Cronos nodes to the latest release binary.

### Backups

Before the upgrade, node hosts are encouraged to take a complete data backup. backup depends heavily on infrastructure, but generally, we can do this by backing up the `.cronos` directory.

It is critically important for validator operators to back-up the `.cronos/data/priv_validator_state.json` file after stopping the `cronosd` process. This file is updated every block as your validator participates in consensus rounds. It is a critical file needed to prevent double-signing if the upgrade fails and the previous chain needs to be restarted.

## Step 1 - Get the `v0.7.0` binary

To simplify the following step, we will be using **Linux-x86** for illustration. Binary for Mac Windows with different DB and architecture are also available [here](https://github.com/crypto-org-chain/cronos/releases/tag/v0.7.0).

* Terminate the `cronosd`; afterwards, download the `0.7.0` released binaries from github:

  ```bash
  $ curl -LOJ https://github.com/crypto-org-chain/cronos/releases/download/v0.7.0/cronos_0.7.0_Linux_x86_64.tar.gz
  $ tar -zxvf cronos_0.7.0_Linux_x86_64.tar.gz
  ```
*

{% hint style="info" %}
Remarks: If you have stated `cronosd` with *systemd* service, kindly stop it by

```bash
$ sudo systemctl stop cronosd
```

And replace the binary in the location where the `ExecStart` states in Systemd Unit file.
{% endhint %}

### Step 1.1 - Verify the version

You can verify the installation by checking the version of `cronosd`, the latest version is `0.7.0`.

```bash
# check the version of cronosd
$ ./cronosd version
0.7.0
```

### Step 1.2 - Update `app.toml`

In this v0.7.0 upgrade, there are a few extra parameters that we would have to add to `.cronos/config/app.toml` under

* EVM Configuration - `[evm]` and;
* JSON RPC Configuration - `[json-rpc]`. they are:

```diff
...
...
###############################################################################
###                             EVM Configuration                           ###
###############################################################################

[evm]

+ max-tx-gas-wanted=500000
...
...
###############################################################################
###                           JSON RPC Configuration                        ###
###############################################################################

[json-rpc]

+ feehistory-cap = 100
+ logs-cap = 10000
+ block-range-cap = 10000
+ http-timeout="30s"
+ http-idle-timeout="120s"
...
...
```

kindly insert the above parameters, save it and move on!

## Step 2. - Run everything

We are ready to start the node join the network again with the new binary:

* Start `cronosd`, e.g.:

```bash
  $ ./cronosd start
```

{% hint style="info" %}
Remark: Once the `cronosd` is started we would see the message

```bash
applying upgrade "v0.7.0" at height: 2693800"
```

and there will be an iteration over the previous blockchain data. This process will take a while, which is depending on the size of the database and the hardware specs.
{% endhint %}

Afterwards, sit back and wait for the syncing process. You can query the node syncing status by

```bash
$ ./cronosd status 2>&1 | jq '.SyncInfo.catching_up'
```

If the above command returns `false`, it means that your node **is synced**; otherwise, it returns `true` and implies your node is still catching up.

At this step, you've successfully performed the Huygen upgrade!


# The "v0.7.0-hotfix" upgrade guide (v0.7.\* to v0.8.\*)

## Step 0 - Don't panic

At the point of the proposed upgrade of block `3982500`, user will see the error message on the `cronosd` similar to the below:

```bash
ERR UPGRADE "v0.7.0-hotfix" NEEDED at height: 3982500: {\"binaries\":{...."}}
```

**Don't panic** - The Chain will be paused to allow the majority of validators to upgrade. Validators and full node hosts will have to upgrade your Cronos nodes to the latest release binary.

### Backups

Before the upgrade, node hosts are encouraged to take a complete data backup. backup depends heavily on infrastructure, but generally, we can do this by backing up the `.cronos` directory.

It is critically important for validator operators to back-up the `.cronos/data/priv_validator_state.json` file after stopping the `cronosd` process. This file is updated every block as your validator participates in consensus rounds. It is a critical file needed to prevent double-signing if the upgrade fails and the previous chain needs to be restarted.

## Step 1 - Get the v0.8.3 binary

To simplify the following step, we will be using **Linux-x86** for illustration. Binary for Mac Windows with different DB and architecture are also available [here](https://github.com/crypto-org-chain/cronos/releases/tag/v0.8.3).

* Terminate the `cronosd`; afterwards, download the `v0.8.3` released binaries from github:

  ```bash
  $ curl -LOJ https://github.com/crypto-org-chain/cronos/releases/download/v0.8.3/cronos_0.8.3_Linux_x86_64.tar.gz
  $ tar -zxvf cronos_0.8.3_Linux_x86_64.tar.gz
  ```
*

{% hint style="info" %}
Remarks: If you have stated `cronosd` with *systemd* service, kindly stop it by

```bash
$ sudo systemctl stop cronosd
```

And replace the binary in the location where the `ExecStart` states in Systemd Unit file.
{% endhint %}

### Step 1.1 - Verify the version

You can verify the installation by checking the version of `cronosd`, the version should be `v0.8.3`.

```bash
# check the version of cronosd
$ ./cronosd version
0.8.3
```

### Step 1.2 - Update `app.toml`

In this v0.8.3 upgrade, there are a few extra parameters that we would have to add to `.cronos/config/app.toml` under

* Base Configuration :

```diff
...
...
###############################################################################
###                            Base Configuration                       ###
###############################################################################

+index_events = []
+ iavl-cache-size = 781250
+ iavl-disable-fastnode = true
...
...
###############################################################################

```

kindly insert the above parameters, save it and move on!

## Step 2. - Run everything

We are ready to start the node join the network again with the new binary:

* Start `cronosd`, e.g.:

```bash
  $ ./cronosd start
```

{% hint style="info" %}
Remark: Once the `cronosd` is started we will see the message

```bash
applying upgrade "v0.8.3" at height: 3982500"
```

and there will be an iteration over the previous blockchain data. This process will take a while, which is depending on the size of the database and the hardware specs.
{% endhint %}

Afterwards, sit back and wait for the syncing process. You can query the node syncing status by

```bash
$ ./cronosd status 2>&1 | jq '.SyncInfo.catching_up'
```

If the above command returns `false`, it means that your node **is synced**; otherwise, it returns `true` and implies your node is still catching up.

At this step, you've successfully performed the \` upgrade!


# The "Galileo" upgrade guide (v0.8.\* to v1.0.\*)

## Step 0 - Don't panic

At the point of the proposed upgrade, user will see the error message on the `cronosd` similar to the below:

```bash
ERR UPGRADE "v1.0.2" NEEDED at height: 6542800: {\"binaries\":{...."}}
```

**Don't panic** - The Chain will be paused to allow the majority of validators to upgrade. Validators and full node hosts will have to upgrade your Cronos nodes to the latest release binary.

### Backups

Before the upgrade, node hosts are encouraged to take a complete data backup. backup depends heavily on infrastructure, but generally, we can do this by backing up the `.cronos` directory.

It is critically important for validator operators to back-up the `.cronos/data/priv_validator_state.json` file after stopping the `cronosd` process. This file is updated every block as your validator participates in consensus rounds. It is a critical file needed to prevent double-signing if the upgrade fails and the previous chain needs to be restarted.

## Step 1 - Get the `v1.0.2` binary

To simplify the following step, we will be using **Linux-x86** for illustration. Binary for Mac Windows with different DB and architecture are also available [here](https://github.com/crypto-org-chain/cronos/releases/tag/v1.0.2).

* Terminate the `cronosd`; afterwards, download the `1.0.2` released binaries from github:

  ```bash
  $ curl -LOJ https://github.com/crypto-org-chain/cronos/releases/download/v1.0.2/cronos_1.0.2_Linux_x86_64.tar.gz
  $ tar -zxvf cronos_1.0.2_Linux_x86_64.tar.gz
  ```
*

{% hint style="info" %}
Remarks: If you have stated `cronosd` with *systemd* service, kindly stop it by

```bash
$ sudo systemctl stop cronosd
```

And replace the binary in the location where the `ExecStart` states in Systemd Unit file.
{% endhint %}

### Step 1.1 - Verify the version

You can verify the installation by checking the version of `cronosd`, the version should be`1.0.2`.

```bash
# check the version of cronosd
$ ./cronosd version
1.0.2
```

### Step 1.2 - Update `app.toml`

In this v1.0.2 upgrade, there are a few extra parameters that we would have to add to `.cronos/config/app.toml` under

* `config.toml` with the `db_backend` field;
* `app.toml` with the `app-db-backend` field.

**For `db_backend` :**

Kindly set the above config to `config/config.toml`in your our `.cronos` dir according to your current DB setting, for example:

```
db_backend = "goleveldb"
```

* For `app-db-backend` :

Kindly add

```
# AppDBBackend defines the database backend type to use for the application and snapshots DBs.
# An empty string indicates that a fallback will be used.
# First fallback is the deprecated compile-time types.DBBackend value.
# Second fallback (if the types.DBBackend also isn't set), is the db-backend value set in Tendermint's config.toml.
app-db-backend = ""
```

to `config/app.toml`in your our `.cronos` dir according to your current DB setting.

## Step 2. - Run everything

We are ready to start the node join the network again with the new binary:

* Start `cronosd`, e.g.:

```bash
  $ ./cronosd start
```

{% hint style="info" %}
Remark: Once the `cronosd` is started we would see the message

```bash
applying upgrade "v1.0.2" at height: 6542800"
```

and there will be an iteration over the previous blockchain data. This process will take a while, which is depending on the size of the database and the hardware specs.
{% endhint %}

Afterwards, sit back and wait for the syncing process. You can query the node syncing status by

```bash
$ ./cronosd status 2>&1 | jq '.SyncInfo.catching_up'
```

If the above command returns `false`, it means that your node **is synced**; otherwise, it returns `true` and implies your node is still catching up.

At this step, you've successfully performed the "Galileo" upgrade!


# The "Titan" upgrade guide (v1.0.\* to v1.1.0)

{% hint style="warning" %}
The Cronos v1.1.0 - "Titan" upgrade is proposed to be scheduled at the block height of 13,184,000. Referencing estimated time can be found at\
<https://explorer.cronos.com/block/countdown/13184000>

**DO NOT UPGRADE to the binary v1.1.0 before that suggested upgrade schedule.**

You might check the current block height by the [Cronos Explorer](https://explorer.cronos.com/)
{% endhint %}

## Step 0 - Don't panic

At the point of the proposed upgrade, user will see the error message on the `cronosd` similar to the below:

```bash
ERR UPGRADE "v1.1.0" NEEDED at height: 13184000: {\"binaries\":{...."}}
```

**Don't panic** - The Chain will be paused to allow the majority of validators to upgrade. Validators and full node hosts will have to upgrade your Cronos nodes to the latest release binary.

### Backups

Before the upgrade, node hosts are encouraged to take a complete data backup. backup depends heavily on infrastructure, but generally, we can do this by backing up the `.cronos` directory.

It is critically important for validator operators to back-up the `.cronos/data/priv_validator_state.json` file after stopping the `cronosd` process. This file is updated every block as your validator participates in consensus rounds. It is a critical file needed to prevent double-signing if the upgrade fails and the previous chain needs to be restarted.

## Step 1 - Get the `v1.1.0` binary

To simplify the following step, we will be using **Linux-x86** for illustration. Binary for Mac Windows with different DB and architecture are also available [here](https://github.com/crypto-org-chain/cronos/releases/tag/v1.1.0).

* Terminate the `cronosd`; afterwards, download the `1.1.0` released binaries from github:

  ```bash
  $ curl -LOJ https://github.com/crypto-org-chain/cronos/releases/download/v1.1.0/cronos_1.1.0_Linux_x86_64.tar.gz
  $ tar -zxvf cronos_1.1.0_Linux_x86_64.tar.gz
  ```

{% hint style="info" %}
Remarks: If you have stated `cronosd` with *systemd* service, kindly stop it by

```bash
$ sudo systemctl stop cronosd
```

And replace the binary in the location where the `ExecStart` states in Systemd Unit file.
{% endhint %}

### Step 1.1 - Verify the version

You can verify the installation by checking the version of `cronosd`, the latest version is `1.1.0`.

```bash
# check the version of cronosd
$ ./cronosd version
1.1.0
```

## Step 2. - Run everything

We are ready to start the node join the network again with the new binary:

* Start `cronosd`, e.g.:

```bash
  $ ./cronosd start
```

{% hint style="info" %}
Remark: Once the `cronosd` is started we will see the message

```bash
applying upgrade "v1.1.0" at height: 13184000"
```

and there will be an iteration over the previous blockchain data. This process will take a while, which is depending on the size of the database and the hardware specs.
{% endhint %}

Afterwards, sit back and wait for the syncing process. You can query the node syncing status by

```bash
$ ./cronosd status 2>&1 | jq '.SyncInfo.catching_up'
```

If the above command returns `false`, it means that your node **is synced**; otherwise, it returns `true` and implies your node is still catching up.

At this step, you've successfully performed the Titan upgrade!


# The "v1.2" upgrade guide (v1.1.\* to v1.2.0)

{% hint style="warning" %}
The Cronos v1.2.0 - "v1.2" upgrade is proposed to be scheduled at the block height of 13,520,000. Referencing estimated time can be found [here](https://explorer.cronos.com/block/countdown/13520000).

**DO NOT UPGRADE to the binary v1.2.0 before that suggested upgrade schedule.**

You might check the current block height with the [Cronos Explorer](https://explorer.cronos.com/)
{% endhint %}

## Step 0 - Don't panic

At the point of the proposed upgrade, user will see the error message on the `cronosd` similar to the below:

```bash
ERR UPGRADE "v1.2.0" NEEDED at height: 13520000: {\"binaries\":{...."}}
```

**Don't panic** - The Chain will be paused to allow the majority of validators to upgrade. Validators and full node hosts will have to upgrade your Cronos nodes to the latest release binary.

### Backups

Before the upgrade, node hosts are encouraged to take a complete data backup. backup depends heavily on infrastructure, but generally, we can do this by backing up the `.cronos` directory.

It is critically important for validator operators to back up the `.cronos/data/priv_validator_state.json` file after stopping the `cronosd` process. This file is updated every block as your validator participates in consensus rounds. It is a critical file needed to prevent double-signing if the upgrade fails and the previous chain needs to be restarted.

## Step 1 - Get the `v1.2.0` binary

To simplify the following step, we will be using **Linux-x86** for illustration. Binary for Mac Windows with different DB and architecture are also available [here](https://github.com/crypto-org-chain/cronos/releases/tag/v1.2.0).

* Terminate the `cronosd`; afterwards, download the `1.2.0` released binaries from github:

  ```bash
  $ curl -LOJ https://github.com/crypto-org-chain/cronos/releases/download/v1.2.0/cronos_1.2.0_Linux_x86_64.tar.gz
  $ tar -zxvf cronos_1.2.0_Linux_x86_64.tar.gz
  ```

{% hint style="info" %}
Remarks: If you have stated `cronosd` with *systemd* service, kindly stop it by

```bash
$ sudo systemctl stop cronosd
```

And replace the binary in the location where the `ExecStart` states in Systemd Unit file.
{% endhint %}

### Step 1.1 - Verify the version

You can verify the installation by checking the version of `cronosd`, the latest version is `1.2.0`.

```bash
# check the version of cronosd
$ ./cronosd version
1.2.0
```

## Step 2. - Run everything

We are ready to start the node join the network again with the new binary:

* Start `cronosd`, e.g.:

```bash
  $ ./cronosd start
```

{% hint style="info" %}
Remark: Once the `cronosd` is started we will see the message

```bash
applying upgrade "v1.2.0" at height: 13520000"
```

and there will be an iteration over the previous blockchain data. This process will take a while, which is depending on the size of the database and the hardware specs.
{% endhint %}

Afterwards, sit back and wait for the syncing process. You can query the node syncing status by

```bash
$ ./cronosd status 2>&1 | jq '.SyncInfo.catching_up'
```

If the above command returns `false`, it means that your node **is synced**; otherwise, it returns `true` and implies your node is still catching up.

At this step, you've successfully performed the v1.2 upgrade!


# The "v1.3" upgrade guide (v1.2.\* to v1.3.0)

{% hint style="warning" %}
The Cronos v1.3.0 - "v1.3" upgrade is proposed to be scheduled at the block height of 14,920,000. Referencing estimated time can be found [here](https://explorer.cronos.com/block/countdown/14920000).

**DO NOT UPGRADE to the binary v1.3.0 before that suggested upgrade schedule.**

You might check the current block height with the [Cronos Explorer](https://explorer.cronos.com/)
{% endhint %}

## Step 0 - Don't panic

At the point of the proposed upgrade, the user will see the error message on the `cronosd` similar to the below:

```bash
ERR UPGRADE "v1.3.0" NEEDED at height: 14920000: {\"binaries\":{...."}}
```

**Don't panic** - The Chain will be paused to allow the majority of validators to upgrade. Validators and full node hosts will have to upgrade your Cronos nodes to the latest release binary.

### Backups

Before the upgrade, node hosts are encouraged to take a complete data backup. backup depends heavily on infrastructure, but generally, we can do this by backing up the `.cronos` directory.

## Step 1 - Get the `v1.3.0` binary

To simplify the following step, we will be using **Linux-x86** for illustration. Binary for Mac Windows with different DB and architecture are also available [here](https://github.com/crypto-org-chain/cronos/releases/tag/v1.3.0).

* Terminate the `cronosd`; afterwards, download the `1.3.0` released binaries from github:

  ```bash
  $ curl -LOJ https://github.com/crypto-org-chain/cronos/releases/download/v1.3.0/cronos_1.3.0_Linux_x86_64.tar.gz
  $ tar -zxvf cronos_1.3.0_Linux_x86_64.tar.gz
  ```

{% hint style="info" %}
Remarks: If you have stated `cronosd` with *systemd* service, kindly stop it by

```bash
$ sudo systemctl stop cronosd
```

And replace the binary in the location where the `ExecStart` states in Systemd Unit file.
{% endhint %}

### Step 1.1 - Verify the version

You can verify the installation by checking the version of `cronosd`, the latest version is `1.3.0`.

```bash
# check the version of cronosd
$ ./cronosd version
1.3.0
```

## Step 2. - Run everything

We are ready to start the node join the network again with the new binary:

* Start `cronosd`, e.g.:

```bash
  $ ./cronosd start
```

{% hint style="info" %}
Remark: Once the `cronosd` is started we will see the message

```bash
applying upgrade "v1.3.0" at height: 14920000"
```

and there will be an iteration over the previous blockchain data. This process will take a while, which is depending on the size of the database and the hardware specs.
{% endhint %}

Afterwards, sit back and wait for the syncing process. You can query the node syncing status by

```bash
$ ./cronosd status 2>&1 | jq '.SyncInfo.catching_up'
```

If the above command returns `false`, it means that your node **is synced**; otherwise, it returns `true` and implies your node is still catching up.

At this step, you've successfully performed the v1.3 upgrade!


# The "v1.4" Pallene upgrade guide (v1.3.\* to v1.4.1)

{% hint style="warning" %}
The Cronos v1.4 - "Pallene" upgrade is proposed to be scheduled at the block height of 17,155,000. Referencing estimated time can be found [here](https://explorer.cronos.com/block/countdown/17155000).

**DO NOT UPGRADE to the binary v1.4.1 before that suggested upgrade schedule.**

You might check the current block height with the [Cronos Explorer](https://explorer.cronos.com/)
{% endhint %}

## Step 0 - Don't panic

At the point of the proposed upgrade, the user will see the error message on the `cronosd` similar to the below:

```bash
ERR UPGRADE "v1.4" NEEDED at height: 17155000: {\"binaries\":{...."}}
```

**Don't panic** - The Chain will be paused to allow the majority of validators to upgrade. Validators and full node hosts will have to upgrade your Cronos nodes to the latest release binary.

### Backups

Before the upgrade, node hosts are encouraged to take a complete data backup. backup depends heavily on infrastructure, but generally, we can do this by backing up the `.cronos` directory.

## Step 1 - Get the `v1.4.1` binary

To simplify the following step, we will be using **Linux-x86** for illustration. Binary for Mac Windows with different DB and architecture are also available [here](https://github.com/crypto-org-chain/cronos/releases/tag/v1.4.1).

* Terminate the `cronosd`; afterwards, download the `1.4.1` released binaries from github:

  ```bash
  $ curl -LOJ https://github.com/crypto-org-chain/cronos/releases/download/v1.4.1/cronos_1.4.1_Darwin_x86_64.tar.gz
  $ tar -zxvf cronos_1.4.1_Darwin_x86_64.tar.gz
  ```

{% hint style="info" %}
Remarks: If you have stated `cronosd` with *systemd* service, kindly stop it by

```bash
$ sudo systemctl stop cronosd
```

And replace the binary in the location where the `ExecStart` states in Systemd Unit file.
{% endhint %}

### Step 1.1 - Verify the version

You can verify the installation by checking the version of `cronosd`, the latest version is `1.4.1`.

```bash
# check the version of cronosd
$ ./cronosd version
1.4.1
```

{% hint style="info" %}
Note for version DB users - There are config changes as covered in the [release note](https://github.com/crypto-org-chain/cronos/releases/tag/v1.4.1).

* For nodes using version DB: There is a new `versiondb` section, and it is suggested to update the `app.toml` appropriate to the upgrade of v1.4:

```
[versiondb]
# Enable defines if the versiondb should be enabled.
enable = true
```

{% endhint %}

## Step 2. - Run everything

We are ready to start the node join the network again with the new binary:

* Start `cronosd`, e.g.:

```bash
  $ ./cronosd start
```

{% hint style="info" %}
Remark: Once the `cronosd` is started we will see the message

```bash
applying upgrade "v1.4" at height: 17155000"
```

and there will be an iteration over the previous blockchain data. This process will take a while, which is depending on the size of the database and the hardware specs.
{% endhint %}

Afterwards, sit back and wait for the syncing process. You can query the node syncing status by

```bash
$ ./cronosd status 2>&1 | jq '.SyncInfo.catching_up'
```

If the above command returns `false`, it means that your node **is synced**; otherwise, it returns `true` and implies your node is still catching up.

At this step, you've successfully performed the v1.4 upgrade!


# The "v1.5" Smarturn upgrade guide (v1.4.\* to v1.5.1)

{% hint style="warning" %}
The Cronos v1.5 - "Smarturn" upgrade is proposed to be scheduled at the block height of 38432212. Referencing estimated time can be found [here](https://explorer.cronos.com/block/countdown/38432212).

**DO NOT UPGRADE to the binary v1.5.1 before that suggested upgrade schedule.**

You might check the current block height with the [Cronos Explorer](https://explorer.cronos.com/).
{% endhint %}

## Step 0 - Don't panic

At the point of the proposed upgrade, the user will see the error message on the `cronosd` similar to the below:

```bash
ERR UPGRADE "v1.5" NEEDED at height: 38432212: {\"binaries\":{...."}}
```

**Don't panic** - The Chain will be paused to allow the majority of validators to upgrade. Validators and full node hosts will have to upgrade your Cronos nodes to the latest release binary.

### Backups

Before the upgrade, node hosts are encouraged to take a complete data backup. backup depends heavily on infrastructure, but generally, we can do this by backing up the `.cronos` directory.

## Step 1 - Get the `v1.5.1` binary

To simplify the following step, we will be using **Linux-x86** for illustration. Binary for Mac Windows with different DB and architecture are also available [here](https://github.com/crypto-org-chain/cronos/releases/tag/v1.5.1).

* Terminate the `cronosd`; afterwards, download the `1.5.1` released binaries from GitHub:

  ```bash
  $ curl -LOJ https://github.com/crypto-org-chain/cronos/releases/download/v1.5.1/cronos_1.5.1_Darwin_x86_64.tar.gz
  $ tar -zxvf cronos_1.5.1_Darwin_x86_64.tar.gz
  ```

{% hint style="info" %}
Remarks: If you have stated `cronosd` with *systemd* service, kindly stop it by

```bash
$ sudo systemctl stop cronosd
```

And replace the binary in the location where the `ExecStart` states in Systemd Unit file.
{% endhint %}

### Step 1.1 - Verify the version

You can verify the installation by checking the version of `cronosd`, the latest version is `1.5.1`.

```bash
# check the version of cronosd
$ ./cronosd version
1.5.1
```

{% hint style="info" %}
Note for version DB users - There are config changes as covered in the [release note](https://github.com/crypto-org-chain/cronos/releases/tag/v1.5.1).

* For nodes using version DB: There is a new `versiondb` section, and it is suggested to update the `app.toml` appropriate to the upgrade of v1.5:

```
# The maximum gas a query coming over rest/grpc may consume.
# Recommended value 100000000 to avoid DOS

query-gas-limit = "100000000"

```

{% endhint %}

## Step 2. - Run everything

We are ready to start the node join the network again with the new binary:

* Start `cronosd`, e.g.:

```bash
  $ ./cronosd start
```

{% hint style="info" %}
Remark: Once the `cronosd` is started we will see the message

```bash
applying upgrade "v1.5" at height: 38432212"
```

and there will be an iteration over the previous blockchain data. This process will take a while, which is depending on the size of the database and the hardware specs.
{% endhint %}

Afterwards, sit back and wait for the syncing process. You can query the node syncing status by

```bash
$ ./cronosd status 2>&1 | jq '.SyncInfo.catching_up'
```

If the above command returns `false`, it means that your node **is synced**; otherwise, it returns `true` and implies your node is still catching up.

At this step, you've successfully performed the v1.5 upgrade!


# The "v1.6" upgrade guide (v1.5.\* to v1.6.1)

{% hint style="warning" %}
Action required:

* \[Regular user]
  * No Action needed, Cronos team will handle the upgrade for the mainnet.
* \[DApp Host]
  * Please test your DApps, nodes, product on the Cronos EVM testnet to confirm compatibility with `v1.6.1`
* \[Node hosts]
  * Upgrade the `cronosd` binary at the upgrade height (`45062800`) to [v1.6.1](https://github.com/crypto-org-chain/cronos/releases/tag/v1.6.1)
  * Update the "*mempool*" and "*cronos*" config in `app.toml` (see "*New configurations*" [here](https://github.com/crypto-org-chain/cronos/releases/tag/v1.6.1))

**DO NOT UPGRADE to the binary v1.6.1 before that suggested upgrade schedule.**
{% endhint %}

## Step 0 - Don't panic

At the point of the proposed upgrade, the user will see the error message on the `cronosd` similar to the below:

```bash
ERR UPGRADE "v1.6" NEEDED at height: 38432212: {\"binaries\":{...."}}
```

**Don't panic** - The Chain will be paused to allow the majority of validators to upgrade. Validators and full node hosts will have to upgrade your Cronos nodes to the latest release binary.

### Backups

Before the upgrade, node hosts are encouraged to take a complete data backup. backup depends heavily on infrastructure, but generally, we can do this by backing up the `.cronos` directory.

## Step 1 - Get the `v1.6.1` binary

To simplify the following step, we will be using **Linux-x86** for illustration. Binary for Mac Windows with different DB and architecture are also available [here](https://github.com/crypto-org-chain/cronos/releases/tag/v1.5.1).

* Terminate the `cronosd`; afterwards, download the `1.6.1` released binaries from GitHub:

  ```bash
  $ curl -LOJ https://github.com/crypto-org-chain/cronos/releases/download/v1.6.1/cronos_1.6.1_Darwin_x86_64.tar.gz
  $ tar -zxvf cronos_1.6.1_Darwin_x86_64.tar.gz
  ```

{% hint style="info" %}
Remarks: If you have stated `cronosd` with *systemd* service, kindly stop it by

```bash
$ sudo systemctl stop cronosd
```

And replace the binary in the location where the `ExecStart` states in Systemd Unit file.
{% endhint %}

### Step 1.1 - Verify the version

You can verify the installation by checking the version of `cronosd`, the latest version is `1.6.1`.

```bash
# check the version of cronosd
$ ./cronosd version
1.6.1
```

## Step 2. - Run everything

We are ready to start the node join the network again with the new binary:

* Start `cronosd`, e.g.:

```bash
  $ ./cronosd start
```

{% hint style="info" %}
Remark: Once the `cronosd` is started we will see the message

```bash
applying upgrade "v1.6" at height: xxxxx"
```

and there will be an iteration over the previous blockchain data. This process will take a while, which is depending on the size of the database and the hardware specs.
{% endhint %}

Afterwards, sit back and wait for the syncing process. You can query the node syncing status by

```bash
$ ./cronosd status 2>&1 | jq '.SyncInfo.catching_up'
```

If the above command returns `false`, it means that your node **is synced**; otherwise, it returns `true` and implies your node is still catching up.

At this step, you've successfully performed the v1.6.1 upgrade!


# The "v1.7" upgrade guide (v1.6.1 to v1.7.0)

{% hint style="warning" %}
Action required:

* \[Regular user]
  * No Action needed, Cronos team will handle the upgrade for the mainnet.
* \[DApp Host]
  * Please test your DApps, nodes, product on the Cronos EVM testnet to confirm compatibility with `v1.7.0`
* \[Node hosts]
  * Upgrade the `cronosd` binary at the upgrade height (`58825800`) to [v1.7.0](https://github.com/crypto-org-chain/cronos/releases/tag/v1.7.0)

**DO NOT UPGRADE to the binary v1.7.0 before that suggested upgrade schedule.**
{% endhint %}

## Step 0 - Don't panic

At the point of the proposed upgrade, the user will see the error message on the `cronosd` similar to the below:

```bash
ERR UPGRADE "v1.7" NEEDED at height: 58825800: {\"binaries\":{...."}}
```

**Don't panic** - The Chain will be paused to allow the majority of validators to upgrade. Validators and full node hosts will have to upgrade your Cronos nodes to the latest release binary.

### Backups

Before the upgrade, node hosts are encouraged to take a complete data backup. backup depends heavily on infrastructure, but generally, we can do this by backing up the `.cronos` directory.

## Step 1 - Get the `v1.7.0` binary

To simplify the following step, we will be using **Linux-x86** for illustration. Binary for Mac Windows with different DB and architecture are also available [here](https://github.com/crypto-org-chain/cronos/releases/tag/v1.7.0).

* Terminate the `cronosd`; afterwards, download the `1.6.1` released binaries from GitHub:

  ```bash
  $ curl -LOJ https://github.com/crypto-org-chain/cronos/releases/download/v1.7.0/cronos_1.7.0_Darwin_x86_64.tar.gz
  $ tar -zxvf cronos_1.7.0_Darwin_x86_64.tar.gz
  ```

{% hint style="info" %}
Remarks: If you have stated `cronosd` with *systemd* service, kindly stop it by

```bash
$ sudo systemctl stop cronosd
```

And replace the binary in the location where the `ExecStart` states in Systemd Unit file.
{% endhint %}

### Step 1.1 - Verify the version

You can verify the installation by checking the version of `cronosd`, the latest version is `1.7.0`.

```bash
# check the version of cronosd
$ ./cronosd version
1.7.0
```

## Step 2. - Run everything

We are ready to start the node join the network again with the new binary:

* Start `cronosd`, e.g.:

```bash
  $ ./cronosd start
```

{% hint style="info" %}
Remark: Once the `cronosd` is started we will see the message

```bash
applying upgrade "v1.7" at height: xxxxx"
```

and there will be an iteration over the previous blockchain data. This process will take a while, which is depending on the size of the database and the hardware specs.
{% endhint %}

Afterwards, sit back and wait for the syncing process. You can query the node syncing status by

```bash
$ ./cronosd status 2>&1 | jq '.SyncInfo.catching_up'
```

If the above command returns `false`, it means that your node **is synced**; otherwise, it returns `true` and implies your node is still catching up.

At this step, you've successfully performed the v1.7.0 upgrade!


# Patching Unlucky & Duplicate Tx

In the first version of Cronos (`v0.6`), there was a known issue where transactions were being included in a block even when the block gas limit at the EVM level had already been reached.\
This led to:

* Some "unlucky" transactions are not reflected at the EVM level
* One would observe a few blocks that have >100% of the block gas limit at the EVM level.
* Duplicate transactions

The issue was:

* Last observed in block height `11662912`
* Fixed by binary `v1.0.14`

A node host has two ways to obtain a complete database with patched transactions:

1. Start from genesis and perform the necessary steps at each block height
2. Perform a one-off sync from a snapshot

## Method 1: Start from Genesis

**Step 1.** Follow the [Cronos Mainnet docs](/for-node-hosts/running-nodes/cronos-mainnet) from step 1 to start syncing a node with binary `v0.6.11`

**Step 2.** When you reach blockheight `2693800` , the binary should automatically halt.\
Now run the command `fix-unlucky-tx`to patch unlucky transactions. This patch only works for blocks until blockheight `2693800` .

```bash
./cronosd fix-unlucky-tx --start-block 1 --end-block 2693800
```

{% hint style="info" %}
More information on this command can be found in the release notes of `0.7.1-rc0`\
<https://github.com/crypto-org-chain/cronos/releases/tag/v0.7.1-rc0>\
\
And in the patch unlucky tx wiki\
<https://github.com/crypto-org-chain/cronos/wiki/Patch-Unlucky-Tx>
{% endhint %}

**Step 3.** Verify that the unlucky tx have been patched by checking the following example tx hash\
`0x435ef379b9ddf226d9fe098ae39d36aed2d03f3c46febd84c48919f1adf1b7fe`

```bash
curl -X POST 'https://evm.cronos.com' \
-H 'Content-Type: application/json' \
-d '{
    "jsonrpc": "2.0",
    "method": "eth_getTransactionByHash",
    "params": [
        "0x435ef379b9ddf226d9fe098ae39d36aed2d03f3c46febd84c48919f1adf1b7fe"
    ],
    "id": 44
}'

{"jsonrpc":"2.0","id":44,"result":{"blockHash":"0xf0843bf4f40edb41537ef08fe70e192da77fba26eaae31871c63b15a2b9bda81","blockNumber":"0x2925bc","from":"0x1bfcb6b1ee66fe339a9dc452359c4c111cc5ffc0","gas":"0x5d9b18","gasPrice":"0x48c27395000","maxFeePerGas":"0x48c27395000","maxPriorityFeePerGas":"0x48c27395000","hash":"0x435ef379b9ddf226d9fe098ae39d36aed2d03f3c46febd84c48919f1adf1b7fe","input":"0xd931ccbc000000000000000000000000000000000000000000000000000000000000000700000000000000000000000000000000000000000000000000000000000000050000000000000000000000000000000000000000000000000000000000000bf50000000000000000000000000000000000000000000000000000000002faf0800000000000000000000000000000000000000000000000000000000000000000000000000000000000000000000000000000000000000000000000000000012c00000000000000000000000000000000000000000000000000000000000026de00000000000000000000000000000000000000000000000000000000000005dc","nonce":"0x8b","to":"0xb212ce53ff067ce6e07e3adcd39a362e54c9e534","transactionIndex":"0x1e","value":"0x0","type":"0x2","accessList":[],"chainId":"0x19","v":"0x0","r":"0xf5268b439f80c5294465d70804fe2f731ef87bf54d726ead72772a0162081767","s":"0x292d753ad7e52839c974df0325bd41cb2766d4f1c0ecd5d561d14da05b257d8"}}
```

**Step 4.** Run the command `reindex-duplicated-tx` to patch duplicated transactions.\
This command works for all blockheights.

```bash
./cronosd reindex-duplicated-tx --start-block 1 --end-block 2693800
```

**Step 5.** Verify that the duplicate tx have been patched by checking the following example tx hash\
`0x3941c8a1625163165fb185e934d463743258ee4b0924c5deb690fc836dab839d`

```bash
curl -X POST 'https://evm.cronos.com' \
--header 'Content-Type: application/json' \
--data-raw '{
    "jsonrpc": "2.0",
    "method": "eth_getTransactionByHash",
    "params": [
        "0x3941c8a1625163165fb185e934d463743258ee4b0924c5deb690fc836dab839d"
    ],
    "id": 44
}'

{"jsonrpc":"2.0","id":44,"result":{"blockHash":"0x6eca0e692f6cce612a5c52294db0f5c75127dc6feb310b2693bc697fe3797793","blockNumber":"0x28c3ed","from":"0xdb8befa2f810662316e298f387c943e57b377260","gas":"0x7a120","gasPrice":"0x4a36fb03800","hash":"0x3941c8a1625163165fb185e934d463743258ee4b0924c5deb690fc836dab839d","input":"0x54d2f242","nonce":"0x30","to":"0xc6494099716abe3d95db5a97e5a7fc5ae7e7caba","transactionIndex":"0x0","value":"0x0","type":"0x0","v":"0x55","r":"0xea07319d8a7666afd8ad4970d7f11e2135c9b71719fc34b69995c110beeb84f4","s":"0x2f4f5aa3a822121ee65aa879ff50a2a4504d2f7575d404f1d22685e06d86e07b"}}
```

**Step 6.** After the unlucky has been patched, follow the [Upgrade notes](https://docs.cronos.com/for-node-hosts/running-nodes/cronos-mainnet#step-0-notes-on-huygen-network-upgrade) on performing upgrades until the node is synced to the current block height.

{% hint style="info" %}
You can print out which blocks will need re-indexing by adding the `--print-txs` argument. Bear in mind that this won't actually reindex the block, but rather just print.
{% endhint %}

## Method 2: Start from a latest patched snapshot

Alternatively, you can do a one-off sync, if you start with the most recent snapshot, that already includes patched transactions (after November).

Get the latest snapshot with patched data on S3 [here](https://github.com/crypto-org-chain/cronos/wiki/Patch-Unlucky-Tx#patched-archived-snapshots)


# debug\_trace Methods - Gas Simulation Bug (Fixed in v1.7.8)

**Summary**

Two related issues have been identified with `debug_trace` methods on nodes running versions earlier than `v1.7.8`. Both return a false `"insufficient funds"` error even when the affected transactions succeeded on-chain (receipt status `0x1`).

**Root Cause**

When replaying a historical transaction, the EVM keeper deducts the gas fee upfront using current fee market parameters. A change in fee market behavior in an older Cronos version causes the recomputed fee to differ from what was originally charged at the time of inclusion. This makes the upfront deduction fail with an "insufficient funds" error, even though the transaction executed successfully on-chain.

{% hint style="warning" %}
The proposed fix bypasses the fee deduction for gas at the simulation level. While this resolves the error, it can result in incorrect gas accounting. We do not recommend relying on this simulation if you need exact gas accounting (for example, calculating precise CRO balances in a wallet). \
See "Implications of the Fix" below.
{% endhint %}

#### **Issue 1: `debug_traceBlockByNumber`**&#x20;

On debug-enabled nodes running binary versions earlier than `v1.7.8`, `debug_traceBlockByNumber` (callTracer) returns a false error trace for one transaction per block across approximately 30 known mainnet blocks:

```json
{
  "error": "rpc error: code = Internal desc = spendable balance X basecro is smaller than Y basecro: insufficient funds"
}
```

The issue is deterministic and reproducible across multiple node providers. Affected blocks:&#x20;

`2195345, 2216975, 2248485, 2398387, 2478809, 8066106, 8292697, 11577952, 11611854, 11614860, 11615746, 11615834, 11616122, 11616540, 11617030, 11617275, 11618202, 11624946, 11624962, 11627501, 11627662, 11628192, 11636446, 11644174, 11723806, 13467231, 13670292, 14058966, 14074873, 14146732`&#x20;

**Note**: This list may expand as further investigation continues.

#### Issue 2: `debug_traceTransaction`&#x20;

On debug-enabled nodes running binary versions earlier than `v1.7.8`, `debug_traceTransaction` (callTracer) returns the following error:

```json
{
  "error": {
    "code": -32000,
    "message": "rpc error: code = Unknown desc = rpc error: code = Internal desc = spendable balance X basecro is smaller than Y basecro: insufficient funds: unknown request"
  }
}
```

### Resolution

Both issues are fixed in [**v1.7.8**](https://github.com/crypto-org-chain/cronos/releases/tag/v1.7.8). Upgrade your node binary to `v1.7.8` to resolve them.

The fix introduces an optional traceReplay boolean in the trace config. When enabled and the upfront fee deduction fails, the keeper logs a warning, continues the trace without charging the fee, and skips the matching gas refund. &#x20;

```json
  {                                                                              
    "jsonrpc": "2.0",
    "method": "debug_traceTransaction",                                          
    "params": ["0x<tx-hash>", { "tracer": "callTracer", "traceReplay": true }],  
    "id": 1                                                                      
  }     
```

Enable `traceReplay` only when a `debug_trace` call against an already-committed transaction fails with a gas/balance error. It is off by default.&#x20;

{% hint style="warning" %}
Because the fix bypasses fee deduction at the simulation level, gas accounting for affected transactions will be approximate. The reported gas figure may be off by approximately the amount of gas consumed by the transaction itself.

Do not rely on trace results with `traceReplay`: true for exact gas accounting (e.g., calculating precise CRO balances in a wallet). Use it to inspect execution flow only. Omitting the flag (or setting it to false) preserves the previous strict behavior.
{% endhint %}


# Cronos EVM Testnet

### Pre-requisites

#### Supported OS

We officially support macOS, Windows, and Linux only. Other platforms may work but there is no guarantee. We will extend our support to other operating systems after we have stabilised our current architecture.

#### Prepare your machine

To run Cronos Tesnet nodes, you will need a machine with the following minimum requirements to run different types of nodes:

* Pruned node (setting pruning=everything)
  * Storage: \~25G\*
  * RAM: 16G (LevelDB) or 32G RAM (RocksDB)\*\*\*
  * CPU: 4-core
* Default full node (setting pruning=default)
  * Storage: \~1.5T\*\*
  * RAM: 16G (LevelDB) or 32G RAM (RocksDB)\*\*\*
  * CPU: 4-core
* Archive node (setting pruning=nothing)
  * Storage: \~3T\*\* (LevelDB) or \~1.8T (RocksDB)
  * RAM: 16G (LevelDB) or 32G RAM (RocksDB)\*\*\*
  * CPU: 4-core

*\*Only in case of state-sync enabled.*\
\&#xNAN;*\*\* e.g. Note that size of snapshots will keep growing.*\
\&#xNAN;*\*\*\* Note that during a state-sync the node might require higher RAM than 3GB but, returns to normal after state-sync has finished.*

{% hint style="info" %}
Note that all depends on the type of node you are running and settings will vary depending on your usage.
{% endhint %}

{% tabs %}
{% tab title="Testnet" %}

* [Seeds for Fullnode](https://github.com/crypto-org-chain/cronos-testnets/blob/main/testnet.json#L21)
* [Genesis files](https://raw.githubusercontent.com/crypto-org-chain/cronos-testnets/main/cronostestnet_338-3/genesis.json)
* [Binaries Links](https://github.com/crypto-org-chain/cronos/releases)
  {% endtab %}
  {% endtabs %}

### Step 0 : Notes on Testnet Network upgrade

This is a detailed documentation for setting up a full node on Cronos testnet `cronostestnet_338-3`.

Before we start, please note that there are several binary upgrades along with the testnet:

<table><thead><tr><th width="180.59193929036456">Block Height</th><th width="228.6441650390625">Binary Version</th><th>Instruction</th></tr></thead><tbody><tr><td>~ <code>1553700</code></td><td><a href="https://github.com/crypto-org-chain/cronos/releases/tag/v0.6.0-testnet">cronos_0.6.0-testnet</a></td><td><p>Follow <a href="#step-1-get-the-cronos-testnet-binary">Step 1</a> to <a href="#step-3-run-everything">Step 3</a> and start the node with the older binary version <code>v0.6.0</code>;<br></p><p>Sync-up with the blockchain until it reaches the target upgrade block height <code>1553700</code>;</p><p><br><em>Please note that <code>panic: UPGRADE "v0.7.0" NEEDED at height: 1553700</code> is the expected error message when we hit that block.</em></p></td></tr><tr><td><code>1553700</code></td><td><a href="https://github.com/crypto-org-chain/cronos/releases/tag/v0.7.0-rc1">cronos_0.7.0-rc1-testnet</a></td><td><p>After it reaches the block height <code>1553700</code>, update the binary to <a href="https://github.com/crypto-org-chain/cronos/releases/tag/v0.7.0-rc1">cronos_0.7.0-rc1-testnet</a>;<br></p><p>Then update the default <code>~/.cronos/config/app.toml</code>(given there are some new parameters introduced in the upgrade), either by manually replacing the local <code>app.toml</code> with <a href="https://raw.githubusercontent.com/crypto-org-chain/cronos-testnets/main/cronostestnet_338-3/app.toml">this new app.toml</a>, or by: <code>$ curl https://raw.githubusercontent.com/crypto-org-chain/cronos-testnets/main/cronostestnet_338-3/app.toml > ~/.cronos/config/app.toml</code><br></p><p>Then continue to sync from block <code>1553700</code>;</p></td></tr><tr><td><code>1869000</code></td><td><a href="https://github.com/crypto-org-chain/cronos/releases/tag/v0.7.0-rc2">cronos_0.7.0-rc2-testnet</a></td><td><p>After it reaches the block height <code>1869000</code>, update the binary to <a href="https://github.com/crypto-org-chain/cronos/releases/tag/v0.7.0-rc2">cronos_0.7.0-rc2-testnet</a>.</p><p><br>Start the node again and continue to sync from block <code>1869000</code>.</p></td></tr><tr><td><code>2483600</code></td><td><a href="https://github.com/crypto-org-chain/cronos/releases/tag/v0.7.0-rc3">cronos_0.7.0-rc3-testnet</a></td><td><p>Node host would have to upgrade the Cronos testnet binary to <code>cronos_0.7.0-rc3-testnet</code> when we reached the block height <code>2483600</code><br></p><p>There are a few extra parameters that we would have to add to <code>.cronos/config/app.toml</code>. Please refer to the "Config Changes" <a href="https://github.com/crypto-org-chain/cronos/releases/tag/v0.7.0-rc3">here</a>.<br><br>Start the node again.</p></td></tr><tr><td><code>4904100</code></td><td><a href="https://github.com/crypto-org-chain/cronos/releases/tag/v0.8.1">cronos_0.8.1-testnet</a></td><td><p>After it reaches the block height <code>4904100</code>, update the binary to <a href="https://github.com/crypto-org-chain/cronos/releases/tag/v0.8.1">cronos_0.8.1-testnet</a>.<br></p><p>Start the node again.</p></td></tr><tr><td><code>5138880</code></td><td><a href="https://github.com/crypto-org-chain/cronos/releases/tag/v0.9.0-beta2">cronos_0.9.0-beta2-testnet</a></td><td><p>After it reaches the block height <code>5138880</code>, update the binary to <a href="https://github.com/crypto-org-chain/cronos/releases/tag/v0.9.0-beta2">cronos_0.9.0-beta2-testnet</a>;<br><br>There are a few extra parameters that we would have to add to <code>.cronos/config/app.toml</code></p><ul><li>EVM Configuration - [evm] and;</li><li>JSON RPC Configuration - [json-rpc]. they are:</li></ul><p>[evm]</p><p><code>max-tx-gas-wanted=500000</code></p><p>[json-rpc]</p><ul><li><code>feehistory-cap = 100</code></li><li><code>logs-cap = 10000</code></li><li><code>block-range-cap = 10000</code></li><li><code>http-timeout="30s"</code></li><li><code>http-idle-timeout="120s"</code></li></ul><p>Start the node again.</p></td></tr><tr><td><code>6134000</code></td><td><a href="https://github.com/crypto-org-chain/cronos/releases/tag/v1.0.0-rc4">cronos_1.0.0-rc4-testnet</a></td><td><p>After it reaches the block height <code>6134000</code>, update the binary to <a href="https://github.com/crypto-org-chain/cronos/releases/tag/v1.0.0-rc4">cronos_1.0.0-rc4-testnet</a>;</p><p><br>Start the node again.</p></td></tr><tr><td><code>6969900</code></td><td><a href="https://github.com/crypto-org-chain/cronos/releases/tag/v1.0.2">cronos_1.0.2-testnet</a></td><td><p>After it reaches the block height <code>6969900</code>, update the binary to <a href="https://github.com/crypto-org-chain/cronos/releases/tag/v1.0.2">cronos_1.0.2-testnet</a>;<br></p><p>There are two parameters that we would have to update at <code>.cronos/config/app.toml</code> and add to <code>.cronos/config/config.toml</code><br>Please go check "Config Changes" in <a href="https://github.com/crypto-org-chain/cronos/releases/tag/v1.0.2">here</a>.<br><br>Start the node again.</p></td></tr><tr><td><code>14046800</code></td><td><a href="https://github.com/crypto-org-chain/cronos/releases/tag/v1.1.0-rc0">cronos_1.1.0-rc0-testnet</a></td><td><p>After it reaches the block height <code>14046800</code>, update the binary to <a href="https://github.com/crypto-org-chain/cronos/releases/tag/v1.1.0-rc0">cronos_1.1.0-rc0-testnet</a>;</p><p><br>Start the node again.</p></td></tr><tr><td><code>17382000</code></td><td><a href="https://github.com/crypto-org-chain/cronos/releases/tag/v1.1.0-rc2">cronos-v1.1.0-rc2-testnet</a></td><td><p>After it reaches the block height <code>17382000</code>, update the binary to <a href="https://github.com/crypto-org-chain/cronos/releases/tag/v1.1.0-rc2">cronos-v1.1.0-rc2-testnet</a>;</p><p><br>Start the node again.</p></td></tr><tr><td><code>18881000</code></td><td><a href="https://github.com/crypto-org-chain/cronos/releases/tag/v1.1.0-rc4">cronos_1.1.0-rc4-testnet</a></td><td><p>After it reaches the block height <code>18881000</code>, update the binary to <a href="https://github.com/crypto-org-chain/cronos/releases/tag/v1.1.0-rc4">cronos_1.1.0-rc4-testnet</a>;</p><p><br>Start the node again.</p></td></tr><tr><td><code>20142500</code></td><td><a href="https://github.com/crypto-org-chain/cronos/releases/tag/v1.2.0-rc0">cronos_1.2.0-rc0-testnet</a></td><td><p>After it reaches the block height <code>20142500</code>, update the binary to <a href="https://github.com/crypto-org-chain/cronos/releases/tag/v1.2.0-rc0">cronos_1.2.0-rc0-testnet</a>;</p><p><br>Start the node again.</p></td></tr><tr><td><code>22200000</code></td><td><a href="https://github.com/crypto-org-chain/cronos/releases/tag/v1.3.0-rc1">cronos_1.3.0-rc1-testnet</a></td><td><p>After it reaches the block height <code>22200000</code>, update the binary to <a href="https://github.com/crypto-org-chain/cronos/releases/tag/v1.3.0-rc1">cronos_1.3.0-rc1-testnet</a>;</p><p><br>Start the node again.</p></td></tr><tr><td><code>27101800</code></td><td><a href="https://github.com/crypto-org-chain/cronos/releases/tag/v1.4.0-rc3">cronos_v1.4.0-rc3-testnet</a></td><td><p>After it reaches the block height <code>27101800</code>, update the binary to <a href="https://github.com/crypto-org-chain/cronos/releases/tag/v1.4.0-rc3">cronos_v1.4.0-rc3-testnet</a>;</p><p><br>Config Changes: <code>v1.4</code> for <code>versiondb</code> nodes in <code>app.toml.</code> See all changes <a href="https://github.com/crypto-org-chain/cronos/releases/tag/v1.4.0-rc3">here</a>.</p><p><br>Start the node again.</p></td></tr><tr><td><code>27540000</code></td><td><a href="https://github.com/crypto-org-chain/cronos/releases/tag/v1.4.0-rc5">cronos_v1.4.0-rc5-testnet</a></td><td><p>After it reaches the block height <code>27540000</code>, update the binary to <a href="https://github.com/crypto-org-chain/cronos/releases/tag/v1.4.0-rc5">cronos_v1.4.0-rc5-testnet</a>;</p><p><br>Start the node again.</p></td></tr><tr><td><code>50026000</code></td><td><a href="https://github.com/crypto-org-chain/cronos/releases/tag/v1.5.0">cronos_1.5.0-testnet</a></td><td><p>After it reaches the block height <code>50026000</code>, update the binary to <a href="https://github.com/crypto-org-chain/cronos/releases/tag/v1.5.0">cronos_1.5.0-testnet</a>;<br><br>Update<code>query-gas-limit = "100000000"</code> in <code>app.toml</code>.</p><p>Start the node again.</p></td></tr><tr><td><code>60815000</code></td><td><a href="https://github.com/crypto-org-chain/cronos/releases/tag/v1.6.1">cronos_1.6.1-testnet</a></td><td><p>After it reaches the block height <code>60815000</code>, update the binary to <a href="https://github.com/crypto-org-chain/cronos/releases/tag/v1.6.1">cronos_1.6.1-testnet</a>;<br><br>For config changes, please refer to the <a href="https://github.com/crypto-org-chain/cronos/releases/tag/v1.6.1">release note</a> for config changes.</p><p>Start the node again.</p></td></tr><tr><td><code>70440000</code></td><td><a href="https://github.com/crypto-org-chain/cronos/releases/tag/v1.7.0">cronos_v1.7.0-testnet</a></td><td><p>After it reaches the block height <code>70440000</code>, update the binary to <a href="https://github.com/crypto-org-chain/cronos/releases/tag/v1.7.0">cronos_v1.7.0-testnet</a>;</p><p>Start the node again.</p></td></tr></tbody></table>

### Step 1. Get the Cronos Testnet binary

{% hint style="info" %}
Remarks: The following is the minimal setup for a **full node**.
{% endhint %}

To simplify the following step, we will be using **Linux** (Intel x86) for illustration. Binary for

**Mac** Intel x86 as `Darwin_x86_64`, **Mac** M1 as `arm64` and **Windows** as `Windows_x86_64` are also available [here](https://github.com/crypto-org-chain/cronos/releases). Please check the required node version [here](https://github.com/crypto-org-chain/cronos-testnets/blob/main/testnet.json).

* To install released **Cronos testnet binaries** from github:
* Create a new folder for the Install e.g. (cronostestnet):

  ```bash
  $ cd cronostestnet
  $ curl -LOJ https://github.com/crypto-org-chain/cronos/releases/download/v1.0.9/cronos_1.0.9-testnet_Linux_x86_64.tar.gz
  $ tar -zxvf cronos_1.0.9-testnet_Linux_x86_64.tar.gz
  ```

  Afterwards, you can check the version of `cronosd` by:

  ```bash
  $ cd cronostestnet/bin
  $ ./cronosd version
  v1.0.9-testnet
  ```

### Step 2. Configure `cronosd`

#### Step 2-0 (Optional) Clean up the old blockchain data

* If you have joined `cronostestnet_338-2` before, you would have to clean up the old blockchain data and start over again, it can be done by running:

  ```bash
  $ ./cronosd unsafe-reset-all
  ```
* Remove the old Genesis file:

  ```bash
  $ rm ~/.cronos/config/genesis.json
  ```

Before kick-starting your node, we will have to configure your node so that it connects to the Cronos Testnet:

#### Step 2-1 Initialize `cronosd`

* First of all, you can initialize cronosd by:

  ```bash
    $ ./cronosd init [moniker] --chain-id cronostestnet_338-3
  ```

  This `moniker` will be the displayed id of your node when connected to the Cronos network. When providing the moniker value, make sure you drop the square brackets since they are not needed. The example below shows how to initialize a node named `pegasus-node` :

  ```bash
    $ ./cronosd init pegasus-node --chain-id cronostestnet_338-3
  ```

{% hint style="info" %}
NOTE

* Depending on your cronosd home setting, the cronosd configuration will be initialized to that home directory. To simplify the following steps, we will use the default cronosd home directory `~/.cronos/` for illustration.
* You can also put the `cronosd` to your binary path and run it by `cronosd`
  {% endhint %}

#### Step 2-2 Configure cronosd

* Download and replace the Cronos Testnet `genesis.json` by:

  ```bash
  $ curl https://raw.githubusercontent.com/crypto-org-chain/cronos-testnets/main/cronostestnet_338-3/genesis.json > ~/.cronos/config/genesis.json
  ```
* Verify sha256sum checksum of the downloaded `genesis.json`. You should see `OK!` if the sha256sum checksum matches.

  ```bash
  $ if [[ $(sha256sum ~/.cronos/config/genesis.json | awk '{print $1}') = "7d898ad75b3e2e1fa182d928ca10a284c1dd252e12d17ad6dab76551b29d1a59" ]]; then echo "OK"; else echo "MISMATCHED"; fi;
  OK!
  ```

{% hint style="info" %}
NOTE

For Mac environment, `sha256sum` was not installed by default. In this case, you may setup `sha256sum` with this command:

```bash
function sha256sum() { shasum -a 256 "$@" ; } && export -f sha256sum
```

{% endhint %}

* (Validator node only) In `~/.cronos/config/app.toml`, update minimum gas price to avoid [transaction spamming](https://github.com/cosmos/cosmos-sdk/issues/4527)

  ```bash
  $ sed -i.bak -E 's#^(minimum-gas-prices[[:space:]]+=[[:space:]]+).*$#\1"5000000000000basetcro"#' ~/.cronos/config/app.toml
  ```
* For network configuration, in `~/.cronos/config/config.toml`, validator nodes need to modify the configurations of `persistent_peers`, `create_empty_blocks_interval` and `timeout_commit`. For non-validator full nodes, only `persistent_peers` modification is required:

  ```bash
  $ sed -i.bak -E 's#^(persistent_peers[[:space:]]+=[[:space:]]+).*$#\1"8fcba3485c67a2a00a383b6f45660a4ac529c6ca@52.77.30.18:26656,e65199bc579ffd89d7c021c5611f9f1c97f7ff13@54.251.209.254:26656,b8e6d6e16d236fa6a7101316d96de718200c500c@bd-cronos-testnet-seed-node-01.bdnodes.net:26656"#' ~/.cronos/config/config.toml
  $ sed -i.bak -E 's#^(create_empty_blocks_interval[[:space:]]+=[[:space:]]+).*$#\1"5s"#' ~/.cronos/config/config.toml
  $ sed -i.bak -E 's#^(timeout_commit[[:space:]]+=[[:space:]]+).*$#\1"5s"#' ~/.cronos/config/config.toml
  ```

{% hint style="info" %}
NOTE

For Mac environment, if `jq` is missing, you may install it by: `brew install jq`
{% endhint %}

### Step 3. Run everything

{% hint style="warning" %}
CAUTION: This page only shows the minimal setup for validator / full node.

Furthermore, you may want to run full nodes as sentries (see [Tendermint](https://docs.tendermint.com/master/tendermint-core/running-in-production.html)), restrict your validator connections to only connect to your full nodes, test secure storage of validator keys etc.
{% endhint %}

Once `cronosd` has been configured, we are ready to start the node and sync the blockchain data.

* Start cronosd, e.g.:

```bash
  $ ./cronosd start
```

{% hint style="info" %}
Remarks: If you see errors saying `too many files opened...`, then you need to set a higher number for maximum open file descriptors in your OS.

If you are on OSX or Linux, then the following could be useful:

```bash
# Check current max fd
$ ulimit -n
# Set a new max fd
$ ulimit -Sn [NEW_MAX_FILE_DESCRIPTOR]
# Example
$ ulimit -Sn 4096
```

{% endhint %}

*(Optional for Linux)* Start cronosd with systemd service, e.g.:

```bash
  $ curl -s https://raw.githubusercontent.com/crypto-org-chain/cronos-docs/master/systemd/create-service.sh -o create-service.sh && curl -s https://raw.githubusercontent.com/crypto-org-chain/cronos-docs/master/systemd/cronosd.service.template -o cronosd.service.template
  $ chmod +x ./create-service.sh && ./create-service.sh
  $ sudo systemctl start cronosd
  # view log
  $ journalctl -u cronosd -f
```

{% hint style="info" %}
Example: /etc/systemd/system/cronosd.service created by script

```bash
# /etc/systemd/system/cronosd.service
[Unit]
Description=cronosd
ConditionPathExists=/usr/local/bin/cronosd
After=network.target

[Service]
Type=simple
User=ubuntu
WorkingDirectory=/usr/local/bin
ExecStart=/usr/local/bin/cronosd start --home /home/ubuntu/.cronos
Restart=on-failure
RestartSec=10
LimitNOFILE=50000

[Install]
WantedBy=multi-user.target
```

{% endhint %}

It should begin fetching blocks from the other peers. Please wait until it is fully synced before moving onto the next step.

* You can query the node syncing status by

  ```bash
  $ ./cronosd status 2>&1 | jq '.SyncInfo.catching_up'
  ```

  If the above command returns `false`, It means that your node **is fully synced**; otherwise, it returns `true` and implies your node is still catching up.
* One can check the current block height by querying the public full node by:

  ```bash
  curl -s https://evm-t3.cronos.com/:26657/commit | jq "{height: .result.signed_header.header.height}"
  ```

  and you can check your node's progress (in terms of block height) by

  ```bash
  $ ./cronosd status 2>&1 | jq '.SyncInfo.latest_block_height'
  ```


# Cronos EVM Snapshots

To streamline the node setup process and reduce sync times, Cronos supports multiple snapshot and sync methods, both **officially provided** **by Cronos Labs** and supported by **ecosystem partners**. These options allow node operators to start from a recent blockchain state without syncing from the genesis block.\
\
In general, there are 3 kinds of pruning types (respectively for mainnet and testnet):

**Cronosmainnet\_25-1-pruned / Cronostestnet\_338-3-pruned**

* Pruned snapshot is the quickest way to get a node running. If you just would like to give it a shot, use it for a validator or sentry node, the pruned snapshot will be a good choice. Pruned snapshots have tx index disabled to save disk/download size, which also will make API queries not work backward in time. If you still want to use a pruned snapshot to start an API node, then you can enable tx index on your end to start indexing blocks from when you startup your node. But you will not be able to query anything earlier than that.

**Cronosmainnet\_25-1-default / Cronostestnet\_338-3-default**

* Default is a good middle choice between everything. It will work in most use cases, validator, sentry node, API nodes. It has tx index enabled, so you can query block back in time. The only thing that default nodes do not have is the full history from the start of the chain or chain upgrade.

**Cronosmainnet\_25-1-archive / Cronostestnet\_338-3-archive**

* For the users who would like to query the old block, you may pick the archive one for complete blockchain data. The archive node will have all the blocks from the chain start or chain upgrade with full indexing. So this is a good option for API nodes if you need to have access to the whole chain history. Archives grow fast in size and might be more sluggish to run, so if you need something simpler default or a pruned kickstarted API node might solve most of the needs out there.

### **Cronos EVM Snapshot Options**

This section provides an overview and guidance on the available snapshot options for Cronos EVM.

{% content-ref url="/pages/ev21Aic78SUp9betN4M1" %}
[Cronos Native Snapshots](/for-node-hosts/running-nodes/cronos-evm-snapshots/cronos-native-snapshots)
{% endcontent-ref %}

{% content-ref url="/pages/rskqAEhJNgFyIcwNd5LJ" %}
[State Sync](/for-node-hosts/running-nodes/cronos-evm-snapshots/state-sync)
{% endcontent-ref %}

{% content-ref url="/pages/wECOEFpZZBnVBO5wWQUR" %}
[Public Node](/for-node-hosts/running-nodes/cronos-evm-snapshots/public-node)
{% endcontent-ref %}

{% content-ref url="/pages/sxoICm9l76Kq8T10B5bh" %}
[KSYNC](/for-node-hosts/running-nodes/cronos-evm-snapshots/ksync)
{% endcontent-ref %}


# Cronos Native Snapshots

Fast, reliable blockchain snapshots for Cronos networks

### Introduction

These snapshots are available for both Cronos EVM Mainnet and Testnet networks, supporting multiple database backends including LevelDB, RocksDB, and VersionDB. Additionally, snapshots are provided for different node types to match your specific use case:

* ***Archive nodes***: store complete blockchain history and state
* ***Default nodes***: standard configuration with recent state data
* ***Pruned nodes*****:** optimized storage with minimal historical data

All Cronos EVM snapshots can be accessed at: <https://snapshot.cronos.com/>

Using these snapshots significantly reduces the time required to get your Cronos node operational, allowing you to quickly join the network without waiting for a full synchronization from the genesis block.

### Step 1: Installation Guide <a href="#step-1-quicksync-download" id="step-1-quicksync-download"></a>

Before using snapshots, you'll need to install the Cronos binary. Follow these steps to get started:

1. Create a new directory and navigate to it:

```
mkdir cronos-node
cd cronos-node
```

2. Download the latest Cronos Binary [release](https://github.com/crypto-org-chain/cronos/releases):

<pre><code><strong>curl -LOJ https://github.com/crypto-org-chain/cronos/releases/download/v1.7.8/cronos_1.7.8_Darwin_arm64.tar.gz
</strong></code></pre>

3. Unpack & Install the binary files:

```
tar -zxvf cronos_1.7.8_Darwin_arm64.tar.gz
```

4. Verify the installation:

```
cd bin
./cronosd version
Expected output:
1.7.8
```

Once the Cronos binary is installed and verified, you can proceed with downloading and applying the appropriate snapshot for your node configuration.

### Step 2: Download Cronos EVM Snapshot

Download the snapshot you need. To avoid using outdated links, users is recommended to visit the [Cronos EVM Snapshots site](https://snapshot.cronos.com/) to obtain the latest available snapshot URL that matches your desired snapshot type.

{% hint style="warning" %}
**Please note**:\
The snapshot link shown below is **only an example**.\
Snapshot files are **retained for 14 days only** and automatically removed after that.

If the link provided in this guide has expired at the time of downloading, replace it manually by retrieving the latest link from the snapshot site above.
{% endhint %}

```
wget https://snapshot-download.cronos.com/cronos/mainnet-snapshot/leveldb/pruned/cronosmainnet_25-1_leveldb-pruned-20260707.tar.lz4
```

### Step 3: Unpack Cronos EVM Snapshot

First copy or move the snapshot to the hidden `.cronos/` directory in the root. Then unpack the file:

```
tar -zxvf cronosmainnet_25-1_leveldb-pruned-20260707.tar.lz4
```

{% hint style="info" %}
**Note:** Pre-requisite: gnu-tar and lz4\
`brew install gnu-tar lz4`
{% endhint %}

### Step 4: Initialize `cronosd` <a href="#step-1-quicksync-download" id="step-1-quicksync-download"></a>

Initialize your Cronos node with a unique identifier (moniker):

```
./cronosd init [moniker] --chain-id cronosmainnet_25-1
```

The `moniker` will be the displayed name of your node when connected to the Cronos network. Make sure to replace `[moniker]` with your desired node name without the square brackets.

### Step 4: Configure `cronosd` <a href="#step-1-quicksync-download" id="step-1-quicksync-download"></a>

Now you'll need to download the genesis file and configure your node settings:

1. Download and replace the Cronos Mainnet genesis file:

```
curl https://raw.githubusercontent.com/crypto-org-chain/cronos-mainnet/master/cronosmainnet_25-1/genesis.json > ~/.cronos/config/genesis.json
```

2. Verify the genesis file checksum:

```
if [[ $(sha256sum ~/.cronos/config/genesis.json | awk '{print $1}') = "58f17545056267f57a2d95f4c9c00ac1d689a580e220c5d4de96570fbbc832e1" ]]; then echo "OK"; else echo "MISMATCHED"; fi;
```

Expected output:

```
OK
```

3. Configure network settings:

Update the configuration file with the required seed nodes and timing parameters:

```
sed -i.bak -E 's#^(seeds[[:space:]]+=[[:space:]]+).*$#\1"0d5cf1394a1cfde28dc8f023567222abc0f47534@seed-0.cronos.com:26656,3032073adc06d710dd512240281637c1bd0c8a7b@seed-1.cronos.com:26656,04f43116b4c6c70054d9c2b7485383df5b1ed1da@seed-2.cronos.com:26656,337377dcda43d79c537d2c4d93ad3b698ce9452e@bd-cronos-mainnet-seed-node-01.bdnodes.net:26656"#' ~/.cronos/config/config.toml

sed -i.bak -E 's#^(create_empty_blocks_interval[[:space:]]+=[[:space:]]+).*$#\1"5s"#' ~/.cronos/config/config.toml

sed -i.bak -E 's#^(timeout_commit[[:space:]]+=[[:space:]]+).*$#\1"5s"#' ~/.cronos/config/config.toml
```

4. Update the `minimum-gas-prices` in the app.toml file:

```
minimum-gas-prices = "46000000000000basecro"
```

### Step 5: Start the Node

```
  $ ./cronosd start
```


# Snapshot Downloader

The Snapshot Downloader is a Rust-based tool that automates setting up a Cronos node from a snapshot. It supports two modes:

* **Download only:** Run with `--profile` to download a snapshot without any configuration file.
* **Full setup:** Configure `config.yaml` and run `cargo run` to go through the full node setup lifecycle.

This guide walks you through installation, setup, and configuration. Follow the steps in order, adapting to your hardware setup (e.g. number of disks).

### Environment Setup

The tool works best on Linux with Btrfs, as it leverages Btrfs subvolumes for efficient snapshot handling. On Linux, users can manually create snapshots of subvolumes and roll back to previous states if needed.

On macOS and Windows, the downloader still supports snapshot download, extraction, and node start, but Btrfs-specific snapshot and rollback features are unavailable.

**Note:** On Windows, it requires a Unix-compatible shell (e.g. Git Bash) to run the tool.

<details>

<summary><strong>Linux Only – Btrfs Setup</strong></summary>

**Install `btrfs-progs`**

```sh
sudo apt install -y btrfs-progs
```

**Format and Mount Disk(s)**

Choose one of the below according to the number of additional disk(s) mounted.

**Format and Mount 2 Disks**

```sh
sudo parted /dev/nvme0n2 -- mklabel gpt
sudo parted /dev/nvme0n2 -- mkpart downloads btrfs 0% 100%
sudo mkfs.btrfs /dev/nvme0n2p1
sudo parted /dev/nvme0n3 -- mklabel gpt
sudo parted /dev/nvme0n3 -- mkpart chain-data btrfs 0% 100%
sudo mkfs.btrfs /dev/nvme0n3p1
mkdir -p ~/test
sudo mount /dev/nvme0n3p1 ~/test
sudo btrfs sub create ~/test/data
sudo btrfs sub create ~/test/data/.snapshots
```

```sh
mkdir -p ~/.snapshot-downloader/downloads
mkdir -p ~/.snapshot-downloader/workspace/home/data
```

```sh
sudo mount /dev/nvme0n2p1 ~/.snapshot-downloader/downloads
sudo mount -osubvol=data /dev/nvme0n3p1 ~/.snapshot-downloader/workspace/home/data
sudo chown -R $USER ~/.snapshot-downloader/downloads
sudo chown -R 1001:1002 ~/.snapshot-downloader/workspace/home/data
```

**Format and Mount 1 Disk**

```sh
sudo parted /dev/nvme0n2 -- mklabel gpt
sudo parted /dev/nvme0n2 -- mkpart downloads btrfs 0% 100%
sudo mkfs.btrfs /dev/nvme0n2p1
```

```sh
mkdir -p ~/.snapshot-downloader
```

```sh
sudo mount /dev/nvme0n2p1 ~/.snapshot-downloader
sudo chown -R $USER ~/.snapshot-downloader
```

**Resize Disk (Optional)**

```sh
sudo growpart /dev/nvme0n3 1
sudo btrfs filesystem resize max ~/.snapshot-downloader/workspace/home/data
```

</details>

### Dependencies Installation

Install Rust using the official installer.

```sh
$ curl --proto '=https' --tlsv1.2 -sSf https://sh.rustup.rs | sh
$ . "$HOME/.cargo/env"
```

Install other dependencies needed for building Rust projects.

```sh
$ sudo apt install -y gcc libssl-dev pkg-config
```

### Build Snapshot Downloader

```sh
$ git clone https://github.com/whs-dot-hk/snapshot-downloader2.git
$ cd snapshot-downloader2
$ cargo build
```

***

### Mode 1: Download Snapshot Only

Run with `--profile` to download a snapshot without a `config.yaml` file.

```sh
$ cargo run -- --profile cronos-{network}-{dbType}-{pruneType}
```

Full available `profile` list:

{% tabs %}
{% tab title="Cronos EVM Mainnet" %}

```
cronos-mainnet-leveldb-archive
cronos-mainnet-leveldb-default
cronos-mainnet-leveldb-pruned
cronos-mainnet-rocksdb-archive
cronos-mainnet-rocksdb-default
cronos-mainnet-rocksdb-pruned
cronos-mainnet-versiondb-archive
cronos-mainnet-versiondb-pruned
cronos-mainnet-versiondb-memiavl-none
```

{% endtab %}

{% tab title="Cronos EVM Testnet" %}

```
cronos-testnet-leveldb-archive
cronos-testnet-leveldb-default
cronos-testnet-leveldb-pruned
cronos-testnet-rocksdb-archive
cronos-testnet-rocksdb-default
cronos-testnet-rocksdb-pruned
cronos-testnet-versiondb-archive
cronos-testnet-versiondb-default
cronos-testnet-versiondb-pruned
cronos-testnet-versiondb-memiavl-none
```

{% endtab %}

{% tab title="Cronos POS Mainnet" %}

```
cronos-pos-mainnet-leveldb-archive
cronos-pos-mainnet-leveldb-default
cronos-pos-mainnet-leveldb-pruned
cronos-pos-mainnet-rocksdb-archive
cronos-pos-mainnet-rocksdb-default
cronos-pos-mainnet-rocksdb-pruned
cronos-pos-mainnet-versiondb-pruned
```

{% endtab %}

{% tab title="Cronos POS Testnet" %}

```
cronos-pos-testnet-leveldb-pruned
cronos-pos-testnet-rocksdb-pruned
cronos-pos-testnet-versiondb-pruned
```

{% endtab %}
{% endtabs %}

***

### Mode 2: Full Node Setup with config.yaml

With `config.yaml`, the downloader runs through a 6-step lifecycle to set up and start a full node automatically.

**Lifecycle steps:**

1. Download and extract `cronosd` binary
2. Run `cronosd init`
3. Download snapshot
4. Extract snapshot
5. Update `app.toml` and `config.toml`
6. Start `cronosd`

#### **Choose Snapshot**

Check the latest snapshots at <https://snapshot.cronos.com/>.

#### **Update DB Settings**

In `snapshot-downloader2/config.yaml`, under the `app_yaml` and `config_yaml` sections, update the database settings according to the target snapshot database type and pruning type, along with any other desired configurations. Follow the same pattern as:

```
[file_yaml]:
    [section]:
        name: "value"
```

Below are examples of each database with pruning type `Default`, overriding `minimum-gas-prices` and `persistent_peers`.

{% tabs %}
{% tab title="GolevelDB" %}

```
app_yaml:
  minimum-gas-prices: "0.025basecro"
  pruning: "nothing"
  app-db-backend: "goleveldb"

config_yaml:
  db_backend: "goleveldb"
  p2p:
    persistent_peers: "0d5cf1394a1cfde28dc8f023567222abc0f47534@seed-0.cronos.com:26656,3032073adc06d710dd512240281637c1bd0c8a7b@seed-1.cronos.com:26656,04f43116b4c6c70054d9c2b7485383df5b1ed1da@seed-2.cronos.com:26656,337377dcda43d79c537d2c4d93ad3b698ce9452e@bd-cronos-mainnet-seed-node-01.bdnodes.net:26656"
```

{% endtab %}

{% tab title="RocksDB" %}

```
app_yaml:
  minimum-gas-prices: "0.025basecro"
  pruning: "nothing"
  app-db-backend: "rocksdb"

config_yaml:
  db_backend: "rocksdb"
  p2p:
    persistent_peers: "0d5cf1394a1cfde28dc8f023567222abc0f47534@seed-0.cronos.com:26656,3032073adc06d710dd512240281637c1bd0c8a7b@seed-1.cronos.com:26656,04f43116b4c6c70054d9c2b7485383df5b1ed1da@seed-2.cronos.com:26656,337377dcda43d79c537d2c4d93ad3b698ce9452e@bd-cronos-mainnet-seed-node-01.bdnodes.net:26656"
```

{% endtab %}

{% tab title="VersionDB" %}

```
app_yaml:
  minimum-gas-prices: "0.025basecro"
  pruning: "nothing"
  app-db-backend: "rocksdb"
  versiondb:
    enable: true

config_yaml:
  db_backend: "rocksdb"
  p2p:
    persistent_peers: "0d5cf1394a1cfde28dc8f023567222abc0f47534@seed-0.cronos.com:26656,3032073adc06d710dd512240281637c1bd0c8a7b@seed-1.cronos.com:26656,04f43116b4c6c70054d9c2b7485383df5b1ed1da@seed-2.cronos.com:26656,337377dcda43d79c537d2c4d93ad3b698ce9452e@bd-cronos-mainnet-seed-node-01.bdnodes.net:26656"
```

{% endtab %}

{% tab title="VersionDB Memiavl" %}

```
app_yaml:
  minimum-gas-prices: "0.025basecro"
  pruning: "nothing"
  app-db-backend: "rocksdb"
  versiondb:
    enable: true
  memiavl:
    enable: true
    async-commit-buffer: 3

config_yaml:
  db_backend: "rocksdb"
  p2p:
    persistent_peers: "0d5cf1394a1cfde28dc8f023567222abc0f47534@seed-0.cronos.com:26656,3032073adc06d710dd512240281637c1bd0c8a7b@seed-1.cronos.com:26656,04f43116b4c6c70054d9c2b7485383df5b1ed1da@seed-2.cronos.com:26656,337377dcda43d79c537d2c4d93ad3b698ce9452e@bd-cronos-mainnet-seed-node-01.bdnodes.net:26656"
```

{% endtab %}
{% endtabs %}

#### **Full Config Examples**

Below are examples of `snapshot-downloader2/config.yaml` for Cronos EVM. Update URLs, chain IDs, and settings as needed for the latest snapshots and binaries.

* **Cronos EVM Mainnet Example 1: Single File**

  This example uses a single file snapshot for the Cronos EVM chain.

  ```
  # Snapshot Downloader Configuration

  # URL for the snapshot to download (for single file snapshots)
  snapshot_url: "https://snapshot-download.cronos.com/cronos/mainnet-snapshot/leveldb/default/cronosmainnet_25-1_leveldb-pruned-20260707.tar.lz4"

  # URLs for multi-part snapshots (alternative to snapshot_url)
  # If snapshot_urls is provided, it will be used instead of snapshot_url
  # snapshot_urls:
  #   - "https://example.com/cosmos-snapshot.part001.tar.gz"
  #   - "https://example.com/cosmos-snapshot.part002.tar.gz"
  #   - "https://example.com/cosmos-snapshot.part003.tar.gz"

  # Final filename for multi-part snapshots (REQUIRED when using snapshot_urls)
  # This specifies what the final concatenated file should be called
  # snapshot_filename: "cosmos-snapshot.tar.gz"

  # URL for the binary to download
  binary_url: "https://github.com/crypto-org-chain/cronos/releases/download/v1.7.8/cronos_1.7.8_Linux_arm64.tar.gz"

  # Relative path to the binary within the workspace directory
  # This is used to locate the binary after extraction
  binary_relative_path: "bin/cronosd"

  # Chain ID for the Cosmos network
  chain_id: "cronosmainnet_25-1"

  # Moniker (node name) to use when initializing
  moniker: "my-cosmos-node"

  # Custom home directory for the chain (optional)
  # If not specified, defaults to ~/.snapshot-downloader/workspace/home
  # chain_home_dir: "/mnt/data/cosmos-home"

  # URL for the addrbook.json file (optional)
  # If specified, this file will be downloaded and placed in the config directory
  # addrbook_url: "https://example.com/addrbook.json"

  # Download retry configuration (optional)
  # These settings control how downloads are retried when they fail or are interrupted
  download_retry:
    # Maximum number of retry attempts (default: 5)
    max_retries: 5
    # Initial delay between retries in seconds (default: 1)
    initial_delay_secs: 1
    # Maximum delay between retries in seconds (default: 300 = 5 minutes)
    max_delay_secs: 300
    # Exponential backoff multiplier (default: 2.0)
    backoff_multiplier: 2.0
    # Request timeout in seconds (default: 30)
    request_timeout_secs: 30

  # Command to execute after snapshot download completes (optional)
  # This will run only after snapshot download, not after binary download
  # post_snapshot_download_command: "echo 'Snapshot download completed'"

  # Command to execute after snapshot extraction (optional)
  # This will only run if a snapshot is successfully extracted
  post_snapshot_extract_command: "echo 'Snapshot extraction completed'"

  # Command to execute after cosmos node starts and specific pattern is detected (optional)
  # This will run after the node starts and the post_start_pattern is found in the output
  # post_start_command: "echo 'Node started and pattern detected'"

  # Pattern to search for in cosmos node output (optional)
  # When this pattern is found in the node output, the post_start_command will be executed
  # Can be any message you want to wait for after node startup
  # post_start_pattern: "committed state"

  # Whether to stop the cosmos node and exit the program after executing post_start_command (optional)
  # If true, the cosmos node will be terminated and the program will exit after post_start_command completes
  # stop_after_post_start: false

  # Configuration overrides for app.toml
  # These values will be merged with the existing app.toml file
  app_yaml:
    minimum-gas-prices: "46000000000000basecro"
    pruning: "nothing"
    app-db-backend: "goleveldb"

  # Configuration overrides for config.toml
  # These values will be merged with the existing config.toml file
  config_yaml:
    db_backend: "goleveldb"
    p2p:
      persistent_peers: "dc9905490007f7271d0f884a2dd659db0366c1c0@13.215.127.128:26656"
  ```
* **Cronos EVM Mainnet Example 2: Multi-part**

  This example demonstrates a multi-part archive snapshot, including an <mark style="color:orange;">`addrbook`</mark> download.

  ```
  # Snapshot Downloader Configuration

  # URL for the snapshot to download (for single file snapshots)
  #snapshot_url: "https://snapshot-download.cronos.com/cronos/mainnet-snapshot/leveldb/default/cronosmainnet_25-1_leveldb-default-20260703.tar.lz4"

  # URLs for multi-part snapshots (alternative to snapshot_url)
  # If snapshot_urls is provided, it will be used instead of snapshot_url
  snapshot_urls:
    - "https://snapshot-download.cronos.com/cronos/mainnet-snapshot/leveldb/archive/cronosmainnet_25-1_leveldb-archive-20260703.tar.lz4.part001"
    - "https://snapshot-download.cronos.com/cronos/mainnet-snapshot/leveldb/archive/cronosmainnet_25-1_leveldb-archive-20260703.tar.lz4.part002"

  # Final filename for multi-part snapshots (REQUIRED when using snapshot_urls)
  # This specifies what the final concatenated file should be called
  snapshot_filename: "cronosmainnet_25-1_leveldb-archive-20260703.tar.lz4"

  # URL for the binary to download
  binary_url: "https://github.com/crypto-org-chain/cronos/releases/download/v1.7.8/cronos_1.7.8_Linux_arm64.tar.gz"

  # Relative path to the binary within the workspace directory
  # This is used to locate the binary after extraction
  binary_relative_path: "bin/cronosd"

  # Chain ID for the Cosmos network
  chain_id: "cronosmainnet_25-1"

  # Moniker (node name) to use when initializing
  moniker: "my-cosmos-node"

  # Custom home directory for the chain (optional)
  # If not specified, defaults to ~/.snapshot-downloader/workspace/home
  # chain_home_dir: "/mnt/data/cosmos-home"

  # URL for the addrbook.json file (optional)
  # If specified, this file will be downloaded and placed in the config directory
  addrbook_url: "https://snapshots.polkachu.com/addrbook/cronos/addrbook.json"

  # Download retry configuration (optional)
  # These settings control how downloads are retried when they fail or are interrupted
  download_retry:
    # Maximum number of retry attempts (default: 5)
    max_retries: 5
    # Initial delay between retries in seconds (default: 1)
    initial_delay_secs: 1
    # Maximum delay between retries in seconds (default: 300 = 5 minutes)
    max_delay_secs: 300
    # Exponential backoff multiplier (default: 2.0)
    backoff_multiplier: 2.0
    # Request timeout in seconds (default: 30)
    request_timeout_secs: 30

  # Command to execute after snapshot download completes (optional)
  # This will run only after snapshot download, not after binary download
  # post_snapshot_download_command: "echo 'Snapshot download completed'"

  # Command to execute after snapshot extraction (optional)
  # This will only run if a snapshot is successfully extracted
  post_snapshot_extract_command: "echo 'Snapshot extraction completed'"

  # Command to execute after cosmos node starts and specific pattern is detected (optional)
  # This will run after the node starts and the post_start_pattern is found in the output
  # post_start_command: "echo 'Node started and pattern detected'"

  # Pattern to search for in cosmos node output (optional)
  # When this pattern is found in the node output, the post_start_command will be executed
  # Can be any message you want to wait for after node startup
  # post_start_pattern: "committed state"

  # Whether to stop the cosmos node and exit the program after executing post_start_command (optional)
  # If true, the cosmos node will be terminated and the program will exit after post_start_command completes
  # stop_after_post_start: false

  # Configuration overrides for app.toml
  # These values will be merged with the existing app.toml file
  app_yaml:
    minimum-gas-prices: "46000000000000basecro"
    pruning: "nothing"
    app-db-backend: "goleveldb"

  # Configuration overrides for config.toml
  # These values will be merged with the existing config.toml file
  config_yaml:
    db_backend: "goleveldb"
    p2p:
      persistent_peers: "dc9905490007f7271d0f884a2dd659db0366c1c0@13.215.127.128:26656"
  ```

**Run The Tool**

Once configured, run:

```sh
$ cargo run
```

The tool will go through all 6 steps in order. Use lifecycle hooks (`post_snapshot_download_command`, `post_snapshot_extract_command`, `post_start_command`) for any custom automation between steps.

**Skipping Steps**

You can skip one or more steps by passing skip flags. This is useful when re-running the tool after a partial run, or when certain steps have already been completed.

| Flag                       | Skips                                         |
| -------------------------- | --------------------------------------------- |
| `--skip-binary-download`   | Step 1: Download and extract `cronosd` binary |
| `--skip-download-snapshot` | Step 3: Download snapshot                     |
| `--skip-extract-snapshot`  | Step 4: Extract snapshot                      |
| `--skip-download-addrbook` | Addrbook download (if `addrbook_url` is set)  |
| `--skip-execute-binary`    | Step 6: Start `cronosd`                       |

{% hint style="info" %}
Steps 2 (init) and 5 (update config) always run and cannot be skipped.
{% endhint %}

**Examples**

Re-run without re-downloading or re-extracting the snapshot:

```sh
$ cargo run -- --skip-download-snapshot --skip-extract-snapshot
```

Re-run from scratch but skip starting the node:

```sh
$ cargo run -- --skip-execute-binary
```

Skip everything except starting the node:

```sh
$ cargo run -- --skip-binary-download --skip-download-snapshot --skip-extract-snapshot
```


# Quicksync

Download the latest Cronos Chain snapshots to accelerate node setup and maintain sync with current network data

### Introduction

The Cronos team has partnered with Chainlayer to provide the Quicksync service and make the process more efficient for our users.

Users can visit [Chainlayer QuickSync Cronos page](https://quicksync.io/cronos) and download the snapshots for Cronos Chain with different pruning settings.

{% hint style="info" %}
IMPORTANT

In order to use Quicksync you need to first complete [Step 3-2](https://docs.cronos.com/for-node-hosts/running-nodes/cronos-evm-snapshots/pages/FGCPNouBUvChBf1Hswy6#step-3-2.-run-everything) with the latest binary.

\
**Note** that as of `v0.9.0`, we have merged the binary to support both levelDB and rocksDB. Therefore, make sure to select the right [`app-db-backend`](https://github.com/crypto-org-chain/cronos/releases/tag/v1.0.2)in your `app.toml`.
{% endhint %}

### Step 1: Quicksync Download

After executing the command `./cronosd` start at [Step 3-2](https://docs.cronos.com/for-node-hosts/running-nodes/cronos-evm-snapshots/pages/FGCPNouBUvChBf1Hswy6#step-3-2.-run-everything) Run everything, it starts the node and syncs the blockchain data. When you see it starts to sync from 0, you can terminate the terminal.\
\
Both RocksDB and LevelDB snapshots are now available for Cronos Chain.

### Step 2: Quicksync Extract

To start with Quicksync, you need to run `brew install lz4` to install lz4 in a new terminal.\
Then download the file with preferred pruning settings directly from [Quicksync](https://quicksync.io/cronos).

### Step 3: Quicksync Setup

In the following steps, we will take as an example the version\
`cronosmainnet_25-1-pruned.20220309.2010.tar.lz4`.

* (Optional) you can download an addressbook from [Quicksync](https://quicksync.io/cronos) to get connected to peers faster. After downloading it, place the new `addrbook.json` under `.cronos/config` folder and restart your node to take effect.
* Now add the `cronosmainnet_25-1-pruned.20220309.2010.tar.lz4` inside `.cronos`

Then perform the following steps:

* Change the path under `.cronos` with `cd .cronos`
* Decompress with `lz4` and `tar` by `lz4 -d /Users/<username>/.cronos/cronosmainnet_25-1-pruned.20220308.2010.tar.lz4 | tar -xv`, as below:

{% hint style="info" %}
Example: Decompress the QuickSync pack with `lz4`

```bash
  x data/
  x data/application.db/
  x data/application.db/84856034.ldb
  x data/application.db/83264153.ldb
  ...
  x data/snapshots/metadata.db/CURRENT.bak
  x data/snapshots/metadata.db/MANIFEST-000107
  x data/snapshots/metadata.db/LOG
```

{% endhint %}

The original data folder under `.cronos` is overwritten with this step (it takes around 5-7 mins to decompress the pruned version \~50GB).

### Step 4: Sync with Quicksync

{% hint style="info" %}
Example: Restart `cronosd start` with QuickSync

```bash
  $ ./cronosd start
  6:59PM INF Unlocking keyring
  6:59PM INF starting ABCI with Tendermint
  6:59PM INF Starting multiAppConn service impl=multiAppConn module=proxy server=node
  6:59PM INF Starting localClient service connection=query impl=localClient module=abci-client server=node
  ...
  6:59PM INF ABCI Replay Blocks appHeight=1813707 module=consensus server=node stateHeight=1813707 storeHeight=1813707
```

{% endhint %}


# State Sync

### Introduction

The fastest way to get a node synced to the latest block-height is by using [State Sync](https://docs.tendermint.com/master/nodes/state-sync.html#configure-state-sync). With State Sync, your node downloads a snapshot near the head of the chain and verifies this data. This leads to drastically shorter times to join the network.

Keep in mind that blocks prior to the trust height used for State Sync will not be queryable.

Therefore, if your goal is to run a full node with historical data, it is recommended not to use State Sync, but instead to explore other Snapshot option such as [Native Snapshots](/for-node-hosts/running-nodes/cronos-evm-snapshots/cronos-native-snapshots) archive snapshot.

#### Supported OS

Linux x86\_64 is confirmed to work. Other platforms may work but there is no guarantee. We will extend our support to other operating systems after we have stabilised our current architecture.

#### Prepare your machine

To run Cronos Mainnet nodes, you will need a machine with the following minimum requirements:

* 4-core, x86\_64 / ARM architecture processor
* 16 GB RAM
* 1 TB of storage space.

{% hint style="info" %}
IMPORTANT

State-sync depends on the ability to pull a snapshot from its persistent-peers, so there is some amount of timing and luck involved with this method. Although it is the fastest way, it is not always going to work, in case state-sync is not syncing, we recommend using [Native Snapshots](/for-node-hosts/running-nodes/cronos-evm-snapshots/cronos-native-snapshots), although it takes a longer time to download the snapshot, this method is more guaranteed to work.
{% endhint %}

### Step 1: Get the latest cronosd binary

{% hint style="info" %}
The latest Cronosd [version](https://github.com/crypto-org-chain/cronos/releases) release is `cronosd v1.4.5`
{% endhint %}

* Install the **Cronos Mainnet** binaries from GitHub:

<pre class="language-bash"><code class="lang-bash"><strong>curl -LOJ https://github.com/crypto-org-chain/cronos/releases/download/v1.4.5/cronos_1.4.5_Darwin_x86_64.tar.gz
</strong><strong>tar -zxvf cronos_1.4.5_Darwin_x86_64.tar.gz
</strong></code></pre>

* Check that **`cronosd`** is effectively installed:

```bash
./bin/cronosd version
1.4.5
```

### Step 2: Configure cronosd

* Initialize **cronosd.** Replace the **\[moniker]** with an ID for your node.

```bash
./bin/cronosd init [moniker] --chain-id cronosmainnet_25-1
```

* Download and replace the Cronos Mainnet `genesis.json` by:

```bash
curl https://raw.githubusercontent.com/crypto-org-chain/cronos-mainnet/master/cronosmainnet_25-1/genesis.json > ~/.cronos/config/genesis.json
```

* Verify the sha256sum checksum of the`genesis.json`. You should see `OK!` if the sha256sum checksum matches.

```bash
if [[ $(sha256sum ~/.cronos/config/genesis.json | awk '{print $1}') = "58f17545056267f57a2d95f4c9c00ac1d689a580e220c5d4de96570fbbc832e1" ]]; then echo "OK"; else echo "MISMATCHED"; fi;
OK!
```

* Replace the following parameters in the `~/.cronos/config/config.toml` file, by executing:

```bash
LATEST_HEIGHT=$(curl -s https://rpc.cronos.com:443/block | jq -r .result.block.header.height); \
BLOCK_HEIGHT=$((LATEST_HEIGHT - 1000)); \
TRUST_HASH=$(curl -s "https://rpc.cronos.com:443/block?height=$BLOCK_HEIGHT" | jq -r .result.block_id.hash)

sed -i.bak -E "s|^(enable[[:space:]]+=[[:space:]]+).*$|\1true| ; \
s|^(rpc_servers[[:space:]]+=[[:space:]]+).*$|\1\"https://rpc.cronos.com:443,https://rpc.cronos.com:443\"| ; \
s|^(trust_height[[:space:]]+=[[:space:]]+).*$|\1$BLOCK_HEIGHT| ; \
s|^(trust_hash[[:space:]]+=[[:space:]]+).*$|\1\"$TRUST_HASH\"| ; \
s|^(persistent_peers[[:space:]]+=[[:space:]]+).*$|\1\"0d5cf1394a1cfde28dc8f023567222abc0f47534@seed-0.cronos.com:26656,3032073adc06d710dd512240281637c1bd0c8a7b@seed-1.cronos.com:26656,04f43116b4c6c70054d9c2b7485383df5b1ed1da@seed-2.cronos.com:26656,337377dcda43d79c537d2c4d93ad3b698ce9452e@bd-cronos-mainnet-seed-node-01.bdnodes.net:26656\"| ; \
s|^(seeds[[:space:]]+=[[:space:]]+).*$|\1\"\"|" ~/.cronos/config/config.toml
```

{% hint style="info" %}
Tips: Corresponding to the `persistent_peers` above for Cronos Mainnet, here is the ones for **Cronos Testnet**:\
`8fcba3485c67a2a00a383b6f45660a4ac529c6ca@52.77.30.18:26656,e65199bc579ffd89d7c021c5611f9f1c97f7ff13@54.251.209.254:26656`
{% endhint %}

### Step 3: Run everything

* Now that `cronosd` has been configured, we are ready to start the node:

```bash
./bin/cronosd start

1:40AM INF Unlocking keyring
1:40AM INF starting ABCI with Tendermint
1:40AM INF service start impl=multiAppConn module=proxy msg={} server=node
1:40AM INF service start connection=query impl=localClient module=abci-client msg={} server=node
1:40AM INF service start connection=snapshot impl=localClient module=abci-client msg={} server=node
1:40AM INF service start connection=mempool impl=localClient module=abci-client msg={} server=node
1:40AM INF service start connection=consensus impl=localClient module=abci-client msg={} server=node
1:40AM INF service start impl=EventBus module=events msg={} server=node
1:40AM INF service start impl=PubSub module=pubsub msg={} server=node
1:40AM INF service start impl=IndexerService module=txindex msg={} server=node
1:40AM INF Version info block=11 p2p=8 server=node tendermint_version=0.34.20
1:40AM INF This node is not a validator addr=DB03363D854BA491F280177BE33DE527F7542094 module=consensus pubKey=/L3Qe1oaNfrDael3QAmILSz5bLre9NAmKd48wd4eW8w= server=node
1:40AM INF P2P Node ID ID=d799c596250f27b5435775fdabb86d469dc5a784 file=/home/ubuntu/.cronos/config/node_key.json module=p2p server=node
1:40AM INF Adding persistent peers
```

This will take a couple of minutes, if your node manages to state-sync, you should see that snapshot chunks are being downloaded, and your node starts signing blocks.

To check the current node syncing status:

```bash
./bin/cronosd status 2>&1 | jq '.SyncInfo.catching_up'
```

That's it! You are now running a synced node on **Cronos Mainnet**!


# Public Node

Public Node Blockchain Snapshots for Cronos Mainnet

## Introduction

[Public Node](https://www.publicnode.com/snapshots#cronos) Snapshots, provided by blockchain infrastructure company [Allnodes](https://www.allnodes.com/), offer a streamlined solution for Cronos node operators looking to quickly sync with the Cronos EVM network.

Available as one-time bulk downloads, the snapshots significantly reduce initial setup time and bandwidth requirements for new nodes. It provides pruned snapshots for both Cronos EVM and Cronos POS mainnet blockchains.

This guide walks you through the step-by-step process of performing a `Cronosd`s synchronization using [Public Node](https://www.publicnode.com/snapshots#cronos) Snapshots. The snapshots provided are pruned for optimize file size and download speed.

If a complete blockchain history to operate a full archive node is needed, [Native Snapshots](/for-node-hosts/running-nodes/cronos-evm-snapshots/cronos-native-snapshots) archive snapshot are the recommended alternatives.

{% hint style="info" %}
Note

As of `v0.9.0`, we have merged the binary to support both levelDB and rocksDB. Therefore, make sure to select the right[`app-db-backend`](https://github.com/crypto-org-chain/cronos/releases/tag/v1.0.2)in your`app.toml`.
{% endhint %}

### Step 1: Download Public Node Snapshot

Download the latest Cronos EVM snapshot from [Public Node Page](https://www.publicnode.com/snapshots#cronos).

### Step 2: Cronosd Setup

Download the latest version of Cronosd Binary files from [Cronos Chain Github](https://github.com/crypto-org-chain/cronos/releases/latest) based on your preferred operating system.

Extract the downloaded file (`cronos_1.4.5_Darwin_arm64.tar.gz` is used as an example). After you download and unzip the `cronosd` to the location you desire. In terminal, change directory to the `bin` folder, where `cronosd` is located.

Follow the step from [Step 2-1 Initialize and Step 2-2 Configure cronosd](https://docs.cronos.com/for-node-hosts/running-nodes/cronos-mainnet#step-2-1-initialize-cronosd) to initialize and setup `cronosd`.

Example CLI sequence:

```shell
mkdir cronos-node
cd cronos-node
tar -zxvf cronos_1.4.9_Darwin_arm64.tar.gz
cd bin
./cronosd version
Expected output:
1.4.9
```

Make sure you also implement the changes from [Step 0 : Notes on Network Upgrade](https://docs.cronos.com/for-node-hosts/running-nodes/cronos-mainnet#step-0-notes-on-network-upgrade), and add these config items from [`v0.7.0`](https://github.com/crypto-org-chain/cronos/releases/tag/v0.7.0) into `app.toml` before upgrade:

<pre class="language-bash"><code class="lang-bash">### JSON RPC Configuration ###
<strong>[json-rpc]
</strong>feehistory-cap = 100
logs-cap = 10000
block-range-cap = 10000
http-timeout="30s"
http-idle-timeout="120s"

### EVM Configuration ###
[evm]
max-tx-gas-wanted=500000
</code></pre>

[Run Everything](https://docs.cronos.com/for-node-hosts/running-nodes/cronos-mainnet#step-3.-run-everything), `Cronosd` should be able to sync.

### Step 3: Extract Data from the Public Node Sync Snapshot

After you successfully initialized `cronosd`, you should find a new folder named `.cronos` under `/Users/<username>.` Move the `.lz4` snapshot file (e.g., `cronos-pruned-18949418-18949428.tar.lz4`) into the `.cronos` directory.\
Decompress with `tar` by:

```bash
tar -zxvf Users/<username>/.cronos/cronos-pruned-18949418-18949428.tar.lz4
```

{% hint style="info" %}
Note

All of the above files should be extracted to `/Users/<username>/.cronos/data`
{% endhint %}

### Step 4: Run Cronosd

Now your `cronosd` is updated to the latest height as the Public Node Sync file, you can run the node now with `cronosd start`.

That's it! You are now running a synced node on Cronos mainnet.


# KSYNC

### Introduction

This sections covers how to perform a genesis-sync up to live height and how to state-sync to historical heights for Cronos Mainnet with KSYNC. In summary KSYNC is a tool developed by [KYVE](https://www.kyve.network/) which is capable of syncing blocks and state-sync snapshots from the decentralized KYVE data lake directly into Cosmos blockchain nodes.\
For Cronos, KYVE has validated all historical blocks and state-sync snapshots (in a 10,000 interval) in a decentralized way and permanently archived them to [Arweave](https://arweave.org/), a decentralized storage solution. KSYNC can then pull down this verified data and apply them against the Cronos app, you can find full documentation on the tool [here](https://docs.kyve.network/validators/ksync).

{% hint style="info" %}
**Note**

Set environmental variables:

`PATH="$PATH: <tools folder>"`

e.g. `PATH="$PATH: /Users/localuser/Cronos/bin"`
{% endhint %}

### Pre-requisites

Please check the environment requirements for KSYNC from [here](https://docs.kyve.network/run-a-node/protocol-nodes/requirements#supported-os).

### Installation

You can install KSYNC with the following command, ensure that you have [go1.21](https://go.dev/blog/go1.21) installed:

```bash
go install github.com/KYVENetwork/ksync/cmd/ksync@latest
```

To verify the installation simply run `ksync version`. To build from source visit the repository on [GitHub](https://github.com/KYVENetwork/ksync).

### Sync Cronos from genesis

### Step 1: Get the cronosd binary for genesis

To sync Cronos from genesis up to live height install the binary used for genesis from [here](https://github.com/crypto-org-chain/cronos/releases/tag/v0.6.11).

* Install the **Cronos Mainnet** binaries from GitHub:

```bash
https://github.com/crypto-org-chain/cronos/releases/download/v0.6.11/cronos_0.6.11_Darwin_arm64.tar.gz
tar -zxvf cronos_0.6.11_Darwin_arm64.tar.gz
```

* Check that **`cronosd`** is effectively installed:

```bash
./bin/cronosd version
0.6.11
```

### Step 2: Configure cronosd

After the installation, init the config:

```bash
./cronosd init <your-moniker> --chain-id cronosmainnet_25-1
```

Download the genesis:

```bash
wget -O ~/.cronos/config/genesis.json https://raw.githubusercontent.com/crypto-org-chain/cronos-mainnet/master/cronosmainnet_25-1/genesis.json
```

### Step 3: Run everything

Now that Cronos is properly set up you can start the genesis sync:

```bash
ksync block-sync --binary="/path/to/cronosd" --source="cronos"
```

This will run until live height has been reached, you can check the latest height which KYVE has validated and archived [here](https://app.kyve.network/#/pools/5).

### Cosmovisor

Note that you can also configure Cosmovisor which contains all the upgrade binaries. With Cosmosvisor, you do not need to manually switch to a different version every time Cronos reaches an upgrade point. It is recommended to pair this with a systemd service file, refer to the template below:

```
[Unit]
Description=KSYNC deamon supervising the ksync sync process
After=network-online.target

[Service]
User=$USER
WorkingDirectory=$HOME
ExecStart=$HOME/ksync block-sync --binary="/path/to/cosmovisor" --source=cronos -y
Restart=always
RestartSec=10s
LimitNOFILE=infinity
Environment="DAEMON_NAME=cronosd"
Environment="DAEMON_HOME=$HOME/.cronos"
Environment="DAEMON_ALLOW_DOWNLOAD_BINARIES=false"
Environment="DAEMON_RESTART_AFTER_UPGRADE=false"
Environment="DAEMON_LOG_BUFFER_SIZE=512"
Environment="UNSAFE_SKIP_BACKUP=true"

[Install]
WantedBy=multi-user.target
```

Remember to replace $USER with your actual username.

### Apply historical state-sync snapshots

The "normal" state-sync only supports syncing to live height, however KYVE has validated and archived all state-sync snapshots from genesis with a 10,000 block interval therefore historical state-sync is possible with KSYNC. Note that the archival process is still ongoing and live height has not been reached yet, check the progress [here](https://app.kyve.network/#/pools/6).

### Step 1: Install & configure cronosd for specific upgrade height

To install and configure Cronos, follow the same process as in the genesis sync part before. However, you will need to use a different binary version. You can find all upgrades with the relevant upgrade heights [here](https://docs.cronos.com/for-node-hosts/running-nodes/cronos-mainnet#step-0--notes-on-huygen-network-upgrade).

### Step 2: Run everything

To perform the state-sync execute the following command:

```bash
ksync state-sync --binary="/path/to/cronosd" --source="cronos" --target-height=$HEIGHT
```

If there is no state-sync snapshot available for your requested $HEIGHT, KSYNC will automatically propose the nearest snapshot the chosen height.

### Sync to any historical height with height-sync

The features of historical state-sync and block-sync can now be combined to sync to any historical block height by using the combination of the two. KSYNC will state-sync to the nearest snapshot before your specified target height and sync the remaining blocks using block-sync.\
With this process, checking the state at a certain height is greatly improved because now you don't need to sync all the way from genesis to inspect the state of an historical block height.

### Step 1: Install & configure cronosd for specific upgrade height

To install and configure Cronos, follow the same process as in the historical state-sync before. You can find all upgrades with the relevant upgrade heights [here](https://docs.cronos.com/for-node-hosts/running-nodes/cronos-mainnet#step-0--notes-on-huygen-network-upgrade).

### Step 2: Run everything

To perform the height-sync execute the following command:

```bash
ksync height-sync --binary="/path/to/cronosd" --source="cronos" --target-height=$HEIGHT
```


# Set Up a Local Devnet

A local Cronos Devnet lets you run the chain on your machine for your testing and development.

We provide two approaches - choose the setup that fits your use case:

<table><thead><tr><th width="128.87841796875"></th><th width="293.791748046875">Single-Node Devnet</th><th>Multi-Validator Devnet</th></tr></thead><tbody><tr><td>Tooling</td><td>Bash script</td><td>Pystarport</td></tr><tr><td>Best for</td><td>EVM development, quick local testing</td><td>Consensus testing, multi-node scenarios</td></tr><tr><td>Guide</td><td><a href="/pages/YWr0hkRXV2Ne9U8qfex4">Set up Single-Node Devnet</a></td><td><a href="/pages/UCDCl8doMOU9JO5afTVh">Set up Multi-validator Devnet</a></td></tr></tbody></table>


# Single-node Devnet

Set up a single-node Cronos Devnet on your local machine for testing and development purposes.

{% hint style="warning" %}
CAUTION

This page is for building and running the latest development version of the chain for testing purpose only. Please note that is under active development and is highly unstable and subject to breaking changes. You should expect a moderate amount of troubleshooting work is required.
{% endhint %}

{% hint style="info" %}
This below was verified with [cronosd v1.7.1](https://github.com/crypto-org-chain/cronos/releases/tag/v1.7.1) on `macOS` (arm64) and `Linux` (arm64 or x86\_64).
{% endhint %}

### Prerequisites

* **macOS** or **Linux**
* **Jq** - JSON processor
* **Curl**

### Step 1: Download the Cronos Binary

Download the pre-built `cronosd` binary from the [official releases page](https://github.com/crypto-org-chain/cronos/releases/tag/v1.7.1).

<pre class="language-bash"><code class="lang-bash">mkdir -p ~/cronos-devnet &#x26;&#x26; cd ~/cronos-devnet

# macOS:
curl -sL -o cronos.tar.gz \
<strong>  "https://github.com/crypto-org-chain/cronos/releases/download/v1.7.1/cronos_1.7.1_Darwin_arm64.tar.gz"
</strong>
# OR linux(x86_64):
# curl -sL -o cronos.tar.gz \
#  "https://github.com/crypto-org-chain/cronos/releases/download/v1.7.1/cronos_1.7.1_Linux_x86_64.tar.gz"

# OR linux(arm64):
<strong># curl -sL -o cronos.tar.gz \
</strong>#  "https://github.com/crypto-org-chain/cronos/releases/download/v1.7.1/cronos_1.7.1_Linux_arm64.tar.gz"

tar xzf cronos.tar.gz
</code></pre>

Verify the installation:

<pre class="language-bash"><code class="lang-bash"><strong>./bin/cronosd version
</strong># Expected output: v1.7.1
</code></pre>

### Step 2: Initialize the Devnet

Customize and run the following script(referring to [start-local-node.sh](https://github.com/crypto-org-chain/cronos/blob/main/start-local-node.sh)) to set up a fresh single-validator devnet. Please note that this will **remove any existing `~/.cronos` data directory**.

```bash
#!/bin/bash
set -e

CRONOSD="$(pwd)/bin/cronosd"
CHAINID="cronos_9000-1"
MONIKER="localtestnet"

# --- Pre-funded accounts (mnemonics included for development use only) ---

# Validator account — address: 0x7cb61d4117ae31a12e393a1cfa3bac666481d02e
VAL_KEY="localkey"
VAL_MNEMONIC="gesture inject test cycle original hollow east ridge hen combine junk child bacon zero hope comfort vacuum milk pitch cage oppose unhappy lunar seat"

# User 1 — address: 0xc6fe5d33615a1c52c08018c47e8bc53646a0e101
USER1_KEY="user1"
USER1_MNEMONIC="copper push brief egg scan entry inform record adjust fossil boss egg comic alien upon aspect dry avoid interest fury window hint race symptom"

# User 2 — address: 0x963ebdf2e1f8db8707d05fc75bfeffba1b5bac17
USER2_KEY="user2"
USER2_MNEMONIC="maximum display century economy unlock van census kite error heart snow filter midnight usage egg venture cash kick motor survey drastic edge muffin visual"

# Clean up previous data
rm -rf ~/.cronos*

# Import keys
echo "$VAL_MNEMONIC"   | $CRONOSD keys add $VAL_KEY   --recover --keyring-backend test --algo "eth_secp256k1"
echo "$USER1_MNEMONIC" | $CRONOSD keys add $USER1_KEY  --recover --keyring-backend test --algo "eth_secp256k1"
echo "$USER2_MNEMONIC" | $CRONOSD keys add $USER2_KEY  --recover --keyring-backend test --algo "eth_secp256k1"

# Initialize the chain
$CRONOSD init $MONIKER --chain-id $CHAINID

# Configure genesis: set block gas limit + EVM denom
cat $HOME/.cronos/config/genesis.json \
  | jq '.consensus["params"]["block"]["max_gas"]="10000000" | .app_state.evm.params.evm_denom="basetcro" | .app_state.feemarket.params.base_fee="100000000000"' \
  > $HOME/.cronos/config/tmp_genesis.json \
  && mv $HOME/.cronos/config/tmp_genesis.json $HOME/.cronos/config/genesis.json

# Add genesis accounts (each gets 1000 basetcro + 1 stake)
$CRONOSD genesis add-genesis-account \
  "$($CRONOSD keys show $VAL_KEY -a --keyring-backend test)" \
  1000000000000000000000basetcro,1000000000000000000stake --keyring-backend test

$CRONOSD genesis add-genesis-account \
  "$($CRONOSD keys show $USER1_KEY -a --keyring-backend test)" \
  1000000000000000000000basetcro,1000000000000000000stake --keyring-backend test

$CRONOSD genesis add-genesis-account \
  "$($CRONOSD keys show $USER2_KEY -a --keyring-backend test)" \
  1000000000000000000000basetcro,1000000000000000000stake --keyring-backend test

# Create and collect genesis transaction
$CRONOSD genesis gentx $VAL_KEY 1000000000000000000stake \
  --chain-id $CHAINID --keyring-backend test

$CRONOSD genesis collect-gentxs
$CRONOSD genesis validate

# Add blocked addresses
echo "blocked-addresses = ['crc16z0herz998946wr659lr84c8c556da55dc34hh']" \
  >> $HOME/.cronos/config/app.toml

echo "Devnet initialized successfully!"

```

Save this as `setup-devnet.sh`, make it executable, and run it:

```bash
chmod +x setup-devnet.sh
bash setup-devnet.sh
```

### Step 3: Start the Node

Then start the node:

```bash
./bin/cronosd start \
  --pruning=nothing \
  --rpc.unsafe \
  --log_level info \
  --json-rpc.api eth,txpool,personal,net,debug,web3 \
  --minimum-gas-prices 200000basetcro \
  --api.enable
```

You should see log output indicating blocks are being produced. The node is ready when you see lines like:

```
INF committed state block_app_hash=... height=1
```

{% hint style="info" %}
**Note**

You may see `ERR Setting ante handler without blacklist` in the logs — this is expected and does not affect functionality.
{% endhint %}

### Step 4: Verify the Node

Open a new terminal and run the following checks:

**Check node status (Tendermint RPC):**

```bash
curl -s http://localhost:26657/status | jq '.result.sync_info'
```

You should see `catching_up: false` and an increasing `latest_block_height`.

**Check latest block number (EVM JSON-RPC):**

```bash
curl -s http://localhost:8545 \
  -X POST -H "Content-Type: application/json" \
  --data '{"jsonrpc":"2.0","method":"eth_blockNumber","params":[],"id":1}'
```

**Check account balance:**

```bash
curl -s http://localhost:8545 \
  -X POST -H "Content-Type: application/json" \
  --data '{"jsonrpc":"2.0","method":"eth_getBalance","params":["0x7cb61d4117ae31a12e393a1cfa3bac666481d02e","latest"],"id":1}'
```

### Service Endpoints

| Service                  | URL                      |
| ------------------------ | ------------------------ |
| EVM JSON-RPC (HTTP)      | `http://localhost:8545`  |
| EVM JSON-RPC (WebSocket) | `ws://localhost:8546`    |
| Tendermint RPC           | `http://localhost:26657` |
| Cosmos REST API          | `http://localhost:1317`  |

### Pre-funded Accounts

Three accounts are created at genesis, each funded with **1000 basetcro** (the native EVM token) and **1 stake** (the staking token).

| Name       | Role      | EVM Address                                  |
| ---------- | --------- | -------------------------------------------- |
| `localkey` | Validator | `0x7cb61d4117ae31a12e393a1cfa3bac666481d02e` |
| `user1`    | Test user | `0xc6fe5d33615a1c52c08018c47e8bc53646a0e101` |
| `user2`    | Test user | `0x963ebdf2e1f8db8707d05fc75bfeffba1b5bac17` |

{% hint style="warning" %}
**Warning**

These mnemonics are publicly known and intended for local development only. **Never** use them on mainnet or testnet.
{% endhint %}

#### Importing Accounts into MetaMask / Wallets

You can derive the private keys from the mnemonics above, or export them directly:

```bash
./bin/cronosd keys unsafe-export-eth-key localkey --keyring-backend test
./bin/cronosd keys unsafe-export-eth-key user1 --keyring-backend test
./bin/cronosd keys unsafe-export-eth-key user2 --keyring-backend test
```

When adding the network to MetaMask:

| Field           | Value                   |
| --------------- | ----------------------- |
| Network Name    | Cronos Devnet           |
| RPC URL         | `http://localhost:8545` |
| Chain ID        | `9000`                  |
| Currency Symbol | `tcro`                  |

### Common Operations

**Stop the node:**

```bash
# Graceful shutdown
kill $(pgrep cronosd)
```

**Restart with existing data:**

```bash
./bin/cronosd start \
  --pruning=nothing \
  --rpc.unsafe \
  --log_level info \
  --json-rpc.api eth,txpool,personal,net,debug,web3 \
  --minimum-gas-prices 200000basetcro \
  --api.enable
```

**Full reset (wipe all data and re-initialize):**

```bash
bash setup-devnet.sh
```

**Send a transaction via CLI:**

```bash
./bin/cronosd tx bank send localkey crc1cml96vmptgw99syqrrz8az79xer2pcgpj22459 \
  1000000000000000000basetcro \
  --keyring-backend test \
  --chain-id cronos_9000-1 \
  --gas-prices 200000basetcro \
  --yes
```


# Multi-validator Devnet

Set up a local Cronos Devnet with 2 validators and 3 pre-funded non-validator accounts using          Pystarport. Intended for testing and development purposes only.

{% hint style="warning" %}
CAUTION\
This page is for building and running the latest development version of the chain for testing purpose only. Please note that is under active development and is highly unstable and subject to breaking changes. You should expect a moderate amount of troubleshooting work is required.
{% endhint %}

{% hint style="info" %}
This below was verified with [cronosd v1.7.1](https://github.com/crypto-org-chain/cronos/releases/tag/v1.7.1) + [pystarport v0.2.5](https://github.com/crypto-com/pystarport) on `macOS`(arm64) and `Linux`(arm64 or x86\_64).
{% endhint %}

***

### 1. Prerequisites

<table><thead><tr><th width="156.73004150390625">Tool</th><th width="175.70751953125">Minimum Version</th><th>Notes</th></tr></thead><tbody><tr><td>macOS/Linux</td><td>N/A</td><td>Apple Silicon (arm64) / Linux(arm64 or x86_64)</td></tr><tr><td>Python</td><td>3.9+</td><td>3.12+ recommended</td></tr><tr><td>pip</td><td>Latest</td><td><code>pip3 install --upgrade pip</code></td></tr></tbody></table>

***

### 2. Install cronosd

Download the pre-built binary from GitHub Releases:\
\
Linux users can follow the same steps - simply replace `Darwin` with `Linux` below.

```bash
# ==============================
# Create working directory
# ==============================
mkdir -p /tmp/cronos-devnet/bin  # choose the directory
cd /tmp/cronos-devnet

# ==============================
# Download cronosd (e.g. v1.7.1 / macOS arm64)
# ==============================
CRONOS_VERSION="1.7.1"
OS="Darwin"          # For Linux, change to "Linux"
ARCH="arm64"         # For Linux, change to "arm64" or "x86_64"

TARBALL="cronos_${CRONOS_VERSION}_${OS}_${ARCH}.tar.gz"
curl -LO "https://github.com/crypto-org-chain/cronos/releases/download/v${CRONOS_VERSION}/${TARBALL}"

tar -xzf "$TARBALL"
chmod +x bin/cronosd

# ==============================
# Verify installation
# ==============================
./bin/cronosd version
# Expected output: 1.7.1
```

***

### 3. Install pystarport

[pystarport](https://github.com/crypto-com/pystarport) is a devnet orchestration tool provided by the Cronos team. It automates:

* Multi-node genesis initialization
* Validator gentx signing and collection
* P2P peer discovery configuration
* supervisord process management

```bash
pip3 install pystarport

# Also install supervisord (process manager)
pip3 install supervisor

# Verify installation
pystarport --version
supervisord --version
```

***

### 4. Configuration File

Create `multi-validator-devnet.yaml` (referring to [cronos-devnet.yaml](https://github.com/crypto-org-chain/cronos/blob/main/scripts/cronos-devnet.yaml)):

```bash
cd /tmp/cronos-devnet
cat > multi-validator-devnet.yaml << 'EOF'
cronos_777-1:
  cmd: /tmp/cronos-devnet/bin/cronosd  # Absolute path to the cronosd binary
  start-flags: "--trace"
  app-config:
    minimum-gas-prices: 0basetcro
    index-events:
      - ethereum_tx.ethereumTxHash
    json-rpc:
      address: "127.0.0.1:{EVMRPC_PORT}"
      ws-address: "127.0.0.1:{EVMRPC_PORT_WS}"
      api: "eth,net,web3,debug,cronos"
  validators:
    - coins: 1000000000000000000stake,10000000000000000000000basetcro
      staked: 1000000000000000000stake
      mnemonic: "gesture inject test cycle original hollow east ridge hen combine junk child bacon zero hope comfort vacuum milk pitch cage oppose unhappy lunar seat"
    - coins: 1000000000000000000stake,10000000000000000000000basetcro
      staked: 1000000000000000000stake
      mnemonic: "copper push brief egg scan entry inform record adjust fossil boss egg comic alien upon aspect dry avoid interest fury window hint race symptom"
  accounts:
    - name: community
      coins: 10000000000000000000000basetcro
      mnemonic: "maximum display century economy unlock van census kite error heart snow filter midnight usage egg venture cash kick motor survey drastic edge muffin visual"
    - name: signer1
      coins: 20000000000000000000000basetcro
      mnemonic: "figure outdoor option kitten force avocado hair rug shoulder win engage coconut record lounge insane royal crime powder dwarf monster car thing bench bamboo"
    - name: signer2
      coins: 30000000000000000000000basetcro
      mnemonic: "pencil shrug wire extra bonus deny ride trap science clarify lonely profit rural quote hamster fuel pig speak total lumber bench canyon possible execute"
  genesis:
    consensus:
      params:
        block:
          max_bytes: "1048576"
          max_gas: "81500000"
    app_state:
      evm:
        params:
          evm_denom: basetcro
      gov:
        params:
          voting_period: "10s"
          expedited_voting_period: "5s"
          max_deposit_period: "10s"
          min_deposit:
            - denom: "basetcro"
              amount: "1"
      transfer:
        params:
          receive_enabled: true
          send_enabled: true
      feemarket:
        params:
          no_base_fee: false
          base_fee: "100000000000"
          min_gas_multiplier: "0"
EOF
```

{% hint style="info" %}
**Denomination conversion**: 1 tCRO = 10^18 basetcro (analogous to the ETH-to-Wei relationship)
{% endhint %}

#### Configuration Reference

| Field                                | Description                                                               |
| ------------------------------------ | ------------------------------------------------------------------------- |
| `cronos_777-1`                       | Chain ID in `{name}_{eip155}-{revision}` format                           |
| `cmd`                                | Absolute path to the cronosd binary                                       |
| `minimum-gas-prices`                 | Minimum gas price accepted by the node                                    |
| `{EVMRPC_PORT}` / `{EVMRPC_PORT_WS}` | Placeholders auto-replaced by pystarport based on `base_port`(seen below) |
| `validators` array                   | **Each element = one validator node**, each gets its own data dir         |
| `coins`                              | Initial token balance allocated to the account in genesis                 |
| `staked`                             | Validator self-delegation stake amount                                    |
| `mnemonic`                           | Fixed mnemonic to ensure deterministic address generation                 |
| `accounts`                           | Non-validator pre-funded accounts (for testing)                           |
| `evm_denom: basetcro`                | Gas token denomination for the EVM layer                                  |
| `base_fee`                           | EIP-1559 base fee (100 `basetcro`)                                        |

***

### 5. Initialize and Start

#### 5a. Initialize Only (Without Starting)

```bash
cd /tmp/cronos-devnet

# you could customize the data directory via --data below
pystarport init \
  --data ./multi-data \
  --config multi-validator-devnet.yaml \
  -b 26650
```

This generates the following directory structure under `./multi-data/cronos_777-1/`:

```
multi-data/cronos_777-1/
├── accounts.json          # Summary of all account addresses
├── genesis.json           # Shared genesis file
├── node0/                 # Full node directory for Validator 0
│   ├── config/
│   │   ├── app.toml       # Application config (JSON-RPC, gRPC, etc.)
│   │   ├── config.toml    # Tendermint config (P2P, RPC ports)
│   │   └── genesis.json   # Shared genesis file (same copy)
│   └── data/
│       └── priv_validator_state.json
└── node1/                 # Full node directory for Validator 1
│   ├── config/
│   │   ├── app.toml       # Application config (JSON-RPC, gRPC, etc.)
│   │   ├── config.toml    # Tendermint config (P2P, RPC ports)
│   │   └── genesis.json   # Shared genesis file (same copy)
│   └── data/
│       └── priv_validator_state.json
```

#### 5b. Initialize and Start in One Step

```bash
cd /tmp/cronos-devnet

pystarport serve \
  --data ./multi-data \
  -config multi-validator-devnet.yaml \
  -b 26650
```

{% hint style="info" %}
`serve` = `init` + launches supervisord to manage all node processes.
{% endhint %}

Once started, the terminal will display `supervisord` logs. **Keep this terminal open.**

#### 5c. Verify the Network

Open a new terminal window:

```bash
# Query latest block height (node0)
curl -s http://127.0.0.1:26657/status | python3 -m json.tool | grep latest_block_height

# Query latest block height (node1)
curl -s http://127.0.0.1:26667/status | python3 -m json.tool | grep latest_block_height

# List validator set (should show 2 validators)
/tmp/cronos-devnet/bin/cronosd query staking validators \
  --node tcp://127.0.0.1:26657 \
  --output json | python3 -m json.tool | grep moniker
```

***

### 6. Port Mapping

`pystarport` allocates ports (as per [port rules](https://github.com/crypto-com/pystarport?tab=readme-ov-file#port-rules) here) starting from `base_port` (default 26650), with an offset of +10 per node:

#### Node 0 (Validator 0) — base\_port = 26650

| Service        | Port      | Purpose                         |
| -------------- | --------- | ------------------------------- |
| P2P            | 26650     | Inter-node communication        |
| EVM JSON-RPC   | **26651** | MetaMask / ethers.js endpoint   |
| EVM WebSocket  | 26652     | Event subscriptions             |
| gRPC-Gateway   | 26653     | REST API                        |
| gRPC           | 26654     | gRPC queries                    |
| pprof          | 26655     | Performance profiling           |
| Tendermint P2P | 26656     | CometBFT peer discovery         |
| Tendermint RPC | **26657** | Cosmos SDK query endpoint       |
| ABCI           | 26658     | Application layer communication |

#### Node 1 (Validator 1) — base\_port + 10 = 26660

| Service        | Port      |
| -------------- | --------- |
| P2P            | 26660     |
| EVM JSON-RPC   | **26661** |
| EVM WebSocket  | 26662     |
| gRPC-Gateway   | 26663     |
| gRPC           | 26664     |
| pprof          | 26665     |
| Tendermint P2P | 26666     |
| Tendermint RPC | **26667** |
| ABCI           | 26668     |

**Pattern**: Port for Node N = `base_port` + (N × 10) + service offset

***

### 7. Pre-funded Accounts

All mnemonics are fixed values for deterministic address generation, enabling the team to share the same set of test addresses.

#### Validator Accounts

| Name       | Bech32 Address                               | EVM Address (EIP-55)                         | Initial Balance       |
| ---------- | -------------------------------------------- | -------------------------------------------- | --------------------- |
| validator0 | `crc10jmp6sgh4cc6zt3e8gw05wavvejgr5pw8v2q7j` | `0x7CB61D4117AE31A12E393A1CFA3BAC666481D02E` | 10,000 tCRO + 1 stake |
| validator1 | `crc1cml96vmptgw99syqrrz8az79xer2pcgpj22459` | `0xC6FE5D33615A1C52C08018C47E8BC53646A0E101` | 10,000 tCRO + 1 stake |

#### Non-Validator Accounts

| Name      | Bech32 Address                               | EVM Address (EIP-55)                         | Initial Balance |
| --------- | -------------------------------------------- | -------------------------------------------- | --------------- |
| community | `crc1jcltmuhplrdcwp7stlr4hlhlhgd4htqhyz4ack` | `0x963EBDF2E1F8DB8707D05FC75BFEFFBA1B5BAC17` | 10,000 tCRO     |
| signer1   | `crc1czp5lh3ke85rruvg0vawec02perp2ul678x46r` | `0xC0834FDE36C9E831F1887B3AECE1EA0E461573FA` | 20,000 tCRO     |
| signer2   | `crc1gt7cfua508jfexuf9ea4536sdqkv62dsxxalc2` | `0x42FD84F3B479E49C9B892E7B5A4750682CCD29B0` | 30,000 tCRO     |

{% hint style="info" %}
**Denomination conversion**: 1 tCRO = 10^18 basetcro (analogous to the ETH-to-Wei relationship)
{% endhint %}

#### Mnemonics

<pre><code># validator0
<strong>gesture inject test cycle original hollow east ridge hen combine junk child bacon zero hope comfort vacuum milk pitch cage oppose unhappy lunar seat
</strong>
# validator1
copper push brief egg scan entry inform record adjust fossil boss egg comic alien upon aspect dry avoid interest fury window hint race symptom

# community
maximum display century economy unlock van census kite error heart snow filter midnight usage egg venture cash kick motor survey drastic edge muffin visual

# signer1
figure outdoor option kitten force avocado hair rug shoulder win engage coconut record lounge insane royal crime powder dwarf monster car thing bench bamboo

# signer2
pencil shrug wire extra bonus deny ride trap science clarify lonely profit rural quote hamster fuel pig speak total lumber bench canyon possible execute
</code></pre>

***

### 8. Common Operations

The following commands assume:

```bash
CRONOSD="/tmp/cronos-devnet/bin/cronosd"
NODE="tcp://127.0.0.1:26657"
```

#### Query Balance

```bash
# Cosmos native balance
$CRONOSD query bank balances crc10jmp6sgh4cc6zt3e8gw05wavvejgr5pw8v2q7j --node $NODE

# EVM balance (via JSON-RPC)
curl -s -X POST http://127.0.0.1:26651 \
  -H "Content-Type: application/json" \
  -d '{"jsonrpc":"2.0","method":"eth_getBalance","params":["0x7CB61D4117AE31A12E393A1CFA3BAC666481D02E","latest"],"id":1}'
```

#### Transfer (Cosmos Native)

```bash
$CRONOSD tx bank send \
  crc10jmp6sgh4cc6zt3e8gw05wavvejgr5pw8v2q7j \
  crc1jcltmuhplrdcwp7stlr4hlhlhgd4htqhyz4ack \
  1000000000000000000basetcro \
  --keyring-backend test \
  --home /tmp/cronos-devnet/multi-data/cronos_777-1/node0 \
  --chain-id cronos_777-1 \
  --fees 100000000000000000basetcro \
  --node $NODE -y
```

#### List Validators

```bash
$CRONOSD query staking validators --node $NODE --output json | \
  python3 -c "
import sys, json
vs = json.load(sys.stdin)['validators']
for v in vs:
    print(f\"  {v['description']['moniker']:12s}  power={v['tokens']}  status={v['status']}\")
"
```


# Devnet

{% hint style="warning" %}
CAUTION this page is for building and running the latest development version of the chain for testing purpose only. Please note that is under active development and is highly unstable and subject to breaking changes. You should expect a moderate amount of troubleshooting work is required.

For anyone interested in joining the Cronos testnet, please refer to our public testnet documentation which will be released shortly.
{% endhint %}

By following this tutorial, you can compile and run the latest development version of Cronos testnet from scratch. It is intended for testing purpose only.

## Overview

The first option is to use [pystarport](https://github.com/crypto-org-chain/chain-main/tree/master/pystarport), a dedicated script similar to [cosmos starport](https://github.com/tendermint/starport), but without the scaffolding feature to build a local development network with multiple validators. Another option is to use a shell script `init.sh` to build a local development network with a single validator.

## Pre-requisites

### Option 1. Using `pystarport`

* Python > 3.7.3
* [cronosd](https://github.com/crypto-org-chain/cronos)

To install pystarport, run:

```
$ git clone https://github.com/crypto-org-chain/cronos.git
$ cd cronos
$ pip3 install pystarport
```

### Option 2. Using Shell script

Install the binded version, which install cronosd together, and find it by the absolute path:

```
git clone https://github.com/crypto-org-chain/cronos
cd cronos
make install
```

Afterward, you can verify that by

```bash
$ cronosd -h
```

and also you can check the version of the cronosd to see if it is built with the later commit:

```bash
$ cronosd version
[version-g<commit_hash>]
```

## Step 1. Customize your devnet

*Note*: You can skip this section and start a local devnet without customization.

### Option 1. Using `pystarport`

You can customize your devnet based on `cronos/scripts/cronos-devnet.yaml`, for example:

```yaml
  cronos_777-1:                   # change the chain-id
      json-rpc:
      address: "0.0.0.0:8545"     # change the JSON-RPC address and port
      ws-address: "0.0.0.0:8546"  # change the JSON-RPC websocket address and port
      api: "eth,net,web3,debug"
.......
  accounts:
    - name: community
      coins: 10000000000000000000000basetcro
      mnemonic: ${COMMUNITY_MNEMONIC}
    - name: signer1
      coins: 20000000000000000000000basetcro
      mnemonic: ${SIGNER1_MNEMONIC}
    - name: signer2
      coins: 30000000000000000000000basetcro
      mnemonic: ${SIGNER2_MNEMONIC}
```

The default configuration will give us two devnet validators with the chain-id `cronos_777-1`; three accounts `community`, `signer1` and `signer2` with some allocated funds at the genesis.

### Option 2. Using Shell script

You can copy the `init.sh` [here](https://raw.githubusercontent.com/crypto-org-chain/cronos-docs/master/docs/getting-started/assets/init_cronos_chain/init.sh) and customize your devnet based on `cronos/init.sh`, for example:

```yaml
### customize the name of your key, the chain-id and moniker of the node ###
  KEY="mykey"
  CHAINID="cronos_777-1"
  MONIKER="localtestnet"
.......
### specify the default keyring back-backend to be 'test' for convenience ###
  cronosd config keyring-backend test
  cronosd config chain-id $CHAINID
.......
# Allocate genesis accounts (cosmos formatted addresses)
  cronosd add-genesis-account $KEY 100000000000000000000000000aphoton --keyring-backend test
# Sign genesis transaction
  cronosd gentx $KEY 1000000000000000000000aphoton --keyring-backend test --chain-id $CHAINID
```

The default configuration will give us a single validator devnet with the chain-id `cronos_777-1`; one account under the name of `mykey` with some allocated funds at the genesis.

## Step 2. Start the devnet

Once we finish with the configuration, we are ready to start the chain: in the repository root directory, run

### Option 1. Using `pystarport`

```bash
$ pystarport serve --config ./scripts/cronos-devnet.yaml
```

Afterwards, keys will be generated according to the configuration specified, the accounts' information is generated in `data/cronos_777-1/accounts.json`, for example:

```json
[
  {"name": "validator", "type": "local", "address": "crc12luku6uxehhak02py4rcz65zu0swh7wjsrw0pp", "pubkey": "{\"@type\":\"/ethermint.crypto.v1.ethsecp256k1.PubKey\",\"key\":\"Am5xCmKjQt4O1NfEUy3Ly7r78ZZS7WeyN++rcOiyB++s\"}"}, 
  {"name": "validator", "type": "local", "address": "crc18z6q38mhvtsvyr5mak8fj8s8g4gw7kjjtsgrn7", "pubkey": "{\"@type\":\"/ethermint.crypto.v1.ethsecp256k1.PubKey\",\"key\":\"AkJ4WnUHRFLWKmrCInD/uPsByTddC6coh66ADcYZMV0b\"}"}, 
  {"name": "community", "type": "local", "address": "crc1czp5lh3ke85rruvg0vawec02perp2ul678x46r", "pubkey": "{\"@type\":\"/ethermint.crypto.v1.ethsecp256k1.PubKey\",\"key\":\"ApQozcgkbLxyWF5VYXBG7EY+R9p0IcyqngqaOz7FPJib\"}", "mnemonic": "figure outdoor option kitten force avocado hair rug shoulder win engage coconut record lounge insane royal crime powder dwarf monster car thing bench bamboo"}, 
  {"name": "signer1", "type": "local", "address": "crc1gt7cfua508jfexuf9ea4536sdqkv62dsxxalc2", "pubkey": "{\"@type\":\"/ethermint.crypto.v1.ethsecp256k1.PubKey\",\"key\":\"A/93qfsXgEexTmtrkcq+LtFfclUU3FjyJuOVeCR+qi/1\"}", "mnemonic": "pencil shrug wire extra bonus deny ride trap science clarify lonely profit rural quote hamster fuel pig speak total lumber bench canyon possible execute"}, 
  {"name": "signer2", "type": "local", "address": "crc1drs00mg2wfn26vtgsfqreq0m3jcfqf564gwkkk", "pubkey": "{\"@type\":\"/ethermint.crypto.v1.ethsecp256k1.PubKey\",\"key\":\"AkcixU8yAi547Oe9lUUMaQU4baQGCZU5ju2YeIZdaSOD\"}", "mnemonic": "cruel install century disease tired glass lesson mushroom donor usual uncover fly post stamp busy utility certain obscure whisper scene order want sentence reduce"}
]
```

Kindly save these mnemonics for key recovery later.

Blocks are now being generated! You can view the blockchain data by the rpc port of the `awesome0` (first node): <http://localhost:26657/>. Furthermore, you can also use the swagger doc of `awesome0` at <http://localhost:26654/swagger/>.

It is worth mentioning that the `serve` command would truncate all the blocks previously generated and regenerate a new genesis block, which means you'll also lose all of your transaction records. If you wish to restart the chain with the existing blocks, please run `pystarport` with `start` command:

```bash
$ pystarport start --config ./scripts/cronos-devnet.yaml
```

## Step 3. Interact with the chain

After the chain has been started, we may open up another terminal and start interacting with the chain by `cronosd`.

### Keys management

#### Restore the key

For Pystarport:

As in the last section, pre-created Hierarchical Deterministic (HD) mnemonic with genesis funds inside are prepared for you in the Devnet. To gain access to the funds, kindly restore the key by using the mnemonic before moving on to the next step.

**Note**: The keys are stored in your operating system by default, we will use `--keyring-backend test` for simplicity. You may refer to a more detailed explanation [here](/for-node-hosts/cli#the-keyring-keyring-backend-option).

* Firstly, restore the key name as `signer2`:

```bash
$ cronosd keys add signer2 --recover --keyring-backend test
```

Fill in your bip39 mnemonic, as can be found in `data/cronos_777-1/accounts.json`. Note that these addresses and mnemonic phrases are different for everyone.

```bash
Enter your bip39 mnemonic
cruel install century disease tired glass lesson mushroom donor usual uncover fly post stamp busy utility certain obscure whisper scene order want sentence reduce
- name: signer2
  type: local
  address: crc1drs00mg2wfn26vtgsfqreq0m3jcfqf564gwkkk
  pubkey: '{"@type":"/ethermint.crypto.v1alpha1.ethsecp256k1.PubKey","key":"A9J4ELPAqyyrmypT9CtOVyWrO66eEXum3d8Z2mV7MS6O"}'
  mnemonic: ""
```

### Check account balance

You can, for example, check the account balance by

```bash
cronosd q bank balances crc1drs00mg2wfn26vtgsfqreq0m3jcfqf564gwkkk -o json | jq
```

For example:

```json
{
  "balances": [
    {
      "denom": "basetcro",
      "amount": "30000000000000000000000"
    }
  ],
  "pagination": {
    "next_key": null,
    "total": "0"
  }
}
```

We can see that there is `30000000000000000000000` basetcro in this address.

### Transfer token to another address

* We are now ready to transfer token between different addresses; we can create another address with the key name `Bob`:

  ```bash
  $ cronosd keys add Bob --keyring-backend test
  ```

  which gives, for example:

```bash
 - name: Bob
 type: local
 address: crc1vqgk86fzr64xsyeemlxnxxeawcw0zfcx3dwgjt
 pubkey: '{"@type":"/ethermint.crypto.v1.ethsecp256k1.PubKey","key":"AsR5N3GJpk6TiN4EDYv7SsW/eKPvaLBkiEh/FFwcNvUoG"}'
 mnemonic: ""
 threshold: 0
 pubkeys: []
```

* Now we can transfer tokens to `Bob`, for example you can send `1basetcro` to Bob's address by

```bash
  $ cronosd tx bank send signer1 crc1vqgk86fzr64xsyeemlxnxxeawcw0zfcx3dwgjt 1basetcro --keyring-backend test --chain-id cronos_777-1
```

* Lastly, check balance of Bob's address:

  ```bash
  $ cronosd query bank balances crc1vqgk86fzr64xsyeemlxnxxeawcw0zfcx3dwgjt
  ```

  and we can see that 1 `basetcro` has already been transferred:

  ```bash
  balances:
  - amount: "1"
  denom: basetcro
  pagination:
  next_key: null
  total: "0"
  ```

Congratulations! You've successfully transferred tokens to Bob.

#### Check the current validator set

Firstly, we can check the details of the current validator set by the query command of cronosd, for example:

```bash
$ cronosd query staking validators -o json | jq
```

will result in

```json
{
  "validators": [
    {
      "operator_address": "ethvaloper1a303tt49l5uhe87yaneyggly83g7e4unxlc59p",
      "consensus_pubkey": {
        "@type": "/cosmos.crypto.ed25519.PubKey",
        "key": "T3srVdJb8CXku5GobwHHt37t2iGQ+mRL/bEHK8Zlusw="
      },
      "jailed": false,
      "status": "BOND_STATUS_BONDED",
      "tokens": "1000000000000000000000",
      "delegator_shares": "1000000000000000000000.000000000000000000",
      "description": {
        "moniker": "localtestnet",
        "identity": "",
        "website": "",
        "security_contact": "",
        "details": ""
      },
      "unbonding_height": "0",
      "unbonding_time": "1970-01-01T00:00:00Z",
      "commission": {
        "commission_rates": {
          "rate": "0.100000000000000000",
          "max_rate": "0.200000000000000000",
          "max_change_rate": "0.010000000000000000"
        },
        "update_time": "2021-07-06T16:15:07.061973Z"
      },
      "min_self_delegation": "1"
    }
  ],
  "pagination": {
    "next_key": null,
    "total": "0"
  }
}
```

then we can see that there are two active validator `localtestnet` at the moment.

For the validator, we can see that it comes with an address and a public key:

* `"operator_address"` - The operator address, which is used for identifying the operators of validators;
* `"consensus_pubkey"` - The consensus public key, which is used for identifying the validator nodes participating in consensus.


# Local State Sync

In [Cronos v1.0.12](https://github.com/crypto-org-chain/cronos/releases/tag/v1.0.12), we introduced a new set of commands to do local state sync, the full command help screen is:

```bash
$ cronosd snapshots --help
Manage local snapshots

Usage:
  cronosd snapshots [command]

Available Commands:
  delete      Delete a local snapshot
  dump        Dump the snapshot as portable archive format
  export      Export app state to snapshot store
  list        List local snapshots
  load        Load a snapshot archive file (.tar.gz) into snapshot store
  restore     Restore app state from local snapshot

Flags:
  -h, --help   help for snapshots

Global Flags:
      --home string         directory for config and data (default "/Users/yihuang/.cronos")
      --log_format string   The logging format (json|plain) (default "plain")
      --log_level string    The logging level (trace|debug|info|warn|error|fatal|panic) (default "info")
      --trace               print out full stack trace on errors

Use "cronosd snapshots [command] --help" for more information about a command.
```

#### Local State Sync

Before we dive into local state sync, let's understand a "normal" state sync first. After you setup state-sync in config and start the node, the node will do the following procedure:

1. Discover snapshots on the p2p network.
2. Verify the snapshot metadata by verifying the block headers between the snapshot and the trusted block height.
3. Download snapshot chunks from the p2p network.
4. Restore app state from the downloaded snapshot chunks.
5. Bootstrap cometbft state.
6. Start normal sync.

With a "normal" state sync, the procedure is done automatically on startup, it works great when the state is small, but as the chain grows, the procedure becomes slow and unstable.

The new local state sync commands try to break down this procedure into smaller steps:

1. Discover and download snapshots from out-of-band communications, for example community shared snapshots on a http server.
2. User downloads shared snapshots and imports into the local snapshot database.

   ```bash
   $ cronosd snapshots load /path/to/downloaded-snapshot.tar.gz
   $ cronosd snapshots list
   <height> <format>
   ```
3. Restore app state from the snapshot (this step is much faster with [MemIAVL](https://github.com/crypto-org-chain/cronos/wiki/MemIAVL) than current iavl):

   ```bash
   $ cronosd snapshots restore <height> <format>
   ```

   3a. (Optional) If you want to enable versiondb together, you need to restore the versiondb from the snapshot as well:

   ```bash
   $ cronosd changeset restore-versiondb <height> <format>
   ```
4. Verify and bootstrap cometbft state based on current app state and state sync configuration:

   ```bash
   $ cronosd tendermint bootstrap-state
   ```

   This step requires the `statesync.*` configurations in `config.toml`, to be the same as you would setup for a "normal" state sync.
5. Start the node and sync normally.

#### Snapshot Provider

Alternatively, a snapshot provider can dump local snapshots into a portable tarball which can be shared across the network:

```bash
$ cronosd snapshots dump <height> <format> --output /path/to/snapshot.tar.gz
```

Normally the snapshots are generated automatically using config `state-sync.snapshot-interval`, with these new commands, one can also manually export arbitrary versions of the state.

```bash
$ cronosd snapshots export --height <height>
$ cronosd snapshots list
<height> <format>
```


# Cronosd build with Nix

It is also possible to reproducibly build `cronosd` binaries locally yourself using nix.

### Prerequisites

* Install `nix`, following the instructions here: <https://nixos.org/download.html>
* Install cachix and enable cronos binary cache:

  <pre><code><strong>nix-env -iA cachix -f https://cachix.org/api/v1/install
  </strong>cachix use cronos

  </code></pre>

### Build Type Matrix

Below are listed the different possible parameters

* **Network Type**
  * `mainnet` (default)
  * `testnet`
* **Build Type**
  * normal nix package (default)
  * re-distributable bundle
  * re-distributable tarball, the tarball of the above bundle.

### Creating a reproducible build

The package name is constructed by joining the above properties with a separator `-`, omitting the default values, for example:

* `cronosd:` defaults to the `mainnet` nix package.
* `cronosd-bundle:` `mainnet` re-distributable bundle.
* `cronosd-tarball:` `mainnet` re-distributable tarball.
* `cronosd-testnet:` `testnet` nix package.
* `cronosd-testnet-tarball:` `testnet` re-distributable tarball.

The nix flake url is: `github:crypto-org-chain/cronos/$TAG_NAME#$PACKAGE_NAME`,\
replace the `$TAG_NAME` and `$PACKAGE_NAME` to the one you needed, for example:\
\
The full command to build a `v0.8.1` `mainnet` re-distributable tarball is:

```shell
nix build github:crypto-org-chain/cronos/v0.8.1#cronosd-tarball

result -> /nix/store/dlhqc2ii8jj1ryrgki90l6j92r2by06g-bundle-cronosd-v0.8.1
```

The result will reside in `./result` by default, you can copy the tarball to other machines with the same OS and arch. The re-distributable bundle/tarball has dynamic libraries included, no extra runtime dependencies are needed.

```bash
mkdir tmp/cronosd
tar xfz ./result -C /tmp/cronosd/
```

{% hint style="info" %}
If you get `error: experimental Nix feature 'nix-command' is disabled`;\
use '--extra-experimental-features nix-command' to override, e.g. by adding:\
\
`--extra-experimental-features nix-command`\
`--extra-experimental-features flakes`
{% endhint %}

### Tarball Content

To keep the tarball redistributable, it has all the runtime dependencies included, the dynamic linker, and the shared libraries. They are located in a relative path, so it's important that the whole package is moved together.

* `bin/cronosd:` the entry point, it's a wrapper script that executes the binary using the included dynamic linker.
* `exe/cronosd:` the executable.
* `lib/:` all the shared libraries.


# VersionDB

### Overview

Anyone that has been running archive nodes for a while, is familiar with the issue of the ever growing disk size of their nodes. For Cronos, the IAVL database of archived nodes, the `application.db` usually grows. Migrating VersionDB dramatically reduces disk pressure while maintaining fast and reliable access to historical state.

VersionDB stores multiple versions of on-chain state key-value pairs, without using a merkelized tree structure like IAVL tree, making both DB size and query performance much better than IAVL trees. However, VersionDB does not perform root hash and Merkle proof generation, so for those features we still need the IAVL tree. gRPC queries do not need to support proof generation, so VersionDB alone is enough to support this. Currently the `--grpc-only` flag for one to start a standalone grpc query service.

After migrating to VersionDB, its safe to prune the IAVL tree to reclaim substantial disk space, as long as you don’t need to generate Merkle proofs on historical versions.

### Limitations

The limitations of the setup with VersionDB and pruned IAVL tree are:

* Currently, this solution is only recommended for **archive** and **non-validator nodes** to try (validator nodes are recommended to do pruning).
* Different implementations exist for VersionDB. Our current implementation is based on **RocksDB'**&#x73; v7's experimental user-defined timestamp, which stores the data in a standalone **RocksDB** instance. it does not support other db backends yet. The other databases in the node still support multiple backends as before.
* Does not support `eth_getProof, non-grpc / abci_query` for the historical versions that's pruned in IAVL tree. The other APIs should function just like an archive node as before.

### 1. Tutorial - Migrating from snapshot

#### Step 1 - Extract from snapshot

Download the archive snapshot from either Quicksync or from the [S3 link](https://cronos-mainnet-fullnode-datadir-backup-external-user.s3.ap-southeast-1.amazonaws.com/data/cronosmainnet_25-1-versiondb-archive-20230810.tar.gz?X-Amz-Algorithm=AWS4-HMAC-SHA256\&X-Amz-Credential=AKIAU2KFOQGWRLYDYR3A%2F20230815%2Fap-southeast-1%2Fs3%2Faws4_request\&X-Amz-Date=20230815T020338Z\&X-Amz-Expires=604800\&X-Amz-SignedHeaders=host\&X-Amz-Signature=9edc36d26ec7d21f61c9a2d8e8ce12321a769a736bc61858955649a9e3733f24) we have provided. After you have extracted the `.tar` into your `$NODE_HOME/data/versiondb` folder, you can continue to update config and restart.

#### Step 2 - **Update config**

To enable VersionDB, you need to update the config in **app.toml** like this:

```bash
[versiondb]
# Enable defines if the versiondb should be enabled.
enable = true
```

The db instance is placed at `$NODE_HOME/data/versiondb` directory. Currently this path cannot be customized. This will switch the grpc query service's backing store from IAVL tree to VersionDB.

#### Step 3 - Start the node

Restart the node. it should start to reindex iavl fastnode now.

### 2. Tutorial - starting from scratch

This tutorial starts from scratch, so prepare enough time to go through this migration, especially the change set extraction may take time in the order of **days** for it to complete, even with a `r6g.16xlarge` instance. In case you want to skip this step, we will be supporting a snapshot for this in the near future. For more information on the different steps, see this documentation [here](https://github.com/crypto-org-chain/cronos/wiki/VersionDB-Migration).

We will be following the following workflow:

1. **Extract** state change sets from existing archived IAVL tree.
2. **Build** the versiondb from the change set files.
3. **Build** a clean **application.db** from the change set files.

<figure><img src="/files/Z323lZSHtrtOZAzV6uJH" alt=""><figcaption></figcaption></figure>

#### Step 0

* Update your binary and stop cronosd.

#### Step 1 - extract changesets

* (Optional) get the end-version before extracting changeset.

```bash
ulimit -n 60000 # python-iavl and cronosd changeset subcommand open many files
export MAXIMUM_VERSION=$(nix run github:crypto-com/python-iavl/main -- commit-infos --db /chain/.chain-maind/data/application.db/ | head -n 1 | awk '{ print $2 }')
export END_VERSION=$((MAXIMUM_VERSION + 1))
```

* **Extract Change Sets**\
  This step takes the **longest**. The migration process will try to parallelize the tasks as much as possible, and hence will use significant **RAM memory**. There are however flags for a user to control the concurrency level and RAM usage to adjust on different machine specs.\
  Time taken: around 4 days (512G RAM, r6g.16xlarge) for an archive node

```bash
$ /chain/.cronosd/cosmovisor/current/bin/cronosd changeset dump /s3-upload/data \
--home /chain/.cronosd --end-version $END_VERSION --concurrency 128
```

* **Verify Change Sets**\
  Time taken: around 1 hour

```bash
#!/bin/bash
set -e
set +o pipefail

MAXIMUM_VERSION=$(nix run github:crypto-com/python-iavl/main -- commit-infos --db /chain/.cronosd/data/application.db/ | head -n 1 | awk '{ print $2 }')
stores=($(/chain/.cronosd/cosmovisor/current/bin/cronosd changeset default-stores --home /chain/.cronosd/))
for i in "${stores[@]}"
do
  if [[ "$(nix run github:crypto-com/python-iavl/eb75df9 -- root-hash --db /chain/.cronosd/data/application.db/ --store $i --version $MAXIMUM_VERSION | awk '{print $2}')" == "$(/chain/.cronosd/cosmovisor/current/bin/cronosd changeset verify /s3-upload/changeset --stores $i | tail -1 | jq -r ".storeInfos[] | select(.name == \\"$i\\") | .commitId.hash" | base64 -d | xxd -p -c 32)" ]]; then
      echo "$i store is verified"
  else
      echo  "$i store has issue"
  fi
done
```

```bash
./verify.sh
```

#### Step 2 - **Build VersionDB**

This is a two-phase process for efficiently constructing a version database from `changeset` data.

The first step is to generate **SST** files from changeset data:

{% hint style="info" %}
SST files are a binary format used by embedded databases (like RocksDB/LevelDB). They store key-value pairs in sorted order, making them efficient for bulk ingestion. Rather than inserting data one record at a time, batching into SSTs is dramatically faster.
{% endhint %}

```bash
./chain/.cronosd/cosmovisor/current/bin/cronosd changeset build-versiondb-sst \
/s3-upload/data /s3-upload/sst
```

Then create VersionDB state directory `./versiondb` with below:

```bash
./chain/.cronosd/cosmovisor/current/bin/cronosd changeset ingest-versiondb-sst \
/s3-upload/versiondb /s3-upload/sst/*.sst --move-files --maximum-version $MAXIMUM_VERSION
```

{% hint style="info" %}
This process can take up to 1 hour.
{% endhint %}

#### Step 3 - **Restore IAVL Tree**

Restore the IAVL tree. The restored `application.db` migration commands don't contain fastnode index

```bash
# create memiavl snapshot
$ /chain/.cronosd/cosmovisor/current/bin/cronosd changeset verify /s3-upload/data --save-snapshot /s3-upload/snapshot
# restore application.db
$ /chain/.cronosd/cosmovisor/current/bin/cronosd changeset restore-app-db /s3-upload/snapshot /s3-upload/application.db
```

{% hint style="info" %}
This process can take up to a few hours.
{% endhint %}

#### Step 4 - **Update config**

Ensure you have properly enabled VersionDB:

```bash
[versiondb]
# Enable defines if the versiondb should be enabled.
enable = true
```

#### Step 5 - Start the node

Restart the node. It should start to reindex iavl fastnode now.

### Results on Cronos

On Cronos, we noticed disk size reductions around \~**`63%`** for a Cronos archive node. Of course the reuctions that you will see, depend from case to case, but as you can see there's a good improvement in disk size reduction to be gained when moving to versionDB.

**Rocksdb** archive node:

```bash
$ du -hd1 /chain/.cronosd/data/
1.6T /chain/.cronosd/data/application.db
103G /chain/.cronosd/data/blockstore.db
1.1G /chain/.cronosd/data/cs.wal
121M /chain/.cronosd/data/evidence.db
114M /chain/.cronosd/data/snapshots
163G /chain/.cronosd/data/state.db
462G /chain/.cronosd/data/tx_index.db
2.3T /chain/.cronosd/data/
```

**Versiondb** archive node:

```bash
du -hd1 /chain/.cronosd/data/
82G /chain/.cronosd/data/application.db
104G /chain/.cronosd/data/blockstore.db
26G /chain/.cronosd/data/versiondb
1.1G /chain/.cronosd/data/cs.wal
115M /chain/.cronosd/data/evidence.db
112M /chain/.cronosd/data/snapshots
163G /chain/.cronosd/data/state.db
463G /chain/.cronosd/data/tx_index.db
837G /chain/.cronosd/data/
```


# MemIAVL

{% hint style="danger" %}
WARNING: EXPERIMENTAL
{% endhint %}

`Memiavl` is a drop-in replacement for the current iavl implementation, offering a huge performance boost ([benchmark](https://github.com/crypto-org-chain/cronos/wiki/MemIAVL-Benchmark)) for the node. MemIAVL can be enabled by turning on the `memiavl.enable` config item in the `app.toml.`It uses a standalone db directory `data/memiavl.db.` You can always disable it again, in that case the `data/application.db` will use the default iavl again, so it's ok to switch between them back and forth.

`Memiavl` only supports **pruned nodes**, the default configuration(`memiavl.snapshot-keep-recent=0`) should be set equivalent to `pruning=everything.` In order to support historical grpc queries, you should enable versiondb together with memiavl, if you need to support archive merkle proof generations, don't use `memiavl!`

The default `memiavl` section in `app.toml`:

```bash
[memiavl]

# Enable defines if the memiavl should be enabled.
enable = false

# ZeroCopy defines if the memiavl should return slices pointing to mmap-ed buffers directly (zero-copy),
# the zero-copied slices must not be retained beyond current block's execution.
zero-copy = false

# AsyncCommitBuffer defines the size of asynchronous commit queue, this greatly improve block catching-up
# performance, -1 means synchronous commit.
async-commit-buffer = 0

# SnapshotKeepRecent defines what many old snapshots (excluding the latest one) to keep after new snapshots are taken.
snapshot-keep-recent = 0

# SnapshotInterval defines the block interval the memiavl snapshot is taken, default to 1000.
snapshot-interval = 1000

# CacheSize defines the size of the cache for each memiavl store, default to 1000.
cache-size = 1000
```

### Use Cases

#### Semi-Archived Node

When versiondb was released, we recommend users to setup a pruned iavl tree together with versiondb, to setup a semi-archived node, you can replace the pruned iavl tree with `memiavl` now.

#### State Sync Node

`Memiavl` can do state-sync snapshot restoration much faster than the current iavl, it's actually much faster than the chunk downloading speed, with `memiavl`, allowing state-sync node to be bootstrapped in around 10 minutes depending on the internet speed. If you download a snapshot from CDN and do a local restoration, it can even be faster. Just enable memiavl in `app.toml` before starting a state-sync.

#### Snapshot Providers

`memiavl` can do state-sync snapshot exports much faster as well, on Cronos mainnet, snapshots can be exported in minutes instead of days, so it's recommended to run snapshot provider nodes with `memiavl`, so the snapshots will be much more up-to-date.

### Migrate Semi-Archive Node

To migrate a semi-archive versionDB node to memiavl, you just need to restore a memiavl db to the same current height as the versiondb, then continue normal syncing from there, we can use local state-sync commands to do that:

```bash
# download a snapshot whose version is smaller than versiondb's latest version
$ cronosd snapshots load /path/to/downloaded-snapshot.tar.gz

# check the snapshot height and format in list command
$ cronosd snapshots list

# edit app.toml to enable memiavl
$ cronosd snapshots restore <snapshot height> 2

# edit app.toml to disable versiondb, and set `memiavl.async-commit-buffer = -1`
$ cronosd start --halt-height <versiondb height>

# edit app.toml to enable versiondb, and set `memiavl.async-commit-buffer = 0 or small positive number` to re-enable async commit.
$ cronosd start
```

### Compression

Right now memiavl doesn't do any generic compressions to the data files, that would kill the simplicity of the current implementation, and probably hurt performance if not done right. Fortunately, on the linux filesystem level compressions work well with `mmap.` We can run memiavl on `btrfs` configured with `zstd` compression, and observe around \~60% compression rate on memiavl directory, with no visible performance regression. So this is the recommended way to run memiavl for efficient disk space usage.


# Best Practices

In order to make it more convenient for DApps and node hosts to set up a node, we have put together a list of useful settings and configurations. Feel free to refer to this guide and adapt settings to suit your own use cases. For a sample config check [here](https://github.com/cronos-labs/cronos-mainnet/tree/master/cronosmainnet_25-1).

## config.toml

### Log\_level

* `info` Depending on the needs of your application it is ok to stick to `info` (default), but do consider setting up log-rotation for your logs, and archive logs after a certain amount of time or size, e.g. use a cron job with weekly rotation or until your file size hits \~5GB.
* set to `debug` only for debugging purposes, turn off after you are finished with debugging.

### db\_backend

Since 1.0.2 there is another db parameter in app.toml as well. Be sure to make these 2 parameters the same to avoid issues.

* `goleveldb` (default) db for low / medium level traffic use case. The reason being there can be some lock contention, especially with P2P.
* `rocksdb` suited for a lot of use-cases, especially for high query load \~ few M / day. Has a better balance between rpc queries and p2p at high traffic. Note that`Rocksdb` however might have a slower startup time and requires a higher memory allocation. \\

### Seeds and persistent\_peers

* `max_num_inbound_peers` For node providers the number of inbound peers can be set to a higher value for example 50.
* `max_num_outbound_peers` For users on a private network set a higher number of outbound peers to 30 for example.
* After peers are connected, set it back to its default value. Note that some trial values might be needed to get it right.
* `seeds` Set the list of seeds as instructed in the [Running Nodes](/for-node-hosts/running-nodes) section to connect to.
* `persistent_peers` is especially useful when using [State Sync](/for-node-hosts/running-nodes/cronos-evm-snapshots/state-sync) to pull snapshots from.

### send\_rate and recv\_rate

Free to tweak to a higher bytes/sec value, if your networking allows this, e.g. `51200000`

### timeout\_broadcast\_tx\_commit

* Freely tweak this parameter. Set to a slightly higher value, such as `20s` to wait for a tx to be committed during / broadcast\_tx\_commit. Be careful a value larger than 10s will result in increasing the global HTTP write timeout, which applies to all connections and endpoints.

### max\_num\_inbound\_peers and max\_num\_outbound\_peers

* `max_num_inbound_peers` For node providers the number of inbound peers can be set to a higher value for example 50.
* `max_num_outbound_peers` For users on a private network set a higher number of outbound peers to 30 for example.
* After peers are connected, set it back to its default value. Note that some trial values might be needed to get it right.

### Metrics

Prometheus provides real-time metrics used for event monitoring and alerting. Prometheus metrics can be served on the Cronos chain. To enable the Prometheus metrics, you will need to set `instrumentation.prometheus=true` in the `config.toml` file manually.

Metrics will be served under `…/metrics` on `26660` port by default, e.g. `localhost:26660/metrics`. The listening address can be changed in the `config.toml` file (`prometheus_listen_addr`).

Sample Settings:

<pre><code><strong>#######################################################
</strong>###       Instrumentation Configuration Options     ###
#######################################################
[instrumentation]

# When true, Prometheus metrics are served under /metrics on
# PrometheusListenAddr.
# Check out the documentation for the list of available metrics.
prometheus = true

# Address to listen for Prometheus collector(s) connections
prometheus_listen_addr = ":26660"

# Maximum number of simultaneous connections.
# If you want to accept a larger number than the default, make sure
# you increase your OS limits.
# 0 - unlimited.
max_open_connections = 3

# Instrumentation namespace
namespace = "tendermint"

</code></pre>

## app.toml

### Pruning

* `default` Normal usage can just be set to default. In the Cosmos SDK this is defined as:

```go
PruneDefault = NewPruningOptions(362880, 100, 10)
```

meaning the app will keep the latest 362880 versions (around 21 days by 5 secs block time), and then only keep 1 version for every 100 blocks past the keepRecent period( the rest will be put into the pruning list), and then execute the pruning every 10 blocks.

* `everything` if you only need to do transaction broadcasting and only need the last blocks.
* `nothing` for DApps that want to be able to query information at a certain known blockheight. Note that this is only needed for `archive` nodes.

### iavl-disable-fastnode and iavl-cache-size

During the `dragonberry` patch and the upgrade to `0.8.2` and `0.8.3`, we enabled the `iavl-disable-fastnode` config parameter. This provides the option to disable the iavl fastnode indexing migration, as a migration will take multiple hours to complete.

* `iavl-disable-fastnode = false` is the default setting and performs the migration. This might take a while. So be prepared in advance and schedule this migration downtime. In case you use a snapshot that has performed migration already (e.g. [Native Snapshots](/for-node-hosts/running-nodes/cronos-evm-snapshots/cronos-native-snapshots)), leave the value to false
* `iavl-disable-fastnode = true` if you want to disable the fast indexing, and skip the migration. Only use this in case you really are not able to perform the migration now.
* `iavl-cache-size` set to `781250` works well as our testing has shown.

### app-db-backend

As of `v1.0.0` we support golevelDB and rocksDB in a single binary, hence we allow to select the backend with the `app-db-backend` parameter. If not filled in it will use a fallback option.\
\
First fallback is the deprecated compile-time types.DBBackend value.\
Second fallback (if the types.DBBackend also isn't set), is the db-backend value set in config.toml.

* `app-db-backend = "rocksdb" or "golevelsdb"`

### API

* `enable = true` to enable the API server
* `swagger = true` to setup the swagger endpoint

### Json-RPC

* `api = "eth,txpool,web3"` Set to the namespaces you wish to use under the [security consideration](#security-consideration), optionally add `net,debug` to that list.
* `evm-timeout` Freely tweak this parameter. Set to a slightly higher value, such as `60s` to avoid timeouts on eth\_calls.
* `http-timeout` Freely tweak this parameter. Set to a slightly higher value, such as `60s` to avoid read/writes timeouts of the http json-rpc server.
* `http-idle-timeout` Freely tweak this parameter. Set to a slightly higher value, such as `120s` to avoid idle timeout of the http json-rpc server.
* `ws-origins` Introduced from [v1.7.5](https://github.com/crypto-org-chain/cronos/releases/tag/v1.7.5). Default empty value might silently reject WebSocket connections from clients that send an Origin header. Set to `"*"` to allow all origins, or specify a comma-separated allowlist if you need to restrict access. Node operators upgrading from pre-v1.7.5 will not have this field in their existing `app.toml` — add it manually under `[json-rpc]` to avoid unexpected WS connectivity issues.

### Debug Method

`debug_trace` allows nodes to return the trace of block and transaction details. In order to enable `debug_trace` for your node on the Cronos chain, two places need to be configured correctly under `app.toml`.

Sample Settings:

```
# default: the last 362880 states are kept, pruning at 10 block intervals
# nothing: all historic states will be saved, nothing will be deleted (i.e. archiving node)
# everything: 2 latest states will be kept; pruning at 10 block intervals.
# custom: allow pruning options to be manually specified through 'pruning-keep-recent', and 'pruning-interval'
pruning = "everything"

[evm]

# Tracer defines the 'vm.Tracer' type that the EVM will use when the node is run in
# debug mode. To enable tracing use the '--evm.tracer' flag when starting your node.
# Valid types are: json|struct|access_list|markdown
tracer = ""


[json-rpc]

# API defines a list of JSON-RPC namespaces that should be enabled
# Example: "eth,txpool,net,debug,web3"
api = "eth,net,web3,txpool,debug"
```

In addition, it should run as `cronosd start --trace` in `cronosd start` command (*archived node*). For the resources needed for `--trace` flag in Cronos mainnet, the mem usage is slightly higher than the others but 64GB should be enough.

## Security Consideration

As a node operator, we do **NOT** recommend exposing `personal_*`, `eth_sign`, or `eth_signTransaction` to the public internet, since these RPC methods grant direct access to any private keys held by the node:

* **`personal_*`** — account-management methods such as `personal_unlockAccount`, `personal_sendTransaction`, `personal_sign`, and `personal_importRawKey`. An exposed endpoint lets attackers unlock accounts, or sign arbitrary transactions on behalf of the node.
* **`eth_sign`** — signs a raw 32-byte digest with a node-managed key. Exposure is functionally equivalent to handing over the private key.
* **`eth_signTransaction`** — returns a signed transaction using a node-managed key. Exposure is functionally equivalent to handing over the private key.

### Recommended practice

1. Bind these namespaces to `localhost` (`127.0.0.1`) only, or disable them entirely.
2. Never hold user-facing signing keys on a node that also serves public RPC. Use a separate signing service with its own authentication and rate limiting.
3. Place all RPC endpoints behind a firewall / reverse proxy with IP allowlisting, TLS, and per-method filtering.


# Cronosd

`cronosd` is an all-in-one command-line interface. It supports wallet management, funds transfers and staking operations.

## Build and configurations

### Build Prerequisites

* You can get the latest `cronosd` binary here from the [release page](https://github.com/crypto-org-chain/cronos/releases);

### Using `cronosd`

`cronosd` is bundled with the Cronos EVM code. After you have obtained the latest `cronosd` binary, run

```bash
$ cronosd [command]
```

There is also a `-h, --help` command available

```bash
$ cronosd -h
```

### Config and data directory

By default, your configuration and data are stored in the folder located in the `~/.cronos` directory.\
\
Ensure that you have backed up your wallet after creating it. Otherwise, your funds may be inaccessible in the event of an accident.

#### Configure cronosd config and data directory

To specify the cronosd config and data storage directory, you can add a global flag `--home <directory>`.

## Configuration Setting

We can view the default config setting by using `cronosd config` command:

```bash
$ cronosd config
{
	"chain-id": "",
	"keyring-backend": "os",
	"output": "text",
	"node": "tcp://localhost:26657",
	"broadcast-mode": "sync"
}
```

We can make changes to the default settings upon our choices, so it allows users to set the configuration beforehand all at once, so it would be ready with the same config afterward.

For example, the `chain-id` can be changed to `cronostestnet_338-3` from a blank name by

```bash
$ cronosd config "chain-id" cronostestnet_338-3
$ cronosd config
{
	"chain-id": "cronostestnet_338-3",
	"keyring-backend": "os",
	"output": "text",
	"node": "tcp://localhost:26657",
	"broadcast-mode": "sync"
}
```

Other values can be changed in the same way.

Alternatively, we can directly make the changes to the config values in one place at client.toml. It is under the path of `.ethermint/config/client.toml` in the folder where we installed ethermint:

```bash
############################################################################
###                         Client Configuration                         ###
############################################################################

# The network chain ID
chain-id = "cronostestnet_338-3"
# The keyring's backend, where the keys are stored (os|file|kwallet|pass|test|memory)
keyring-backend = "os"
# CLI output format (text|json)
output = "number"
# <host>:<port> to Tendermint RPC interface for this chain
node = "tcp://localhost:26657"
# Transaction broadcasting mode (sync|async|block)
broadcast-mode = "sync"
```

After the necessary changes are made in the `client.toml`, then save. For example, if we directly change the `chain-id` from `ethermint0` to ethermint-test1, and output to number, it would change instantly as shown below.

```bash
$ cronosd config
{
	"chain-id": "ethermint-test1",
	"keyring-backend": "os",
	"output": "number",
	"node": "tcp://localhost:26657",
	"broadcast-mode": "sync"
}
```

### Options

A list of commonly used flags of cronosd is listed below:

| Option              | Description                   | Type         | Default Value |
| ------------------- | ----------------------------- | ------------ | ------------- |
| `--home`            | Directory for config and data | string       | `~/.cronos`   |
| `--chain-id`        | Full Chain ID                 | String       | ---           |
| `--output`          | Output format                 | string       | "text"        |
| `--keyring-backend` | Select keyring's backend      | os/file/test | os            |

## Command list

A list of commonly used `cronosd` commands.

<table><thead><tr><th width="185.33333333333331">Command</th><th width="270">Description</th><th>List</th></tr></thead><tbody><tr><td><code>keys</code></td><td><a href="https://docs.cronos.com/for-node-hosts/cli#key-management-cronosd-keys">Key management</a></td><td><a href="#keys-add-wallet-name-create-a-new-key"><code>add &#x3C;wallet_name></code></a><br><br><a href="#keys-add-key-name-recover-restore-existing-key-by-seed-phrase"><code>add &#x3C;key_name> --recover</code></a><br><br><a href="#keys-list-list-your-keys"><code>list</code></a><br><br><a href="#keys-show-key-name-retrieve-key-information"><code>show &#x3C;key_name></code></a><br><br><a href="#keys-delete-key-name-delete-a-key"><code>delete &#x3C;key_name></code></a><br><br><a href="#keys-export-key-name-export-private-keys"><code>export &#x3C;key_name></code></a></td></tr><tr><td><code>tx</code></td><td><a href="https://docs.cronos.com/for-node-hosts/cli#transaction-subcommands-cronosd-tx">Transaction subcommands</a></td><td><a href="#tx-bank-send-transfer-operation"><code>bank send</code></a><br><br><a href="#delegate-you-funds-to-a-validator-tx-staking-delegate-validator-addr-amount"><code>staking delegate</code></a><br><br><a href="#unbond-your-delegated-funds-tx-staking-unbond-validator-addr-amount"><code>staking unbond</code></a><br><br><a href="#tx-staking-create-validator-joining-the-network-as-a-validator"><code>staking create-validator</code></a><br><br><a href="#tx-slashing-unjail-unjail-a-validator"><code>slashing unjail</code></a></td></tr><tr><td><code>query</code></td><td><a href="https://docs.cronos.com/for-node-hosts/cli#balance-and-transaction-history-cronosd-query">Query subcommands</a></td><td><a href="#query-bank-balances-check-your-transferable-balance"><code>query bank balance</code></a></td></tr></tbody></table>

You may also add the flag `-h, --help` on `cronosd [command]` to get more available commands and details.

{% hint style="info" %}
Example: More details of subcommand - tx staking

```bash
$ cronosd tx staking --help
Staking transaction subcommands

Usage:
  cronosd tx staking [flags]
  cronosd tx staking [command]

Available Commands:
  create-validator create new validator initialized with a self-delegation to it
  delegate         Delegate liquid tokens to a validator
  edit-validator   edit an existing validator account
  redelegate       Redelegate illiquid tokens from one validator to another
  unbond           Unbond shares from a validator

Flags:
  -h, --help   help for staking

Global Flags:
      --chain-id string     The network chain ID
      --home string         directory for config and data (default "/Users/.cronos")
      --log_format string   The logging format (json|plain) (default "plain")
      --log_level string    The logging level (trace|debug|info|warn|error|fatal|panic) (default "info")
      --trace
```

{% endhint %}

## Key management - `cronosd keys`

First of all, you will need an address to store and spend your CRO.

### `keys add <wallet_name>` - Create a new key

You can create a new key with the name `Default` as in the following example:

{% hint style="info" %}
Example: Create a new address

```bash
$ cronosd keys add Default
- name: Default
  type: local
  address: tcrc1r4erhyx6jk8nsafhlw7263upnw9hja90gdgj5d
  pubkey: '{"@type":"/ethermint.crypto.v1alpha1.ethsecp256k1.PubKey","key":"A3EzNez+oPwDnRTY9OWdVDSjOqikiP7zYncTyxil2SgO"}'
  mnemonic: ""


**Important** write this mnemonic phrase in a safe place.
It is the only way to recover your account if you ever forget your password.

farm surround surround hunt shop glory fringe bag mountain clerk arch ankle announce turtle slide brisk carbon album immense drop example speed grain dutch
```

{% endhint %}

The key comes with a "mnemonic phrase", which is serialized into a human-readable 24-word mnemonic. User can recover their associated addresses with the mnemonic phrase.

{% hint style="danger" %}
It is important that you keep the mnemonic for address secure, as there is **no way** to recover it. You would not be able to recover and access the funds in the wallet if you forget the mnemonic phrase.
{% endhint %}

### `keys add <key_name> --recover` - Restore existing key by seed phrase

You can restore an existing key with the mnemonic.

{% hint style="info" %}
Example: Restore an existing key

```bash
$ cronosd keys add Default_restore --recover
> Enter your bip39 mnemonic
## Enter your 24-word mnemonic here ##
```

{% endhint %}

### `keys list` - List your keys

Multiple keys can be created when needed. You can list all keys saved under the storage path.

{% hint style="info" %}
Example: List all of your keys

```bash
$ cronosd keys list
    - name: Default
    type: local
    address: ## Address of "Default" ##
    pubkey: ## Pubkey of "Default" ##
    mnemonic: ""
    threshold: 0
    pubkeys: []
  - name: Default_restore
    type: local
    address: ## Address of "Default_restore" ##
    pubkey: ## Pubkey of "Default_restore" ##
    mnemonic: ""
    threshold: 0
    pubkeys: []
```

{% endhint %}

### `keys show <key_name>` - Retrieve key information

You can retrieve key information by its name:

{% hint style="info" %}
Example: Retrieve key information - Account Address and its public key

```bash
$ cronosd keys show mykey --bech acc
- name: mykey
  type: local
  address: tcrc1qsklxwt77qrxur494uvw07zjynu03dq9alwh37
  pubkey: '{"@type":"/ethermint.crypto.v1alpha1.ethsecp256k1.PubKey","key":"A8nbJ3eW9oAb2RNZoS8L71jFMfjk6zVa1UISYgKK9HPm"}'
  mnemonic: ""
```

{% endhint %}

{% hint style="info" %}
Example: Retrieve key information - Validator Address and its public key

```bash
$ cronosd keys show Default --bech val
$ cronosd keys show test --bech val
- name: mykey
  type: local
  address: ethvaloper1qsklxwt77qrxur494uvw07zjynu03dq9rdsrlq
  pubkey: '{"@type":"/ethermint.crypto.v1alpha1.ethsecp256k1.PubKey","key":"A8nbJ3eW9oAb2RNZoS8L71jFMfjk6zVa1UISYgKK9HPm"}'
  mnemonic: ""
```

{% endhint %}

{% hint style="info" %}
Example: Retrieve key information - Consensus nodes Address and its public key

```bash
$ cronosd keys show Default --bech cons
$ cronosd keys show test --bech cons
- name: mykey
  type: local
  address: ethvalcons1qsklxwt77qrxur494uvw07zjynu03dq9h7rlnp
  pubkey: '{"@type":"/ethermint.crypto.v1alpha1.ethsecp256k1.PubKey","key":"A8nbJ3eW9oAb2RNZoS8L71jFMfjk6zVa1UISYgKK9HPm"}'
  mnemonic: ""
```

{% endhint %}

### `keys delete <key_name>` - Delete a key

You can delete a key in your storage path.

{% hint style="danger" %}
Make sure you have backed up the key mnemonic before removing any of your keys, as there will be no way to recover your key without the mnemonic.
{% endhint %}

{% hint style="info" %}
Example: Remove a key

```bash
$ cronosd keys delete Default_restore1
Key reference will be deleted. Continue? [y/N]: y
Key deleted forever (uh oh!)
```

{% endhint %}

### `keys export <key_name>` - Export private keys

You can export and backup your key by using the `export` subcommand:

{% hint style="info" %}
Example: Export your keys Exporting the key *Default* :

```bash
$ cronosd keys export Default
Enter passphrase to encrypt the exported key: ## Insert passphrase (must be at least 8 characters)##
-----BEGIN TENDERMINT PRIVATE KEY-----
kdf: bcrypt
salt: ## Salt of the key ##
type: secp256k1

## Tendermint private key ##
-----END TENDERMINT PRIVATE KEY-----
```

{% endhint %}

### The keyring `--keyring-backend` option

Interacting with a node requires a public-private key pair. Keyring is the place holding the keys. The keys can be stored in different locations with specified backend type.

```bash
$ cronosd keys [subcommands] --keyring-backend [backend type]
```

#### `1. os` backend

The default `os` backend stores the keys in operating system's credential sub-system, which are comfortable to most users, yet without compromising on security.

Here is a list of the corresponding password managers in different operating systems:

* macOS (since Mac OS 8.6): [Keychain](https://support.apple.com/en-gb/guide/keychain-access/welcome/mac)
* Windows: [Credentials Management API](https://docs.microsoft.com/en-us/windows/win32/secauthn/credentials-management)
* GNU/Linux:
  * [libsecret](https://gitlab.gnome.org/GNOME/libsecret)
  * [kwallet](https://api.kde.org/frameworks/kwallet/html/index.html)

#### `2. file` backend

The `file` backend stores the encrypted keys inside the app's configuration directory. A password entry is required every time a user access it, which may also occur multiple times of repeated password prompts in one single command.

#### `3. test` backend

The `test` backend is a password-less variation of the `file` backend. It stores unencrypted keys inside the app's configuration directory. It should only be used in testing environments and never be used in production.

## Transaction subcommands - `cronosd tx`

### `tx bank send` - Transfer operation

Transfer operation involves the transfer of tokens between two addresses.

#### **Send Funds** \[`tx bank send <from_key_or_address> <to_address> <amount> <network_id>`]

{% hint style="info" %}
Example: Send 10tcro from one address to another.

```bash
$ cronosd tx bank send Default tcrc1gjdxrv77zfpq6cywcs8kg6gqyfhl5768ucel6t 10tcro  --chain-id cronostestnet_338-3
  ## Transaction payload##
  {"body":{"messages":[{"@type":"/cosmos.bank.v1beta1.MsgSend","from_address"....}
confirm transaction before signing and broadcasting [y/N]: y
```

{% endhint %}

### `tx staking` - Staking operations

Staking operations involve the interaction between an address and a validator. It allows you to create a validator and lock/unlocking funds for staking purposes.

#### **Delegate your funds to a validator** \[`tx staking delegate <validator-addr> <amount>`]

To bond funds for staking, you can delegate funds to a validator by the `delegate` command

{% hint style="info" %}
Example: Delegate funds from `mykey` to a validator under the address `ethvaloper...lq`

```bash
$ cronosd tx staking delegate ethvaloper1qsklxwt77qrxur494uvw07zjynu03dq9rdsrlq 100tcro --from mykey --chain-id cronostestnet_338-3
## Transactions payload##
{"body":{"messages":[{"@type":"/cosmos.staking.v1beta1.MsgDelegate"....}
confirm transaction before signing and broadcasting [y/N]: y
```

{% endhint %}

#### **Unbond your delegated funds** \[`tx staking unbond <validator-addr> <amount>`]

On the other hand, we can create a `Unbond` transaction to unbond the delegated funds

{% hint style="info" %}
Example: Unbond funds from a validator under the address `ethvaloper...lq`

```bash
$ cronosd tx staking unbond ethvaloper1qsklxwt77qrxur494uvw07zjynu03dq9rdsrlq 100tcro --from mykey --chain-id cronostestnet_338-1
## Transaction payload##
{"body":{"messages":[{"@type":"/cosmos.staking.v1beta1.MsgUndelegate"...}
confirm transaction before signing and broadcasting [y/N]: y
```

{% endhint %}

{% hint style="info" %}
Once your funds are unbonded, it will be locked until the`unbonding_time`has passed.
{% endhint %}

## Balance & transaction history - cronosd query

### `query bank balances` - Check your transferable balance

You can check your *transferable* balance with the `balances` command under the bank module.

{% hint style="info" %}
Example: Check your address balance

```bash
$ cronosd query bank balances tcrc1a303tt49l5uhe87yaneyggly83g7e4uncdxqtl --output json | jq

{
  "balances": [
    {
      "denom": "basetcro",
      "amount": "99999000000000000000000000"
    }
  ],
  "pagination": {
    "next_key": null,
    "total": "0"
  }
}
```

{% endhint %}

## Advanced operations and transactions

### rollback

To recover from an app-hash mismatch failure, it would take hours to re-run an archive node,\
a faster way to do it as of cronos v1.0.2 would be to use `rollback`.

```bash
cronosd rollback
//rollback example at current height 6569206
Rolled back state to height 6569205 and hash 5BFA3A9FA0C207B83D327330ADE77C46A5E688A24864614843C743FDFD968BCD%
```

### index-eth-tx

{% hint style="danger" %}
Only use this command if you are solely using evm-level queries as evm JSON-RPC queries will remain available after re-indexing, however cosmos-level tx will not be available anymore. For example, this will no longer be possible: <https://rpc.cronos.com/tx_search?query=_&prove=_&page=_&per_page=_&order_by=_>
{% endhint %}

After `v1.0.2` nodes can now enable the custom transaction indexer to reduce disk size.\
The custom tx indexer can be enabled in `app.toml` by setting the `json-rpc.enable-indexer` to `true`. Usually, you will want to re-index previous indexed blocks by using the `--backward` field, e.g.:

```bash
cronosd index-eth-tx backward
```

After running the re-index command you will notice in your `.cronos/data/` directory a new file called `evmindexer.db` from which you can see that the size is smaller than the original `tx_index.db` . You can now safely remove the `tx_index.db`file.

### `tx staking create-validator` - Joining the network as a validator

Anyone who wishes to become a validator can submit a `create-validator` transaction by

```bash
$ cronosd tx staking create-validator [flags]
```

{% hint style="info" %}
Example: Joining the network as a validator

```bash
$ cronosd tx staking create-validator \
--amount="100cro" \
--pubkey='{"@type":...,"key":...}' \
--moniker="The_new_node" \
--chain-id="cronostestnet_338-3" \
--commission-rate="0.10" \
--commission-max-rate="0.20" \
--commission-max-change-rate="0.01" \
--min-self-delegation="1" \
--from=node1
## Transactions payload##
{"body":{"messages":[{"@type":"/cosmos.staking.v1beta1.MsgCreateValidator"...}
confirm transaction before signing and broadcasting [y/N]: y
```

{% endhint %}

(TODO: details of each flag )

### `tx slashing unjail` - Unjail a validator

Validator could be punished and jailed due to network misbehaviour, for example, if we check the validator set:

```bash
$ cronosd query staking validators -o json | jq
................................
    "operator_address": "ethvaloper1zwm45n5r3u3xcpsd00d3arwzhz7250rtsadv65",
    "consensus_pubkey": {
        "@type": "/cosmos.crypto.ed25519.PubKey",
        "key": "fD6cWVYv5rsNbXDw3hVIbB3nd9x57HsTyeMgwmH472U="
    },
    "jailed": false,
    "status": "BOND_STATUS_BONDED",
................................
```

After the jailing period has passed, one can broadcast a `unjail` transaction to unjail the validator and resume its normal operations by

```bash
$ cronosd tx slashing unjail --from node1 --chain-id cronostestnet_338-3
  {"body":{"messages":[{"@type":"/cosmos.slashing.v1beta1.MsgUnjail"...}]}
  confirm transaction before signing and broadcasting [y/N]: y
```


# Block Explorer and API Keys

### Block Explorers

{% tabs %}
{% tab title="Cronos Mainnet" %}

* **Cronos Explorer:** <https://explorer.cronos.com/>
  {% endtab %}

{% tab title="Testnet" %}

* **Cronos Testnet Explorer:** <https://explorer.cronos.com/testnet>
  {% endtab %}
  {% endtabs %}

Cronos Explorer is the reference transaction and block explorer on Cronos `https://explorer.cronos.com`

### Creating Account and Getting API Key **Cronos Explorer**

The Cronos Explorer Developer APIs are designed to provide accessible and consistent Cronos data to the Cronos community.

As a means to provide equitable access to blockchain data, we've developed the Cronos Developer APIs to empower developers with direct access to Cronos's blockchain data and services via `GET/POST` requests.

### 1. Register an Account <a href="#id-1-register-an-account" id="id-1-register-an-account"></a>

Head over to the [**Account Registration**](https://explorer.cronos.com/register) page and provide email and password for your account.

<figure><img src="/files/VHdlDSjZczffU99VqeiK" alt=""><figcaption></figcaption></figure>

### 2. Verify Your Email <a href="#id-2-verify-your-email" id="id-2-verify-your-email"></a>

A verification code will be sent to your email address to verify your sign up request. Fill in on the verification page for completing your registration

<figure><img src="/files/wByPKuts4Jon9q4Axesr" alt=""><figcaption></figcaption></figure>

### 3. Exploring Your Account <a href="#id-3-exploring-your-account" id="id-3-exploring-your-account"></a>

Upon signing in, you will have access to your account dashboard where you can make full use of Cronos explorer's features such as viewing API keys and viewing submitted contract verification status.

<figure><img src="/files/MrcuMhGizRMlDTjxSFZY" alt="" width="563"><figcaption></figcaption></figure>

### 4. Getting an Default API Key <a href="#id-4-getting-an-default-api-key" id="id-4-getting-an-default-api-key"></a>

From your Account Dashboard, click on label **My API Keys**. From there, you may view your API Keys. By Default, each Cronos Explorer account will assign a default API Key on registration completed.

<figure><img src="/files/kP9ouzScZpRu2VvCl0y6" alt="" width="563"><figcaption></figcaption></figure>

### 5. Using APIs <a href="#id-5-using-apis" id="id-5-using-apis"></a>

Once you have obtained your API key, you can fetch data from the provided endpoints.

*Example:*

```
  curl --request GET 'https://explorer-api.cronos.org/mainnet/api/v1/{module}/{action}?apikey={your_apikey}
```

### API Documentation

Please visit <https://explorer-api-doc.cronos.org/mainnet/> for API documentation.


# Chain ID and Address Format

## Chain ID

Cronos has different Chain IDs to distinguish between the *devnet*, *testnet* and *mainnet*. When running Cronos in your local environment, you will need to decide your own Chain ID.

For example, our testnet Chain ID is `cronostestnet_338-3`.

## Address prefix

[BIP-0173](https://github.com/satoshilabs/slips/blob/master/slip-0173.md) defines a new format for segregated witness output addresses that contains a human-readable part which identifies the coin type. Cronos has different address prefixes for its corresponding network types, these prefixes are:

| Testnet |
| ------- |
| `tcrc`  |

Cronos uses the Bech32 address format wherever users must handle binary data. Bech32 encoding provides robust integrity checks on data and the human readable part (HRP) that provides contextual hints that can assist UI developers with providing informative error messages. Specifically, we have the following HRP prefixes for different address types in the mainnet:

|                    | Address bech32 Prefix |
| ------------------ | --------------------- |
| Account            | `tcrc`                |
| Validator Operator | `tcrcvaloper`         |
| Consensus Nodes    | `tcrcvalcons`         |

We can use the `keys show` command of `cronosd` with the flag `--bech <type> (acc|val|cons)` to obtain the addresses and keys as mentioned above.\
For example:

```bash
$ cronosd keys show mykey --bech acc
- name: mykey
  type: local
  address: tcrc1qsklxwt77qrxur494uvw07zjynu03dq9alwh37
  pubkey: '{"@type":"/ethermint.crypto.v1alpha1.ethsecp256k1.PubKey","key":"A8nbJ3eW9oAb2RNZoS8L71jFMfjk6zVa1UISYgKK9HPm"}'
  mnemonic: ""

$ cronosd keys show test --bech val
- name: mykey
  type: local
  address: tcrcvaloper1qsklxwt77qrxur494uvw07zjynu03dq9rdsrlq
  pubkey: '{"@type":"/ethermint.crypto.v1alpha1.ethsecp256k1.PubKey","key":"A8nbJ3eW9oAb2RNZoS8L71jFMfjk6zVa1UISYgKK9HPm"}'
  mnemonic: ""

$ cronosd keys show test --bech cons
- name: mykey
  type: local
  address: tcrcvalcons1qsklxwt77qrxur494uvw07zjynu03dq9h7rlnp
  pubkey: '{"@type":"/ethermint.crypto.v1alpha1.ethsecp256k1.PubKey","key":"A8nbJ3eW9oAb2RNZoS8L71jFMfjk6zVa1UISYgKK9HPm"}'
  mnemonic: ""
```


# Cronos General FAQ

#### **What is the difference between Cronos Chain and Cronos POS Chain?**

* Cronos is an EVM-compatible (Ethereum Virtual Machine) chain powered by Ethermint, built on the Cosmos SDK, which allows rapid porting of apps and smart contracts from Ethereum and EVM-compatible chains. On Cronos, users pay transaction fees in the $CRO cryptocurrency.
* Cronos POS Chain is another Cosmos SDK chain that is primarily used for $CRO staking and as the backbone behind many Crypto.com applications. It aims to provide a fast transaction experience. (Croeseid Testnet is the testnet of Cronos POS Chain). On Cronos POS Chain, users also pay transaction fees in the $CRO cryptocurrency.

If you are an application developer who is creating smart contracts in Solidity and would like to deploy decentralized applications in a permissionless environment, Cronos is suitable for your needs.

#### **Who is currently running as a validator on Cronos?**

Cronos uses Proof of Authority (POA) consensus, a streamlined and scalable consensus mechanism derived from the Tendermint POS consensus.

There are currently 33 validators supporting the Cronos network, all leading infrastructure providers.

#### **How can I become a Cronos validator?**

Cronos validators are by invitation only at the moment. Application for new Cronos validators are not currently open. We will make an announcement once applications re-open.

#### **What is the chain-ID for Cronos Mainnet?**

* Ethereum Chain ID: `25`
* Cosmos Chain ID: `cronosmainnet_25-1`

#### **What are the rate limits of the free JSON-RPC EVM endpoint for Cronos?**

* Cronos Mainnet: rate limit is 300 req/min/IP
* Cronos Testnet: rate limit of 500 req/min/IP

If the limit is exceeded, the IP gets blocked for 1 minute. If you are expecting to consistently make more requests than what limits allow, you may consider setting up your own full node or contacting a commercial JSON-RPC endpoint provider (see Dev Tools & Integrations). You can also reach out to us on [Discord](https://discord.gg/cGtxgVfGMZ) for assistance.

#### **If I increase the gas price, does it help to speed up my transaction?**

Yes. The current mempool setting works in a [priority gas fee manner](/cronos-chain-protocol/module_overview/module_feemarket), where transaction prioritization happens based on the gas price or priority fee.

**Is there a bug bounty?**

Yes, with HackenProof: <https://hackenproof.com/cronos>


# Genesis

The `genesis.json` file defines the initial state of the Cronos Chain. On top of the standard [tendermint genesis](https://docs.tendermint.com/v0.33/tendermint-core/using-tendermint.html#genesis) format, we customize our own genesis file that includes different [modules](https://docs.cronos.com/cronos-chain-protocol/module_overview) and facilitates the special features of the Cronos Chain. Sample genesis file can be found [here](https://github.com/cronos-labs/cronos-mainnet/blob/master/cronosmainnet_25-1/genesis.json).

## Fields in genesis

Specifically, the genesis file includes the following fields:

* `"genesis_time"`: The time of the beginning of the blockchain.
* `"genutil"`: A variety of genesis utility functionality for usage including genesis transactions creation (gentx) and genesis file validation command as well as Tendermint related initialization.
* `"ibc"`: Inter-Blockchain Communication across different chains.
* `"chain_id"`: A unique identifier for the blockchain. See [this](/cronos-chain-protocol/chain-id) for further details.
* `"initial_height"`: The initial height of the blockchain.
* `"consensus_params`: Consensus parameters defined in the genesis file.
  * `"block"`:
    * `"max_bytes"`: Maximum size of a block (in bytes).
    * `"max_gas"`: The gas limit per block, default value is "-1", i.e., no rules about gas are enforced.
    * `"time_iota_ms"`: The minimum time increment between consecutive blocks, in milliseconds.
  * `"evidence"`: Evidence storage handling and block proposal detection with the evidence reactor.
    * `"max_age_num_blocks"`: *This field is to be deprecated.*
    * `"max_age_duration"`: The maximum age of evidence. Any evidence older than this will be rejected.
    * `"max_num"`: The maximum age of evidence (in number of blocks).
  * `"validator"`:
    * `"pub_key_types"`: The supported validator public key types.
* `"app_hash"`: The initial application state defined in the genesis block.
* `"auth"`
  * `"params"`: Parameters of the auth module defined in the genesis file.
    * `"max_memo_characters"`: Maximum number of characters in a memo of a transaction.
    * `"tx_sig_limit"`: The maximum number of signers for a transaction.
    * `"tx_size_cost_per_byte"`: The amount of gas consumed per byte of a transaction.
    * `"sig_verify_cost_ed25519"`: Gas cost on `edd2519` signature verification.
    * `"sig_verify_cost_secp256k1"`: Gas cost on `secp256k1` signature verification.
  * `"accounts"`: Genesis accounts, which defines the initial allocation of the tokens.
    * `"@type"`: Account type.
    * `"address"`: Address of the genesis accounts.
    * `"pub_key"`: Public key of the genesis accounts.
    * `"account_number"`: The account number of the account in state.
    * `"sequence"`: Used to count the number of transactions sent by this account. It is incremented each time a transaction is included in a block, and used to prevent replay attacks.
    * `"base_vesting_account"`:
      * `"original_vesting"`: Special type of accounting that the token needs to be vested for a period of time before they can be transferred. Tokens can be delegated during the vesting period.
        * `"denom"`: Denomination of the token.
        * `"amount"`: Total amount in the vesting account.
        * `"delegated_free"`: Amount of delegated tokens that can be transferred after they've been vested.
        * `"delegated_vesting"`: Amount of delegated tokens that are still under vesting.
        * `"endtime"`: Vesting end time.
* `"bank"` The bank module handles tokens.
  * `"params"`: Parameters of the bank module defined in the genesis file.
    * `"send_enabled"`: The transfer capability in the genesis.
    * `"default_send_enabled"`: The default value for "send\_enabled" value controls send transfer capability.
* `"distribution"`:The module that handles the logic of distribution block provisions and fees to validators and delegators.
  * `"delegator_starting_infos"`:
  * `"delegator_withdraw_infos"`: List of delegators withdraw address.
  * `"fee_pool"`:
    * `"community_pool"`: Allocated funds in the community pool, if any.
  * `"outstanding_rewards"`: Uncollected rewards, if any.
  * `"params"`: Parameters of the distribution module defined in the genesis file.
    * `"base_proposer_reward"`: Base bonus on transaction fees collected in a valid block.
    * `"bonus_proposer_reward"`: Maximum bonus on transaction fees collected in a valid block.
    * `"community_tax"`: The rate of community tax.
    * `"withdraw_addr_enabled"`: Whether delegators can set a different address to withdraw their rewards.
  * `"previous_proposer"`: Proposer of the previous block, if any.
  * `"validator_accumulated_commissions"`: Uncollected commission of validators, if any.
  * `"validator_current_rewards"`: Information related to the current rewards of validators, if any.
  * `"validator_historical_rewards"`: Information related to the historical rewards of validators, if any.
  * `"validator_slash_events"`: Information related to the historical slashing events of validators, if any.
* `"gov"`: The governance module.
  * `"deposit_params"`: Parameters for the deposit required for governance proposal.
    * `"max_deposit_period"`: The maximum deposit period for governance proposal.
    * `"min_deposit"`: The minimum deposit required for governance proposal.
  * `"deposits"`: List of deposits for each proposal ID, if any.
  * `"proposals"`: List of proposals for proposals, if any.
  * `"starting_proposal_id"`: The initial proposals id, starting from `"1"`
  * `"tally_params"`: Parameters for tally.
    * `"quorum"`: Minimum percentage of bonded staking tokens that needs to vote for the result to be valid.
    * `"threshold"`: Minimum percentage of votes that need to be `YES` for the result to be valid.
    * `"veto_threshold"`: Maximum percentage `NO_WITH_VETO` votes for the result to be valid.
  * `"votes"`: List of votes for each proposal ID, if any.
  * `"voting_params"`: Parameters for voting.
    * `"voting_period"`: The voting period for governance proposal.
* `"mint"`: The minting module for token minting.
  * `"minter"`:
    * `"annual_provisions"`: Annual expected provisions (set to zero in genesis).
    * `"inflation"`: The target yearly inflation rate, compounded weekly.
  * `"params":` Parameters of the mint module defined in the genesis file.
    * `"blocks_per_year"`: The expected number of blocks being produced per year.
    * `"goal_bonded"`: Target bonded token in percentage.
    * `"inflation_max"`: Maximum inflation rate.
    * `"inflation_min"`: Minimum inflation rate.
    * `"inflation_rate_change"`: Maximum annual change in inflation rate.
    * `"mint_denom"`: Token type being minted.
* `"slashing"`: The slashing module for the punishment of validator's misbehavior.
  * `"missed_blocks"`: Information related to validators missed blocks, if any.
  * `"params"`: Parameters of the slashing module defined in the genesis file.
    * `"downtime_jail_duration"`: The jailing duration for validators with low availability.
    * `"min_signed_per_window"`: Threshold of total missed blocks, in percentage.
    * `"signed_blocks_window"`: Window to calculate validators's liveness.
    * `"slash_fraction_double_sign"`: Maximum percentage of stake reduction for byzantine validators.
    * `"slash_fraction_downtime"`: Maximum percentage of stake reduction for validators with low availability.
  * `"signing_infos"`: Information related to each validator for the slashing module, if any.
* `"staking"`: The staking module that handles Proof-of-Stake related logics.
  * `"delegations"`: Information related to the delegation state of validators, if any.
  * `"exported"`: Whether this genesis file was generated by exporting of a previous state.
  * `"last_total_power"`: Total voting power in the genesis, if any.
  * `"last_validator_powers"`: The voting power of each validator in last known state, if any.
  * `"params"`: Parameters of the staking module defined in the genesis file.
    * `"bond_denom"`: Coin denomination for staking.
    * `"historical_entries"`: The number of historical entries to persist.
    * `"max_entries"`: The max entries for either unbonding delegation or redelegation.
    * `"max_validators"`: The maximum number of validator.
    * `"unbonding_time"`: The time duration of unbonding.
  * `"redelegations"`: List of redelegations for validators, if any.
  * `"unbonding_delegations"`: List of unbonding delegations for validators, if any.
  * `"validators"`: List of existing validators, if any.
* `"transfer"`: The transfer module that handles token transfer transactions.
  * `"receive_enabled"`: An array of Receive enabled entries mapping coin denominations to their `receive_enabled` status.
  * `"send_enabled"`: An array of SendEnabled entries mapping coin denominations to their `send_enabled` status.
* `"evm"`: Ethereum Virtual Machine
  * `"evm_denom"`: The token denomination used on the EVM state transitions and gas consumption for EVM messages.
  * `"enable_create"`: Toggles state transitions that use the `vm.Create` function, and it prevents all contract creation functionality if it is disabled.
  * `"enable_call"`: Toggles state transitions that use the `vm.Call` function, and it prevents transfers between accounts and executing a smart contract call if it is disabled.
  * `"extra_eips"`: The set of activateable Ethereum Improvement Proposals (EIPs) on the Ethereum VM Config that apply custom jump tables.


# Modules

## Overview

Cronos utilizes [Ethermint](https://github.com/tharsis/ethermint) and the [Tendermint](https://tendermint.com/) Core consensus engine underneath. Specifically, the Cosmos SDK is a framework that facilitates the development of secure state-machines on top of Tendermint. In particular, we utilize different SDK modules to facilitate the special features of Cronos.

In this documentation, we will be focusing on some of the important modules we used, for example:

* [Bank](#bank) - Token transfer functionalities and query support for the total supply of all assets;
* [Distribution](#distribution) - Fee distribution, and staking rewards to the validators and delegator;
* [Governance](#gov) - On-chain proposals and voting;
* [Mint](#mint) - Creation of new units of staking token;
* [Slashing](#slashing) - Validator punishment mechanisms;
* [Staking](#staking) - Proof-of-Stake layer for public blockchains;

## `bank`

### Introduction

The `bank` module maintains the state of two primary objects:

* Account balances by address;
* Total supply of tokens of the chain

`bank` module tracks and provides query support for the total supply of all assets used in the application. It also supports token transfer functionalities. Specifically, the total supply is updated whenever a token is:

* **Minted**, e.g. Token created by the [mint](#mint) module; or
* **Burned**, e.g. Token distorted by the [slashing](#slashing) module.

### Transactions and Queries

### Transactions

#### `tx bank send [from_key_or_address] [to_address] [amount] [network_id]` - **Send Funds**

You can transfer of tokens between to a designated address by the `tx bank send` command. For example, we can send 1 basetcro from `address_a` to `address_b` by

```bash
$ cronosd tx bank send <address_a> <address_b> 1basetcro --keyring-backend test --chain-id <chain-id>

## Transaction payload##
{"body":{"messages":[{"@type":"/cosmos.bank.v1beta1.MsgSend","from_address":<address a>,"to_address":<address b>,"amount":[{"denom":"basetcro","amount":"1"}]}],"memo":"","timeout_height":"0","extension_options":[],"non_critical_extension_options":[]},"auth_info":{"signer_infos":[],"fee":{"amount":[],"gas_limit":"200000","payer":"","granter":""}},"signatures":[]}

confirm transaction before signing and broadcasting [y/N]: y
```

### Queries

#### `query bank balances [address]` - Check the balance of a specified account

One can check the current balance of a specified account by:

```json
$ cronosd query bank balances <address> --output json | jq
    {
    "balances": [
        {
        "denom": "basetcro",
        "amount": "[token_balance]"
        }
    ],
    "pagination": {
        "next_key": null,
        "total": "0"
    }
    }
```

#### `query bank total` - Check the total supply of the token

You can also check the current total supply of the token by:

```json
$ cronosd query bank total --output json | jq
    {
    "supply": [
        {
        "denom": "basetcro",
        "amount": "[total_supply_amount]"
        }
    ]
    }
```

### Appendix

#### `bank` module: Network Parameters and configuration

| Key                  | Type           | Example                                |
| -------------------- | -------------- | -------------------------------------- |
| `SendEnabled`        | \[]SendEnabled | \[{denom: "basetcro", enabled: true }] |
| `DefaultSendEnabled` | bool           | true                                   |

## `distribution`

### Introduction

The `distribution` module is responsible for the distribution of rewards to the validators and delegators.

### Overview

#### Network Parameters

Below are all the network parameters for the `distribution` module:

* `community_tax` - The rate of community tax;
* `base_proposer_reward` - Base bonus on transaction fees collected in a valid block;
* `bonus_proposer_reward` - Maximum bonus on transaction fees collected in a valid block;
* `withdraw_addr_enabled` - Whether delegators can set a different address to withdraw their rewards.

#### Rewards

There are two main types of rewards

* Block rewards, governed by the [mint](#mint) module; and
* [Transaction fees bonus](#transaction-fees-bonus).

#### Block reward

Block rewards are distributed proportionally to all validators relative to their voting power. This means that even though each validator gains cro with each reward, all validators will maintain equal weight over time.

For the validator operator, the distribution information is updated if:

* the amount of delegation to a validator is updated (delegation, unbond, slashing etc.);
* a validator successfully proposes a block and receives the reward;
* any delegator withdraws from a validator, or
* the validator withdraws it's commission.

For delegators, once they have delegated to a validator, they will be entitled to a portion of the total reward obtained by the validators. The reward is proportional to their delegated amount, and the commission charged by the validator operator (if any).

#### Transaction Fees Bonus

When a validator is selected to propose the next block, they must include at least 66% precommits of the previous block. To incentivise validators to include more than 66% precommits, the module provide a bonus reward (portion of the transaction fee in the block) to the proposer.

This bonus reward is dependent linearly on the precommits from the other validators. Stating from 66% of the precommits, the basic bonus will be `base_proposer_reward` and increase linearly to `bonus_proposer_reward` when the validator includes 100% of the precommits.

This mechanism aims to incentivize non-empty block proposals, better networking between validators as well as to mitigate censorship. For further example, kindly refers to this [link](https://hub.cosmos.network/main/validators/validator-faq.html).

#### Community tax

The `community_tax` is the tax rate to the reward obtained by the validator. Specifically, part of the reward will be taxed and send to the community pool. The funds in the community pool can be withdrawn by submitting a community pool spend proposal with the [gov module](#gov).

Even if the `community_tax` is set to be zero, the balance of the community pool could be non-zero. For example, the truncated remainder in some accounting edge cases will be sent to the community pool as well. Besides that, users can fund the community pool voluntary, and there could be funds allocated to the community pool in the [genesis](/cronos-chain-protocol/genesis_file).

### Transactions and Queries

### Transactions

#### `tx distribution withdraw-all-rewards` - Withdraw all delegations rewards for a delegator

Delegator can withdraw their reward(s) from the validator(s) that they have delegated all at once.

#### `tx distribution withdraw-rewards [validator-addr]` - Withdraw rewards from a given validator address

Delegator can withdraw their reward from a specific validator.

:::tip Remark: Validator operation can withdraw the commission in addition to the rewards by adding the commission flag `--commission`. :::

#### `tx distribution set-withdraw-addr [withdraw-addr]` - Change the default withdraw address for rewards associated with an address

Delegator can set a different address to withdraw their rewards.

#### `tx distribution fund-community-pool [amount]` - Funds the community pool with the specified amount

Users can make a contribution to the community pool with a specific amount.

### Queries

#### `query distribution commission [validator]` - Query distribution validator commission

We can check the commission of a specific validator.

#### `query distribution community-pool` - Query the amount of coins in the community pool

We can check the balance of the community pool.

#### `query distribution rewards [delegator-addr] [validator-addr]` - Query all distribution delegator rewards or rewards from a particular validator

we can check the current rewards for a delegation on a specific validator.

#### `query distribution slashes [validator] [start-height] [end-height]` - Query distribution validator slashes

We can check the history of slashing event of a validator.

#### `query distribution validator-outstanding-rewards [validator]` - Query distribution outstanding rewards for a validator and all their delegations

We can check distribution outstanding (un-withdrawn) rewards for a validator and all of their delegations.

#### `query distribution params` - Query the current distribution parameters

We can query the current distribution parameters by

```json
$ cronosd query distribution params --output json | jq

  {
    "community_tax": "0.000000000000000000",
    "base_proposer_reward": "0.010000000000000000",
    "bonus_proposer_reward": "0.040000000000000000",
    "withdraw_addr_enabled": true
  }
```

### Appendix

#### `distribution` module: Network Parameters and configuration

The following tables show overall effects on different configurations of the distribution related network parameters:

|                      | `community_tax`                               | `base_proposer_reward`                               | `bonus_proposer_reward`              |
| -------------------- | --------------------------------------------- | ---------------------------------------------------- | ------------------------------------ |
| Type                 | string (dec)                                  | string (dec)                                         | string (dec)                         |
| Higher               | More reward will goes into the community pool | Higher basic transaction fees bonus for the proposer | Easier for a proposal to be passed   |
| Lower                | Less reward will goes into the community pool | Lower basic transaction fees bonus for the proposer  | Harder for a proposal to be passed   |
| Constraints          | Value has to be less or equal to `1`          | Value has to be less or equal to `1`                 | Value has to be less or equal to `1` |
| Sample configuration | `0` (0%)                                      | `0.01` (1%)                                          | `0.04` (4%)                          |

## `gov`

### Introduction

The `gov` module enables on-chain governance which allows Cronos token holder to participate in the decision-making processes. For example, users can:

* Form an idea and seek the feedback;
* Create the proposal and adjust according to feedback as needed;
* Submit a proposal along with an initial deposit;
* Deposit tokens and fund an active proposal;
* Vote for an active proposal.

The details about the governance proposal process are available on [The Proposal Process page](https://docs.cronos-pos.org/cronos-pos-integration/blocks-and-transactions#governance).

### Overview

#### Network parameters

Below are all the network parameters for the `gov` module:

* `deposit_params` - Deposit related parameters:
  * `min_deposit`: Minimum deposit for a proposal to enter voting period; and
  * `max_deposit_period`: Maximum period for Cro holders to deposit on a proposal.
* `voting_params` - Voting related parameters
  * `voting_period`: The length of the voting period.
* `tally_params` - Tally related parameters
  * `quorum`: The minimum percentage of voting power that needs to be casted on a proposal for the result to be valid;
  * `threshold`: Minimum proportion of `Yes` votes (excluding `Abstain` votes) for the proposal to be accepted; and
  * `veto`: Minimum proportion of `Veto` votes to total votes ratio for proposal to be vetoed.

#### The Governance Procedure

**Phase 0 - Submit a proposal along with an initial deposit:**

Users can submit a proposal with an initial deposit. The proposal will then become "active" and entre the *deposit period*.

**Phase 1 - Deposit period**

During the *deposit period*, users can deposit and support an active proposal. Once the deposit of the proposal reached `min_deposit`, it will enter the *voting period*. Otherwise, if the proposal is not successfully funded within `max_deposit_period`, It will become inactive and all the deposit will be refunded.

**Phase 2 - Voting period**

During the *voting period*, staked (bonded) token will be able to participate in the voting. Users can choose one of the following option: `"yes"`, `"no"`, `"no_with_veto"` and `"abstain"`

After the `voting_period` has passed, there are several scenarios that a proposal will consider to be "Rejected", for example, if

* No one votes (everyone `"abstain"`);
* Votes did not reach the `quorum`;
* More than `veto` of voters vote for `"no_with_veto"`;
* More than `threshold` that non-abstaining voters vote `"no"`.

Otherwise, the proposal will be accepted and changes will be implemented according to the proposal.

### Transactions and Queries

### Transactions

#### `tx gov submit-proposal` - Submit a proposal along with an initial deposit

* Submit a parameter change proposal - `param-change [proposal-file]`

  Users can submit a proposal to modify network parameters during run time, Here is a demon proposal if we would like to change the parameter `MaxValidators` (maximum number of validator) in the `staking` module,

  ```json
  {
    "title": "Staking Param Change",
    "description": "Update max validators",
    "changes": [
      {
        "subspace": "staking",
        "key": "MaxValidators",
        "value": 151
      }
    ]
  }
  ```
* Submit a community pool spend proposal - `community-pool-spend [proposal-file]`

  Users can submit a proposal and request funds from the community pool to support their projects or other usages.
* Submit a software upgrade proposal- `software-upgrade [name] (--upgrade-height [height] | --upgrade-time [time]) (--upgrade-info [info])`

  Users can submit an upgrade proposal and suggest a software upgrade at a specific block height.
* Cancel the current software upgrade proposal - `cancel-software-upgrade`

  On the other hand, users can submit a proposal to cancel the planned software upgrade.

#### `tx gov deposit [proposal-id] [deposit]` - Deposit tokens for an active proposal

Users can submit a deposit transaction to fund and support an active proposal.

#### `tx gov vote [proposal-id] [option]` - Vote for an active proposal

Users can vote for an active proposal. Valid value of `"option"` field can be `"yes"`, `"no"`, `"no_with_veto"` and `"abstain"`.

### Queries

#### `query gov proposals [proposal-id]` - Query proposals with optional filters

We can check the proposal with optional filters by:

```json
$ cronosd query gov proposals -o json | jq
```

In the above example, there is only one proposal with `"proposal_id": "1"`, with the title: `"Staking Param Change"` that change the `MaxValidators` parameter of the `staking` module to `151`. We can also see that the status of the proposal is `"PROPOSAL_STATUS_PASSED"`, which means that this proposal has bee passed.

#### `query gov proposal [proposal-id]` Query details of a single proposal

Similarly, we can check the details of a proposal with a given `"proposal_id"`.

#### `query gov tally [proposal-id]` Get the tally of a proposal vote

We can also the tally of a proposal with a given `"proposal_id"`.

#### `query gov params` - Query the current gov parameters

We can query the current gov parameters by

```json
$ cronosd query gov params --output json | jq

  {
    "voting_params": {
      "voting_period": "43200000000000"
    },
    "tally_params": {
      "quorum": "0.334000000000000000",
      "threshold": "0.500000000000000000",
      "veto_threshold": "0.334000000000000000"
    },
    "deposit_params": {
      "min_deposit": [
        {
          "denom": "basetcro",
          "amount": "10000000"
        }
      ],
      "max_deposit_period": "43200000000000"
    }
  }
```

### Appendix

#### `gov` module: Network Parameters and configuration

The following tables show overall effects on different configurations of the gov related network parameters:

|                      | `min_deposit`                               | `max_deposit_period`         | `voting_period`              |
| -------------------- | ------------------------------------------- | ---------------------------- | ---------------------------- |
| Type                 | array (coins)                               | string (time ns)             | string (time ns)             |
| Higher               | Larger window for calculating the downtime  | Longer deposit period        | Longer voting period         |
| Lower                | Smaller window for calculating the downtime | Shorter deposit period       | Shorter voting period        |
| Constraints          | Value has to be a positive integer          | Value has to be positive     | Value has to be positive     |
| Sample configuration | `100000` (100000 cro)                       | `1209600000000000` (2 weeks) | `1209600000000000` (2 weeks) |

|                      | `quorum`                             | `threshold`                          | `veto`                               |
| -------------------- | ------------------------------------ | ------------------------------------ | ------------------------------------ |
| Type                 | string (dec)                         | string (dec)                         | string (dec)                         |
| Higher               | Easier for a proposal to be passed   | Easier for a proposal to be passed   | Easier for a proposal to be passed   |
| Lower                | Harder for a proposal to be passed   | Harder for a proposal to be passed   | Harder for a proposal to be passed   |
| Constraints          | Value has to be less or equal to `1` | Value has to be less or equal to `1` | Value has to be less or equal to `1` |
| Sample configuration | `0.15` (15%)                         | `0.5` (50%)                          | `0.33` (33%)                         |

## `mint`

### Introduction

The `mint` module is responsible for creating token in a flexible way to reward the validator who participate in the proof of stake consensus process (see also the [distribution module](#distribution)). It is also designed in a way to bring a balance between market liquidity and staked supply.

### Overview

#### Network parameters

Below are all the network parameters for the `mint` module:

* `"blocks_per_year"` - The expected number of blocks being produced per year;
* `"goal_bonded"` - Goal of bonded token in percentage;
* `"inflation_max"` - Maximum annual inflation rate;
* `"inflation_min"` - Minimum annual inflation rate;
* `"inflation_rate_change"` - Maximum annual change in inflation rate;
* `"mint_denom"` - Token type being minted.

The target annual inflation rate is recalculated for each previsions cycle. The inflation is also subject to a rate change (positive or negative) depending on the distance from the desired ratio (`"goal_bonded"`). The maximum rate change possible is defined to be `"inflation_rate_change"` per year, where the annual inflation is capped as between `"inflation_min"` and `"inflation_max"`.

### `mint` module: Queries

### Queries

#### `query mint params` - Query the current minting annual provisions value

We can query the current minting annual provisions value, for example:

```json
  $ cronosd query mint annual-provisions
  109573801550200370
```

implies that the current minting annual provisions will be `109573801550200370` basetcro ( i.e. `1,095,738,015` cro)

#### `query mint inflation` - Query the current minting inflation value

We can query the current minting inflation value, for example:

```json
  $ cronosd query mint inflation
  0.013687008526984104
```

implies that the current minting annual provisions will be `0.013687008526984104`( i.e. `1.368%`)

#### `query mint annual-provisions` - Query the current minting parameters

We can query the current query parameters by

```json
$ cronosd query mint params --output json | jq

  {
    "mint_denom": "basetcro",
    "inflation_rate_change": "0.013000000000000000",
    "inflation_max": "0.020000000000000000",
    "inflation_min": "0.007000000000000000",
    "goal_bonded": "0.670000000000000000",
    "blocks_per_year": "6311520"
  }
```

### Appendix

#### `gov` module: Network Parameters and configuration

The following tables show overall effects on different configurations of the mint related network parameters:

|                      | `blocks_per_year`                  | `goal_bonded`                        | `mint_denom` |
| -------------------- | ---------------------------------- | ------------------------------------ | ------------ |
| Type                 | array (coins)                      | string (dec)                         | string       |
| Higher               | More expected blocks per year      | Higher target bonding ratio          | N/A          |
| Lower                | Less expected blocks per year      | Lower target bonding ratio           | N/A          |
| Constraints          | Value has to be a positive integer | Value has to be less or equal to `1` | N/A          |
| Sample configuration | `5256000` (5,256,000 blocks)       | `0.66` (66%)                         | `basetcro`   |

|                      | `inflation_max`                       | `inflation_min`                      | `inflation_rate_change`                       |
| -------------------- | ------------------------------------- | ------------------------------------ | --------------------------------------------- |
| Type                 | string (dec)                          | string (dec)                         | string (dec) (dec)                            |
| Higher               | Higher ceiling for the inflation rate | Higher floor for the inflation rate  | Higher yearly rate of change to the inflation |
| Lower                | Lower ceiling for the inflation rate  | Lower floor for the inflation rate   | Lower yearly rate of change to the inflation  |
| Constraints          | Value has to be less or equal to `1`  | Value has to be less or equal to `1` | Value has to be less or equal to `1`          |
| Sample configuration | `0.02` (2%)                           | `0.01` (1%)                          | `0.01` (1%)                                   |

## `slashing`

### Introduction

Validators are responsible for signing or proposing block at each consensus round. A penalty should be imposed on validators' misbehavior to reinforce this.

Specifically, `slashing` functionality that aims to dis-incentivize network-observable actions, such as faulty validations. The penalties may include losing some amount of their stake, losing their ability to perform the network functionality for a period of time, collect rewards etc.

### Overview

#### Network parameters

Below are all the network parameters used to configure the behavior of validator punishments. Details of all these parameters and their effect on behavior of validator punishments is discussed later in this document.

* `signed_blocks_window`: Number of blocks for which the liveness is calculated for uptime tracking;
* `min_signed_per_window`: Maximum percentage of blocks with faulty/missed validations allowed for an account in last; `signed_blocks_window` blocks before it gets deactivated;
* `downtime_jail_duration`: Duration for [jailing](#jailing);
* `slash_fraction_double_sign`: Percentage of funds being slashed when validator makes a byzantine fault; and
* `slash_fraction_downtime`: Percentage of funds being slashed when a validator is non-live.

#### Slashing mechanism

Punishments for a validator are triggered when they either make a *byzantine fault* or become *non-live*:

* Liveness Faults (Low availability)

  A validator is said to be **non-live** when they fail to sign at least `min_signed_per_window` blocks (in percentage) in the last `signed_blocks_window` blocks successfully. `signed_blocks_window` and `min_signed_per_window` are network parameters and can be configured during genesis and can be updated during runtime by the governance module.

:::tip Example: For example, if `block_signing_window` is `2000` blocks and `min_signed_per_window` is `0.5`, a validator will be marked as **non-live** and jailed if they fail to successfully sign at least `2000*0.5=1000` blocks in last `2000` blocks. :::

* Byzantine Faults

  A validator is said to make a byzantine fault when they sign conflicting messages/blocks at the same height and round. Tendermint has mechanisms to publish evidence of validators that signed conflicting votes so they can be punished by the slashing module. For example:

  * Validator who votes for two different blocks within a single round (*"Equivocation validator"*/ *"Double signing"*);
  * Validator who signs commit messages for arbitrary application state ( *"Lunatic validator"*).

**Remark**: The evidence of a set of validators attempting to mislead a light client can also be detected and captured. However, even the [Amnesia attack](https://github.com/tendermint/tendermint/blob/master/docs/architecture/adr-056-light-client-amnesia-attacks.md#amnesia-attack) can be detected, punishment can not be applied at this stage, as we can not deduce the malicious validators.

:::tip Implementation note: Tendermint passes `Evidence` of a byzantine validator in `BeginBlock` request. Before jailing any account due to byzantine fault, that evidence should be verified. Also, it should be checked that evidence provided by tendermint is not older than `max_age` in tendermint. :::

### Inactivity Slashing

It is important that the validators maintain excellent availability and network connectivity to perform their tasks. A penalty should be imposed on validators' misbehavior to reinforce this.

When a validator fails to successfully sign `missed_block_threshold` blocks in last `block_signing_window` blocks, it is immediately jailed and punished by deducting funds from their bonded and unbonded amount and removing them from active validator set. The funds to be deducted are calculated based on `slash_fraction_downtime`. Kindly refer to this [link](https://docs.cosmos.network/main/build/modules/slashing#liveness-tracking) on the logic of the liveness tracking.

### Jailing

A validator is jailed when they make liveness or Byzantine fault, when a validator is jailed, it will no longer be considered as an active validator until they are un-jailed. Furthermore, it cannot be un-jailed before `downtime_jail_duration`. This `downtime_jail_duration` is a network parameter which can be configured during genesis.

{% hint style="info" %}
Warning Important: When a validator is jailed because of a byzantine fault, their validator public key is added to a list of permanently banned validators and cannot re-join the network as a validator with the same public key, see [staking tombstone](https://docs.cosmos.network/main/build/modules/slashing#staking-tombstone).
{% endhint %}

#### Un-jailing

When a jailed validator wishes to resume normal operations (after `downtime_jail_duration` has passed), they can create an`unjail` transaction which marks them as un-jailed. Validator will then rejoin the validator set once it has bee successful un-jailed.

### Slashing for Byzantine Fault

When there is byzantine fault detected, they are immediately slashed other than jailed. The funds to be deducted are calculated based on `slash_fraction_double_sign`. Furthermore, validator who commit this double-signing fault will also be put into the "tombstone state", which means it will be blacklisted and jailed forever.

### Transactions and Queries

### Transactions

#### `tx slashing unjail` - Unjailing a validator

Validator could be punished and jailed due to network misbehaviour, for example if we check the validator set:

```bash
$ cronosd query staking validators -o json | jq
................................
    "operator_address": "ethvaloper1zwm45n5r3u3xcpsd00d3arwzhz7250rtsadv65",
    "consensus_pubkey": {
        "@type": "/cosmos.crypto.ed25519.PubKey",
        "key": "fD6cWVYv5rsNbXDw3hVIbB3nd9x57HsTyeMgwmH472U="
    },
    "jailed": false,
    "status": "BOND_STATUS_BONDED",
................................
```

After the jailing period has passed, one can broadcast a `unjail` transaction to unjail the validator and resume its normal operations by

```bash
$ cronosd tx slashing unjail --from node1 --chain-id cronostestnet_338-3
  {"body":{"messages":[{"@type":"/cosmos.slashing.v1beta1.MsgUnjail"...}]}
  confirm transaction before signing and broadcasting [y/N]: y
```

### Queries

#### `query slashing params` - Query the current slashing parameters

We can query the current slashing parameters by

```json
$ cronosd query slashing params --output json | jq

  {
    "signed_blocks_window": "2000",
    "min_signed_per_window": "0.500000000000000000",
    "downtime_jail_duration": "3600s",
    "slash_fraction_double_sign": "0.050000000000000000",
    "slash_fraction_downtime": "0.001000000000000000"
  }
```

### Appendix

#### `slashing` module: Network Parameters and configuration

The following tables show overall effects on different configurations of the slashing related network parameters:

|                      | `signed_blocks_window`                      | `min_signed_per_window`         | `downtime_jail_duration`           |
| -------------------- | ------------------------------------------- | ------------------------------- | ---------------------------------- |
| Type                 | string (int64)                              | string (dec)                    | string (int64)                     |
| Higher               | Larger window for calculating the downtime  | Higher availability is required | Longer jailing duration            |
| Lower                | Smaller window for calculating the downtime | Lower availability is required  | Longer jailing duration            |
| Constraints          | Value has to be a positive integer          | Value has to be positive        | Value has to be a positive integer |
| Sample configuration | `2000` (2000 blocks)                        | `0.5` (50%)                     | `3600s` (1 hour)                   |

***

|                      | `slash_fraction_double_sign`         | `slash_fraction_downtime`            |
| -------------------- | ------------------------------------ | ------------------------------------ |
| Type                 | string (dec)                         | string (dec)                         |
| Higher               | Heavier penalty on byzantine faults  | Heavier penalty on liveness faults   |
| Lower                | Lighter penalty on byzantine faults  | Lighter penalty on liveness faults   |
| Constraints          | Value has to be less or equal to `1` | Value has to be less or equal to `1` |
| Sample configuration | `0.001` (0.1%)                       | `0.05` (5%)                          |

## `staking`

### Introduction

The `staking` module handles Proof-of-Stake related logics, which plays a very import part to the underneath consensus protocol.

### Overview

Cronos is based on Tendermint Core's consensus engine, it relies on a set of validators to participate in the proof of stake (PoS) consensus protocol, and they are responsible for committing new blocks in the blockchain.

* `unbonding_time`: The time duration of unbonding;
* `max_validators`: The maximum number of validator;
* `max_entries`: The max entries for either unbonding delegation or redelegation;
* `historical_entries`: The number of historical entries to persist; and
* `bond_denom`: Coin denomination for staking.

### Validator

Validators are responsible for signing or proposing block at each consensus round. It is important that the validators maintain excellent availability and network connectivity to perform their tasks. To incentivise the validator nodes to run the network, rewards are distributed to the validators according to their performance and amount of staked token (see [distribution](#distribution) and [mint](#mint)). On the other hand, a penalty should be imposed on validators' misbehavior (see [slashing](#slashing)).

### Delegator

The `staking` module enables CRO owners to delegate their tokens to active validators and share part of the reward obtained by the validator during the proof of stake protocol(see [distribution](#distribution) module). Specifically, It allows token owners to take part in the consensus process without running a validator themselves.

It is important to point out that the delegator and the validator are on the same boat: They share the reward and the risk. In particular, part of their delegated token could be slashed due to validator's misbehaviour (see [slashing](#slashing)). Therefore, It is very important to choose a reliable validator to delegate. Kindly refer to this [link](https://docs.cosmos.network/main/build/modules/staking#state-transitions) for detailed specification and state transitions of delegation.

### Transactions and Queries

### Transactions

#### `tx staking create-validator` - Create new validator initialized with a self-delegation

First of all, we can create a validator with the `create-validator` transaction, for example:

```bash
$ cronosd tx staking create-validator \
--from=[name_of_your_key] \
--amount=[staking_amount] \
--pubkey='{"@type":...,"key":...}'  \
--moniker="[moniker_id_of_your_node]" \
--security-contact="[security contact email/contact method]" \
--chain-id="[chain-id]" \
--commission-rate="[commission_rate]" \
--commission-max-rate="[maximum_commission_rate]" \
--commission-max-change-rate="[maximum_rate_of_change_of_commission]" \
--min-self-delegation="[min_self_delegation_amount]"

## Transactions payload##
{"body":{"messages":[{"@type":"/cosmos.staking.v1beta1.MsgCreateValidator"...}
confirm transaction before signing and broadcasting [y/N]: y
```

#### `tx staking delegate [validator-addr] [amount]` - Delegate liquid tokens to a validator

As discussed in the delegator section, one can delegate their tokens to an active validators by:

```bash
$ cronosd tx staking delegate [validator-addr] [amount]

## Transactions payload##
{"body":{"messages":[{"@type":"/cosmos.staking.v1beta1.MsgDelegate"...}
```

#### `tx staking unbond [validator-addr] [amount]` - Unbond shares from a validator

Delegator can unbond their staked tokens by

```bash
$ cronosd tx staking unbond [validator-addr] [amount]

## Transactions payload##
{"body":{"messages":[{"@type":"/cosmos.staking.v1beta1.MsgUndelegate"...}
```

*Remark:* Note that funds will only be available after the `unbonding_time` has passed.

#### `tx staking redelegate [src-validator-addr] [dst-validator-addr] [amount]` - Redelegate illiquid tokens from one validator to another

We can also move our staked tokens from one validator to another by:

```bash
$ cronosd tx staking redelegate [src-validator-addr] [dst-validator-addr] [amount]

## Transactions payload##
{"body":{"messages":[{"@type":"/cosmos.staking.v1beta1.MsgBeginRedelegate"...}
```

### Queries

We will be covering most of the commonly used queries here. Meanwhile, you can use

```
cronosd query staking -h
```

to check all the supported sub-commands.

#### `query staking delegation [delegator-addr] [validator-addr]` - Query a delegation based on address and validator address

With a given delegator address and the validator account that it is associated with, we can check the by:

```json
$ cronosd query cronosd query staking delegation [delegator-addr] [validator-addr] --output json | jq

  {
    "delegation": {
      "delegator_address": "[delegator-addr]",
      "validator_address": "[validator-addr]",
      "shares": "[delegator_shares]"
    },
    "balance": {
      "denom": "basetcro",
      "amount": "[delegator_balance]"
    }
  }
```

#### `query staking delegations-to [validator-addr]` - Query all delegations made to one validator

We can check all the delegations made to a specific validator:

```json
$ cronosd query staking delegations-to [validator-addr] --output json  | jq

  {
    "delegation_responses": [
      {
        "delegation": {
          "delegator_address": "[delegator-addr-1]",
          "validator_address": "[validator-addr]",
          "shares": "[delegator_shares]"
        },
        "balance": {
          "denom": "basetcro",
          "amount": "[delegator_balance_1]"
        }
      },
      {
        "delegation": {
          "delegator_address": "[delegator-addr-2]",
          "validator_address": "[validator-addr]",
          "shares": "[delegator_shares-2]"
        },
        "balance": {
          "denom": "basetcro",
          "amount": "[delegator_balance_2]"
        }
      }
    .......
    ],
    "pagination": {
      "next_key": null,
      "total": "0"
    }
  }
```

#### `query staking pool` - Query the current staking pool values

We can check the amount of bonded and unbonded amount in the staking pool:

```json
$ cronosd query staking pool --output json | jq

  {
    "not_bonded_tokens": "[not_bonded_amount]",
    "bonded_tokens": "[bonded_amount]",
  }
```

#### `query staking unbonding-delegation [delegator-addr] [validator-addr]` - Query an unbonding-delegation record based on delegator and validator address

```json
$ cronosd query staking unbonding-delegation [delegator-addr] [validator-addr] --output json | jq

  {
    "delegator_address": "[delegator-addr]",
    "validator_address": "[validator-addr]",
    "entries": [
      {
        "creation_height": "[height_of_unbonding]",
        "completion_time": "[completion_time]",
        "initial_balance": "[unbonding_initial_balance]",
        "balance": "[unbonding_balance]"
      }
    ]
  }
```

#### `query staking validator [validator-addr]` - Query a specific validator

We can query the details of a specific validator with its validator address (ethvaloper...) by:

```json
$ cronosd query staking validator [validator-addr] --output json | jq

  {
    "operator_address": "[validator_address (ethvaloper...)]",
    // address of the validator's operator
    "consensus_pubkey": "[consensus_pubkey '{"@type":...,"key":...}']",
    // the consensus public key of the validator
    "jailed": "[jailed_or_not]",
    // if it has been jailed from bonded status?
    "status": "[validator_statuses]",
    // validator status (bonded/unbonding/unbonded)
    "tokens": "[total_tokens]",
    // total delegated tokens
    "delegator_shares": "[delegator_shares]",
    // total shares issued to a validator's delegators
    "description": {
      "moniker": "[validator_moniker_id]",
      "identity": "",
      "website": "",
      "security_contact": "[security_contact]",
      "details": ""
    },
    // description terms for the validator
    "unbonding_height": "[unbonding_height]",
    "unbonding_time": "[unbonding_time]",
    "commission": {
      "commission_rates": {
        "rate": "[commission_rates]",
        // the commission rate charged to delegators
        "max_rate": "[maximum_commission_rates]",
        // maximum commission rate which validator can ever charge
        "max_change_rate": "[maximum_rate_of_change_of_commission]"
        // maximum daily increase of the validator commission
      },
      "update_time": "[last_update_time]"
      // the last time the commission rate was changed
    },
    "min_self_delegation": "[min_self_delegation_amount]"
    // validator's self declared minimum self delegation
  }
```

#### `query staking validators` - Query all validators

A full list of validators and their details can be found by this query.

#### `query staking params` - Query the current staking parameters

Finally, we can query the current staking parameters by

```json
$ cronosd query staking params --output json | jq

  {
    "unbonding_time": "1814400s",
    "max_validators": 100,
    "max_entries": 7,
    "historical_entries": 100,
    "bond_denom": "basetcro"
  }
```

### Appendix

#### `staking` module: Network Parameters Configuration

The following tables show overall effects on different configurations of the staking related network parameters:

|                      | `bond_denom` | `historical_entries`               | `max_entries`                                                 |
| -------------------- | ------------ | ---------------------------------- | ------------------------------------------------------------- |
| Type                 | string       | uint16                             | uint16                                                        |
| Higher               | N/A          | More historical entries to persist | More entries for either unbonding delegation or redelegation  |
| Lower                | N/A          | Less historical entries to persist | Fewer entries for either unbonding delegation or redelegation |
| Constraints          | N/A          | Value has to be positive           | Value has to be a positive                                    |
| Sample configuration | `basetcro`   | `100` (50%)                        | `7`                                                           |

***

|                      | `max_validators`                     | `unbonding_time`                     |
| -------------------- | ------------------------------------ | ------------------------------------ |
| Type                 | uint16                               | string                               |
| Higher               | More active validators               | Longer waiting period for unbonding  |
| Lower                | Fewer active validators              | Shorter waiting period for unbonding |
| Constraints          | Value has to be less or equal to `1` | Positive value in seconds            |
| Sample configuration | `100` (maximum 100 active validator) | `"1814400s"` (3 weeks)               |


# module\_bank

#### `bank` module

#### Introduction

The `bank` module maintains the state of two primary objects:

* Account balances by address;
* Total supply of tokens of the chain

`bank` module tracks and provides query support for the total supply of all assets used in the application. It also supports token transfer functionalities. Specifically, the total supply is updated whenever a token is:

* **Minted**, e.g. Token created by the [mint](https://docs.cronos.com/cronos-chain-protocol/module_overview#mint) module; or
* **Burned**, e.g. Token distorted by the [slashing](https://docs.cronos.com/cronos-chain-protocol/module_overview#slashing) module.

#### Transactions and Queries

#### Transactions

**`tx bank send [from_key_or_address] [to_address] [amount] [network_id]` - Send Funds**

You can transfer of tokens between to a designated address by the `tx bank send` command. For example, we can send 1 basetcro to Bob's address by

```bash
$ cronosd tx bank send mykey tcrc1xwxk09wds0u2k6l39sp0e8ajx3jkw6dm0z5c26 1basetcro --keyring-backend test --chain-id ethermint-2

## Transaction payload##
{"body":{"messages":[{"@type":"/cosmos.bank.v1beta1.MsgSend","from_address":<address a>,"to_address":<address b>,"amount":[{"denom":"basetcro","amount":"1"}]}],"memo":"","timeout_height":"0","extension_options":[],"non_critical_extension_options":[]},"auth_info":{"signer_infos":[],"fee":{"amount":[],"gas_limit":"200000","payer":"","granter":""}},"signatures":[]}

confirm transaction before signing and broadcasting [y/N]: y
```

#### Queries

**`query bank balances [address]` - Check the balance of a specified account**

One can check the current balance of a specified account by:

```json
$ cronosd query bank balances tcrc1a303tt49l5uhe87yaneyggly83g7e4uncdxqtl --output json | jq
{
  "balances": [
    {
      "denom": "basetcro",
      "amount": "99999000000000000000000000"
    }
  ],
  "pagination": {
    "next_key": null,
    "total": "0"
  }
}
```

**`query bank total` - Check the total supply of the token**

You can also check the current total supply of the token by:

```json
$ cronosd query bank total --output json | jq
{
  "supply": [
    {
      "denom": "basetcro",
      "amount": "100020217468056427441579571"
    }
  ],
  "pagination": {
    "next_key": null,
    "total": "1"
  }
}
```

**REST endpoint**

The parameters can be checked by browsing to the following REST endpoint on Mainnet:

<https://rest.cronos.com/cosmos/bank/v1beta1/params>/

```json
{
  "params": {
    "send_enabled": [
      {
        "denom": "stake",
        "enabled": true
      },
      {
        "denom": "basecro",
        "enabled": false
      }
    ],
    "default_send_enabled": true
  }
}
```

#### Appendix

**`bank` module: Network Parameters and configuration**

| Key                  | Type           | Example                                |
| -------------------- | -------------- | -------------------------------------- |
| `SendEnabled`        | \[]SendEnabled | \[{denom: "basetcro", enabled: true }] |
| `DefaultSendEnabled` | bool           | true                                   |


# module\_distribution

#### `distribution` module

#### Introduction

The `distribution` module is responsible for the distribution of rewards to the validators and delegators.

#### Overview

**Network Parameters**

Below are all the network parameters for the `distribution` module:

* `community_tax` - The rate of community tax;
* `base_proposer_reward` - Base bonus on transaction fees collected in a valid block;
* `bonus_proposer_reward` - Maximum bonus on transaction fees collected in a valid block;
* `withdraw_addr_enabled` - Whether delegators can set a different address to withdraw their rewards.

**Rewards**

There are two main types of rewards

* Block rewards, governed by the [mint](https://docs.cronos.com/cronos-chain-protocol/module_overview#mint) module; and
* [Transaction fees bonus](https://docs.cronos.com/cronos-chain-protocol/module_overview#transaction-fees-bonus).

**Block reward**

Block rewards are distributed proportionally to all validators relative to their voting power. This means that even though each validator gains cro with each reward, all validators will maintain equal weight over time.

For the validator operator, the distribution information is updated if:

* the amount of delegation to a validator is updated (delegation, unbond, slashing etc.);
* a validator successfully proposes a block and receives the reward;
* any delegator withdraws from a validator, or
* the validator withdraws it's commission.

For delegators, once they have delegated to a validator, they will be entitled to a portion of the total reward obtained by the validators. The reward is proportional to their delegated amount, and the commission charged by the validator operator (if any).

**Transaction Fees Bonus**

When a validator is selected to propose the next block, they must include at least 66% precommits of the previous block. To incentivise validators to include more than 66% precommits, the module provide a bonus reward (a portion of the transaction fee in the block) to the proposer.

This bonus reward is dependent linearly on the precommits from the other validators. Stating from 66% of the precommits, the basic bonus will be `base_proposer_reward` and increase linearly to `bonus_proposer_reward` when the validator includes 100% of the precommits.

This mechanism aims to incentivize non-empty block proposals, better networking between validators as well as to mitigate censorship. For further example, kindly refers to this [link](https://hub.cosmos.network/main/validators/validator-faq.html).

**Community tax**

The `community_tax` is the tax rate to the reward obtained by the validator. Specifically, part of the reward will be taxed and send to the community pool. The funds in the community pool can be withdrawn by submitting a community pool spend proposal with the [gov module](https://docs.cronos.com/cronos-chain-protocol/module_overview#gov).

Even if the `community_tax` is set to be zero, the balance of the community pool could be non-zero. For example, the truncated remainder in some accounting edge cases will be sent to the community pool as well. Besides that, users can fund the community pool voluntary, and there could be funds allocated to the community pool in the [genesis](/cronos-chain-protocol/genesis_file).

#### Transactions and Queries

#### Transactions

**`tx distribution withdraw-all-rewards` - Withdraw all delegations rewards for a delegator**

Delegator can withdraw their reward(s) from the validator(s) that they have delegated all at once.

**`tx distribution withdraw-rewards [validator-addr]` - Withdraw rewards from a given validator address**

Delegator can withdraw their reward from a specific validator.

{% hint style="info" %}
Remark: Validator operation can withdraw the commission in addition to the rewards by adding the commission flag `--commission`.
{% endhint %}

**`tx distribution set-withdraw-addr [withdraw-addr]` - Change the default withdraw address for rewards associated with an address**

Delegator can set a different address to withdraw their rewards.

**`tx distribution fund-community-pool [amount]` - Funds the community pool with the specified amount**

Users can make a contribution to the community pool with a specific amount.

#### Queries

**`query distribution commission [validator]` - Query distribution validator commission**

We can check the commission of a specific validator.

**`query distribution community-pool` - Query the amount of coins in the community pool**

We can check the balance of the community pool.

**`query distribution rewards [delegator-addr] [validator-addr]` - Query all distribution delegator rewards or rewards from a particular validator**

We can check the current rewards for a delegation on a specific validator.

**`query distribution slashes [validator] [start-height] [end-height]` - Query distribution validator slashes**

We can check the history of slashing event of a validator.

**`query distribution validator-outstanding-rewards [validator]` - Query distribution outstanding rewards for a validator and all their delegations**

We can check distribution outstanding (un-withdrawn) rewards for a validator and all of their delegations.

**`query distribution params` - Query the current distribution parameters**

We can query the current distribution parameters by

```json
$ cronosd query distribution params --output json | jq
```

**REST endpoint**

The parameters can also be checked by browsing to the following REST endpoint on Mainnet:

[https://rest.cronos.com/cosmos/distribution/v1beta1/params](https://rest.cronos.com/cosmos/bank/v1beta1/params)/

```json
{
  "params": {
    "community_tax": "0.000000000000000000",
    "base_proposer_reward": "0.000000000000000000",
    "bonus_proposer_reward": "0.000000000000000000",
    "withdraw_addr_enabled": true
  }
}
```

#### Appendix

**`distribution` module: Network Parameters and configuration**

The following tables show overall effects on different configurations of the distribution related network parameters:

|                      | `community_tax`                             | `base_proposer_reward`                               | `bonus_proposer_reward`              |
| -------------------- | ------------------------------------------- | ---------------------------------------------------- | ------------------------------------ |
| Type                 | string (dec)                                | string (dec)                                         | string (dec)                         |
| Higher               | More reward will go into the community pool | Higher basic transaction fees bonus for the proposer | Easier for a proposal to be passed   |
| Lower                | Less reward will go into the community pool | Lower basic transaction fees bonus for the proposer  | Harder for a proposal to be passed   |
| Constraints          | Value has to be less or equal to `1`        | Value has to be less or equal to `1`                 | Value has to be less or equal to `1` |
| Sample configuration | `0` (0%)                                    | `0.01` (1%)                                          | `0.04` (4%)                          |


# module\_slashing

#### `slashing` module

#### Introduction

Validators are responsible for signing or proposing block at each consensus round. A penalty should be imposed on validators' misbehavior to reinforce this.

Specifically, `slashing` functionality that aims to dis-incentivize network-observable actions, such as faulty validations. The penalties may include losing some amount of their stake, losing their ability to perform the network functionality for a period of time, collect rewards etc.

#### Overview

**Network parameters**

Below are all the network parameters used to configure the behavior of validator punishments. Details of all these parameters and their effect on behavior of validator punishments is discussed later in this document.

* `signed_blocks_window`: Number of blocks for which the liveness is calculated for uptime tracking;
* `min_signed_per_window`: Maximum percentage of blocks with faulty/missed validations allowed for an account in last; `signed_blocks_window` blocks before it gets deactivated;
* `downtime_jail_duration`: Duration for [jailing](#jailing);
* `slash_fraction_double_sign`: Percentage of funds being slashed when validator makes a byzantine fault; and
* `slash_fraction_downtime`: Percentage of funds being slashed when a validator is non-live.

**Slashing mechanism**

Punishments for a validator are triggered when they either make a *byzantine fault* or become *non-live*:

* Liveness Faults (Low availability)

  A validator is said to be **non-live** when they fail to sign at least `min_signed_per_window` blocks (in percentage) in the last `signed_blocks_window` blocks successfully. `signed_blocks_window` and `min_signed_per_window` are network parameters and can be configured during genesis and can be updated during runtime by the governance module.

{% hint style="info" %}
tip Example: For example, if `block_signing_window` is `2000` blocks and `min_signed_per_window` is `0.5`, a validator will be marked as **non-live** and jailed if they fail to successfully sign at least `2000*0.5=1000` blocks in last `2000` blocks
{% endhint %}

* Byzantine Faults

  A validator is said to make a byzantine fault when they sign conflicting messages/blocks at the same height and round. Tendermint has mechanisms to publish evidence of validators that signed conflicting votes so they can be punished by the slashing module. For example:

  * Validator who votes for two different blocks within a single round (*"Equivocation validator"*/ *"Double signing"*);
  * Validator who signs commit messages for arbitrary application state ( *"Lunatic validator"*).

**Remark**: The evidence of a set of validators attempting to mislead a light client can also be detected and captured. However, even the [Amnesia attack](https://github.com/tendermint/tendermint/blob/master/docs/architecture/adr-056-light-client-amnesia-attacks.md#amnesia-attack) can be detected, punishment can not be applied at this stage, as we can not deduce the malicious validators.

{% hint style="info" %}
tip Implementation note: Tendermint passes `Evidence` of a byzantine validator in `BeginBlock` request. Before jailing any account due to byzantine fault, that evidence should be verified. Also, it should be checked that evidence provided by tendermint is not older than `max_age` in tendermint.
{% endhint %}

#### Inactivity Slashing

It is important that the validators maintain excellent availability and network connectivity to perform their tasks. A penalty should be imposed on validators' misbehavior to reinforce this.

When a validator fails to successfully sign `missed_block_threshold` blocks in last `block_signing_window` blocks, it is immediately jailed and punished by deducting funds from their bonded and unbonded amount and removing them from active validator set. The funds to be deducted are calculated based on `slash_fraction_downtime`. Kindly refer to this [link](https://docs.cosmos.network/v0.40/modules/slashing/04_begin_block.html) on the logic of the liveness tracking.

#### Jailing

A validator is jailed when they make liveness or Byzantine fault, when a validator is jailed, it will no longer be considered as an active validator until they are un-jailed. Furthermore, it cannot be un-jailed before `downtime_jail_duration`. This `downtime_jail_duration` is a network parameter which can be configured during genesis.

{% hint style="danger" %}
warning Important: When a validator is jailed because of a byzantine fault, their validator public key is added to a list of permanently banned validators and cannot re-join the network as a validator with the same public key, see [staking tombstone](https://docs.cosmos.network/master/modules/slashing/07_tombstone.html)
{% endhint %}

**Un-jailing**

When a jailed validator wishes to resume normal operations (after `downtime_jail_duration` has passed), they can create an`unjail` transaction which marks them as un-jailed. Validator will then rejoin the validator set once it has been successful un-jailed.

#### Slashing for Byzantine Fault

When there is byzantine fault detected, they are immediately slashed other than jailed. The funds to be deducted are calculated based on `slash_fraction_double_sign`. Furthermore, validator who commit this double-signing fault will also be put into the "tombstone state", which means it will be blacklisted and jailed forever.

#### Transactions and Queries

#### Transactions

**`tx slashing unjail` - Unjailing a validator**

Validator could be punished and jailed due to network misbehaviour, for example if we check the validator set:

```bash
$ cronosd query staking validators -o json | jq
................................
    "operator_address": "crocncl18prgwae59zdqpwye6t4xftmq3d87vl0h0rj0qq",
    "consensus_pubkey": "crocnclconspub1zcjduepqg0yml2l63qjnhr2cuw4tvprr72tle0twf3zymrxllmr0sj9uv3tqmpcrhs",
    "jailed": true,
    "status": 1,
................................
```

After the jailing period has passed, one can broadcast a `unjail` transaction to unjail the validator and resume its normal operations by

```bash
$ cronosd tx slashing unjail --from node1 --chain-id cro-test
  {"body":{"messages":[{"@type":"/cosmos.slashing.v1beta1.MsgUnjail"...}]}
  confirm transaction before signing and broadcasting [y/N]: y
```

#### Queries

**`query slashing params` - Query the current slashing parameters**

We can query the current slashing parameters by

```json
$ cronosd query slashing params --output json | jq
```

**REST endpoint**

The parameters can also be checked by browsing to the following REST endpoint on Mainnet:

[https://rest.cronos.com/cosmos/slashing/v1beta1/params](https://rest.cronos.com/cosmos/bank/v1beta1/params)

```json
{
  "params": {
    "signed_blocks_window": "10000",
    "min_signed_per_window": "0.500000000000000000",
    "downtime_jail_duration": "28800s",
    "slash_fraction_double_sign": "0.000000000000000000",
    "slash_fraction_downtime": "0.000000000000000000"
  }
}
```

#### Appendix

**`slashing` module: Network Parameters and configuration**

The following tables show overall effects on different configurations of the slashing related network parameters:

|                      | `signed_blocks_window`                      | `min_signed_per_window`         | `downtime_jail_duration`           |
| -------------------- | ------------------------------------------- | ------------------------------- | ---------------------------------- |
| Type                 | string (int64)                              | string (dec)                    | string (int64)                     |
| Higher               | Larger window for calculating the downtime  | Higher availability is required | Longer jailing duration            |
| Lower                | Smaller window for calculating the downtime | Lower availability is required  | Longer jailing duration            |
| Constraints          | Value has to be a positive integer          | Value has to be positive        | Value has to be a positive integer |
| Sample configuration | `2000` (2000 blocks)                        | `0.5` (50%)                     | `3600s` (1 hour)                   |

***

|                      | `slash_fraction_double_sign`         | `slash_fraction_downtime`            |
| -------------------- | ------------------------------------ | ------------------------------------ |
| Type                 | string (dec)                         | string (dec)                         |
| Higher               | Heavier penalty on byzantine faults  | Heavier penalty on liveness faults   |
| Lower                | Lighter penalty on byzantine faults  | Lighter penalty on liveness faults   |
| Constraints          | Value has to be less or equal to `1` | Value has to be less or equal to `1` |
| Sample configuration | `0.001` (0.1%)                       | `0.05` (5%)                          |


# module\_feemarket

**`feemarket` module**

#### Introduction

The Huygen upgrade v0.7.0 on Cronos Mainnet introduced the Feemarket module and EIP-1559 implementation. The new feemarket module allows a dynamic fee structure to be applied to the network. It allows for defining a common base fee for the network, and this base fee is calculated dynamically in each block for the next block allowing it to reflect the activity of the network.

With EIP-1559, the transaction fee itself is calculated with `fee = (baseFee + priorityTip)*gasLimit`, where `baseFee` is the fixed-per-block network fee per gas and `priorityTip` is an optional fee per gas added on extra to accelerate the transaction. However, Cronos chain is based on Cosmos SDK which does not have a prioritization mechanism by nature, and transactions are first in and first out (FIFO) basis on the Cronos chain. Thus, different from the regular EIP-1559 design, Cronos feemarket module design does not have any “prioritization fee” mechanism than the Ethereum EIP-1559 design.

Therefore, on Cronos at the current stage, `fee = gasFeeCap * gasLimit`, where the `gasFeeCap` is the maximum gas price and `gasLimit` is the gas amount. Increasing the total fee does not accelerate the transaction processing time on Cronos, while the transaction still possibly can be rejected if you set up a too low-value arbitrary.

#### Overview

**Parameters**

Below are the parameters for the `x/feemarket` module:

<table><thead><tr><th width="192">Key</th><th width="121">Type</th><th width="179.73089599609375">Default Values</th><th>Description</th></tr></thead><tbody><tr><td>NoBaseFee</td><td>bool</td><td>false</td><td>control the base fee adjustment</td></tr><tr><td>BaseFeeChangeDenominator</td><td>uint32</td><td>300</td><td>bounds the amount the base fee that can change between blocks</td></tr><tr><td>ElasticityMultiplier</td><td>uint32</td><td>4</td><td>bounds the threshold which the base fee will increase or decrease depending on the total gas used in the previous block</td></tr><tr><td>BaseFee</td><td>uint32</td><td>3750000000000</td><td>base fee for EIP-1559 blocks</td></tr><tr><td>EnableHeight</td><td>uint32</td><td>0</td><td>height which enable fee adjustment</td></tr><tr><td>MinGasPrice</td><td>sdk.Dec</td><td>3750000000000</td><td>global minimum gas price that needs to be paid to include a transaction in a block</td></tr><tr><td>min_gas_multiplier</td><td>sdk.Dec</td><td>0.500000000000000000</td><td>bounds the minimum gasUsed to be charged to senders based on the GasLimit</td></tr></tbody></table>

#### Base Fee

`baseFee` is a module param and works as the global state. It affects the amount of gas a transaction costs, not the `gasPrice`. The base fee is a global base fee defined at the consensus level. It is stored as a module parameter and is adjusted at the end of each block based on the total gas used in the previous block and gas target (`block gas limit/elasticity multiplier`):

* It increases when blocks are above the gas target;
* It decreases when blocks are below the gas target.

**Effective Gas price**

For EIP-1559 transactions (dynamic fee transactions) the effective gas price describes the maximum gas price that a transaction is willing to provide. It is derived from the transaction arguments and the base fee parameter. The effective gas price is either the `baseFee + tip` or the `gasFeeCap`. Since `gasTipCap` is not applicable on Cronos, `effectiveGasPrice = min(baseFee, gasFeeCap)` where `gasFeeCap >= baseFee`.

#### Minimum Gas Price

`minimum-gas-price` is a config param per node that only affects that specific node, `minimum-gas-prices` effect is a setting at the Cosmos level and only affects Cosmos-based transactions. In general, Ethereum users won't be affected because they will use the json-rpc endpoint to send the transaction. For an Ethereum transaction, the ante handler has been overwritten to ignore the `minimum-gas-prices` setting and only taking into consideration the global base-fee `Minimum-gas-prices` is a mandatory setting for node operators and should not be 0 for security reasons and it only affects low-level cosmos transactions (delegations, ibc relay messages etc).

#### **Queries**

The query commands allow users to query feemarket state:

**`./conosd query feemarket --help`**

The base-fee command allows users to query the block base fee by height.

**`./cronosd query feemarket base-fee [height] [flags]`**

The block-gas command allows users to query the block gas by height.

**`./cronosd query feemarket block-gas [height] [flags]`**

The params command allows users to query the module parameters.

**`./cronosd query params subspace [subspace] [key] [flags]`**

The query with params command allows users to query the feemarket parameters.

**`./cronosd query feemarket params [flags]`**

**REST endpoint**

The parameters can also be checked by browsing to the following REST endpoint

{% tabs %}
{% tab title="Mainnet" %}
{% embed url="<https://rest.cronos.com/ethermint/feemarket/v1/params>" %}

```bash
{
  "params": {
    "no_base_fee": false,
    "base_fee_change_denominator": 300,
    "elasticity_multiplier": 4,
    "enable_height": "0",
    "base_fee": "3750000000000",
    "min_gas_price": "3750000000000.000000000000000000",
    "min_gas_multiplier": "0.500000000000000000"
  }
}
```

{% endtab %}

{% tab title="Testnet" %}
{% embed url="<https://rest-t3.cronos.com/ethermint/feemarket/v1/params>" %}

```json
{
  "params": {
    "no_base_fee": false,
    "base_fee_change_denominator": 300,
    "elasticity_multiplier": 4,
    "enable_height": "0",
    "base_fee": "3750000000000",
    "min_gas_price": "3750000000000.000000000000000000",
    "min_gas_multiplier": "0.500000000000000000"
  }
}
```

{% endtab %}
{% endtabs %}

**JSON-RPC**

We can query the `eth_feeHistory` by JSON-RPC, the result will return the transaction base fee per gas and effective priority fee per gas for the requested/supported block range.\\

```bash
curl --location --request POST 'https://evm.cronos.com' \
--header 'Content-Type: application/json' \
--data-raw '{
    "jsonrpc": "2.0",
    "method": "eth_feeHistory",
    "params": [
        "0x1",
        "latest",
        []
    ],
    "id": 44
}'
```

For example returns

```json
{
  "id": 44,
  "result": {
    "oldestBlock": "0x11c6885",
    "baseFeePerGas": [
      "0x3691d6afc00",
      "0x3691d6afc00"
    ],
    "gasUsedRatio": [
      0.00677545
    ]
  },
  "jsonrpc": "2.0"
}
```


# Module Account Addresses

The module accounts can be found in Cronos EVM Mainnet and Testnet in below addresses:

<table><thead><tr><th width="228.380126953125">Contract Name</th><th>Address</th><th>Note</th></tr></thead><tbody><tr><td>bonded_tokens_pool</td><td>0x4FEA76427B8345861E80A3540A8A9D936FD39391</td><td>Holds all the validator tokens for voting power.</td></tr><tr><td>not_bonded_tokens_pool</td><td>0x5911B844D7BC224654FE0DCD16BABD2D253F2FDF</td><td>Holds unbonding validator tokens during the unbonding period.</td></tr><tr><td>mint</td><td>0xDC6F17BBEC824FFF8F86587966B2047DB6AB7367</td><td>Mints block inflation; N/A on Cronos EVM as no inflation or minting on Cronos EVM.</td></tr><tr><td>fee_collector</td><td>0xF1829676DB577682E944FC3493D451B67FF3E29F</td><td>Collects transaction fees and new inflation each block; swept by <code>x/distribution</code> next block, therefore usually empty.</td></tr><tr><td>distribution</td><td>0x93354845030274CD4BF1686ABD60AB28EC52E1A7</td><td>Holds community pool, unclaimed delegator rewards, and validator commissions.</td></tr><tr><td>gov</td><td>0x7B5FE22B5446F7C62EA27B8BD71CEF94E03F3DF2</td><td>Escrows proposal deposits; burns them on no-with-veto. Authority for <code>MsgUpdateParams</code>.</td></tr><tr><td>transfer</td><td>0x27F576CAFBB263ED44BE8BD094F66114DA268777</td><td>IBC ICS-20 module. Escrows native CRO on outbound; mints <code>ibc/vouchers</code> on inbound.</td></tr><tr><td>interchainaccounts</td><td>0x67D77474CA8E3A5812DE323A28D7C6DA6B3E4F29</td><td>ICA host module. Enables remote chains register interchain accounts on Cronos via IBC.</td></tr><tr><td>evm</td><td>0x603871C2DDD41C26EE77495E2E31E6DE7F9957E0</td><td>Ethermint <code>x/evm</code> module. Transient mint/burn during EVM tx execution for balances and gas refunds.</td></tr></tbody></table>


# Chain Details


---

[Next Page](/llms-full.txt/1)